
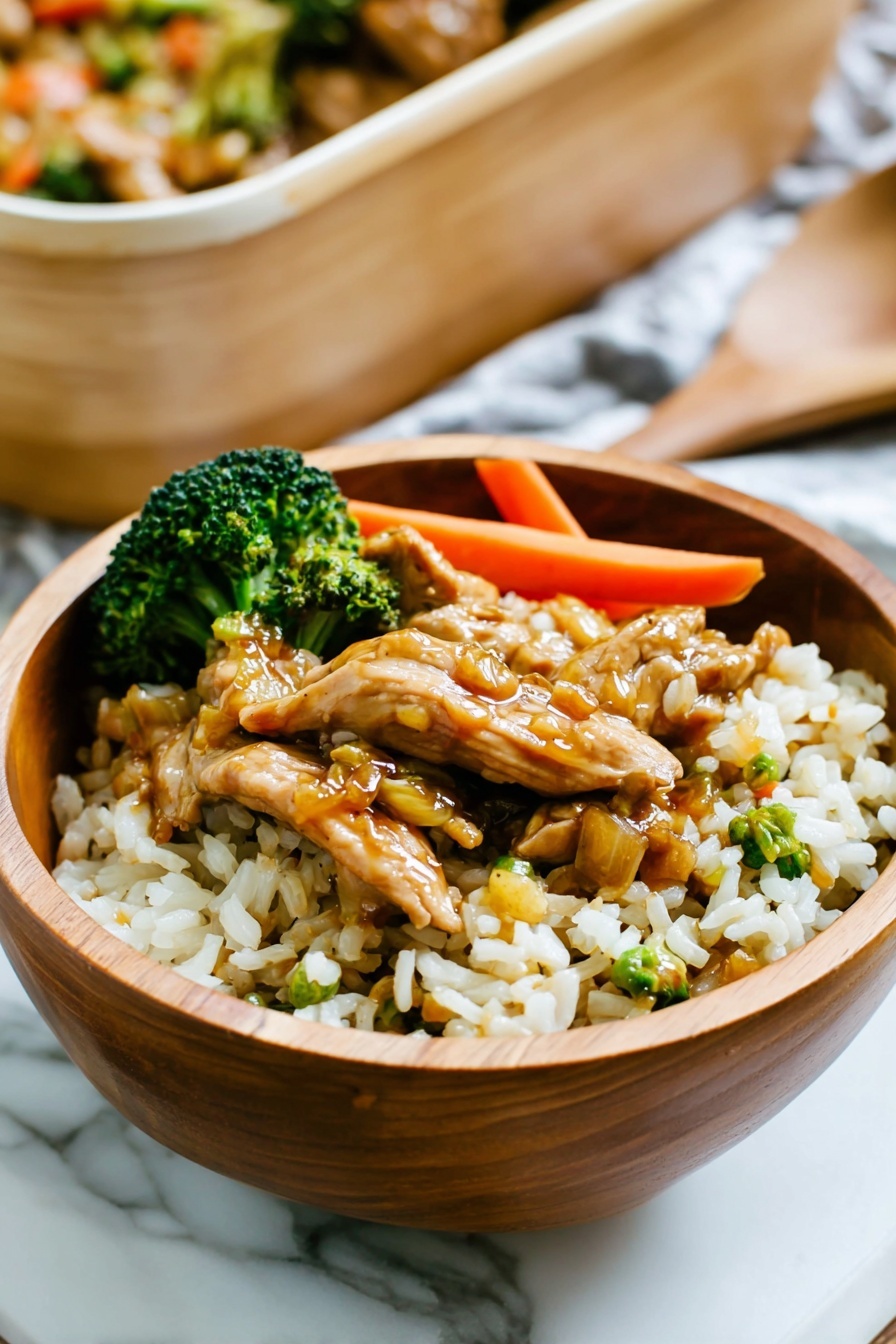
Teriyaki Chicken Casserole Recipe
Today, I’m thrilled to share a recipe that’s become a staple in my weeknight dinner rotation: the Teriyaki Chicken Casserole Recipe. It’s one of those dishes that feels cozy, satisfying, and just the right mix of sweet and savory, thanks to that homemade teriyaki sauce. Whether you’re cooking for your family or meal prepping for the week, this casserole is a total winner that’ll have you coming back for seconds—trust me!
Why This Recipe Works
- Balanced Flavors: The brown sugar, soy sauce, garlic, and ginger create a perfect blend of sweet and savory that’s irresistible.
- One-Pan Convenience: Everything cooks in the casserole dish, making cleanup a breeze—exactly what busy weeknights call for.
- Versatility: You can easily customize the vegetables or swap the rice for quinoa or cauliflower rice to suit your dietary needs.
- Healthy & Hearty: This recipe delivers lean protein, fresh veggies, and filling grains all in one hearty meal.

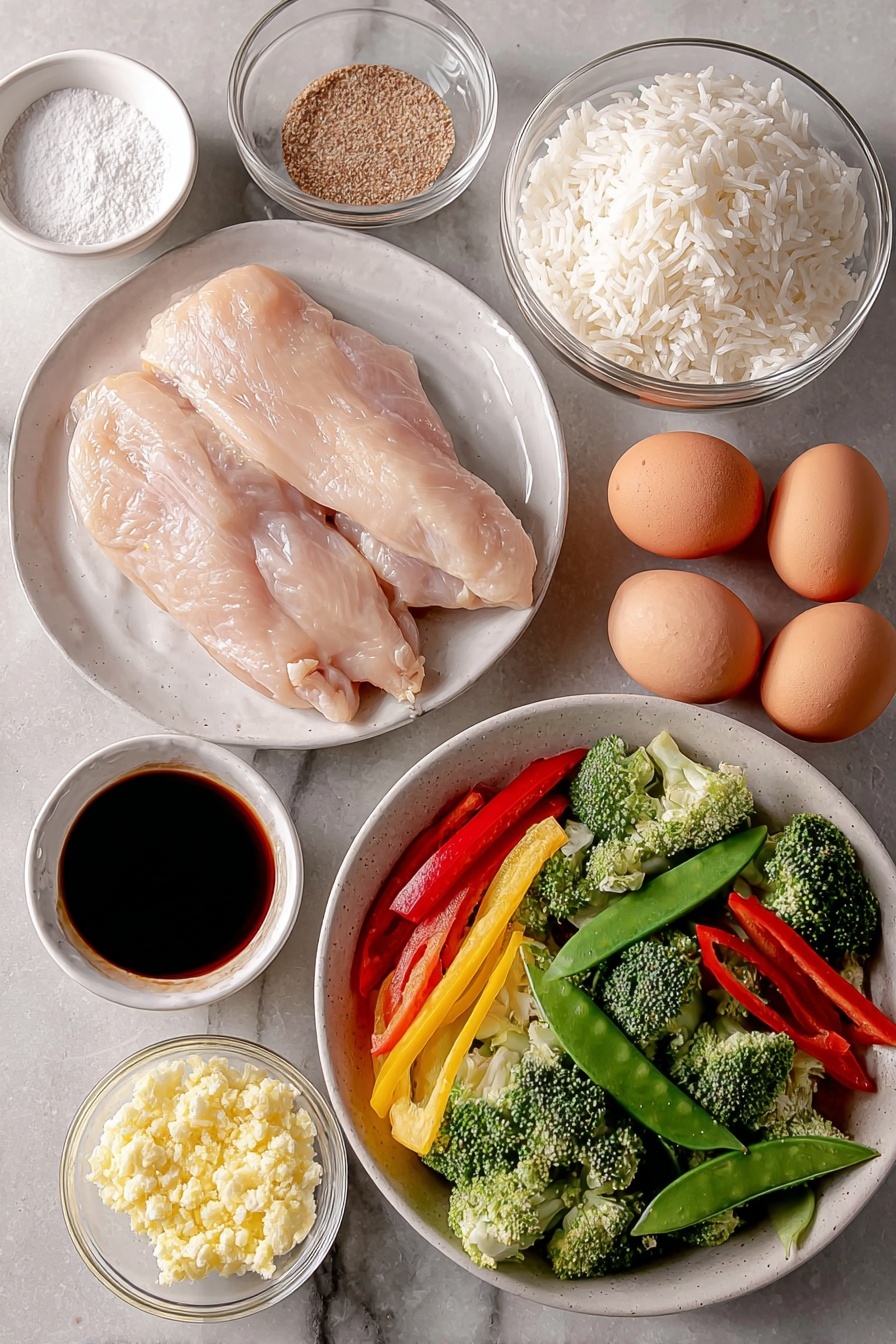
Ingredients & Why They Work
Every ingredient in this Teriyaki Chicken Casserole Recipe plays a role in making the dish both tasty and nutritious. Picking the right kind of soy sauce or fresh veggies can elevate it even more, so here’s a quick rundown on why these specific choices come together so well.
- Low-sodium soy sauce: It adds that deep umami flavor without overpowering the dish with salt.
- Water: Helps balance the saltiness and thins out the sauce for perfect consistency.
- Brown sugar: Brings warmth and sweetness that caramelizes beautifully in the sauce.
- Ground ginger: Adds a subtle zing—fresh ginger works too if you have it!
- Minced garlic: Garlic’s pungency melds everything together for depth and aroma.
- Cornstarch + water slurry: This thickens your sauce just right, so it coats the chicken and veggies perfectly.
- Boneless skinless chicken breasts: Lean and easy to shred, they soak up the sauce beautifully.
- Refrigerated stir-fry vegetables: A mix like broccoli, carrots, and snow peas adds versatility, color, and crunch.
- Cooked brown or white rice: The base that turns this into a filling casserole you can meal prep and enjoy again.
Make It Your Way
One of the things I love most about this Teriyaki Chicken Casserole Recipe is how easy it is to make your own. Whether you like it spicy, loaded with extra veggies, or gluten-free, you can tweak it without losing that signature deliciousness.
- Add heat: I often stir in a splash of sriracha or toss some red pepper flakes into the sauce for a spicy kick—it wakes up the flavor beautifully!
- Vegetable swaps: If fresh stir-fry veggies aren’t in season, frozen mixed veggies work just as well and save prep time.
- Swap the rice: For a lower-carb option, try cauliflower rice or quinoa—both soak up the sauce nicely.
- Make it vegetarian: Replace chicken with tofu or tempeh—just be sure to press the tofu to remove excess water.
Step-by-Step: How I Make Teriyaki Chicken Casserole Recipe
Step 1: Prep the Sauce
Start by mixing the soy sauce, water, brown sugar, ginger, and garlic in a small saucepan. Cover it and bring to a boil over medium heat, then uncover and let it cook for about a minute so it thickens slightly. Meanwhile, whisk cornstarch with water to make a smooth slurry, then stir it into your sauce. Keep cooking gently until it thickens nicely—you’ll know it’s ready when it coats the back of a spoon.
Step 2: Arrange Chicken and Veggies
While the sauce simmers, spray a 9×13-inch baking dish with non-stick spray. Lay the chicken breasts evenly in the pan and tuck your steamed stir-fry veggies all around them—you want a nice, colorful bed of goodness!
Step 3: Pour Sauce and Bake
Pour about a cup of that luscious teriyaki sauce evenly over the chicken and veggies. Cover the pan tightly with foil and bake at 350°F for roughly 30 minutes, or until your chicken reaches a safe internal temperature of 165°F. This slow bake lets the flavors meld and keeps the chicken perfectly tender.
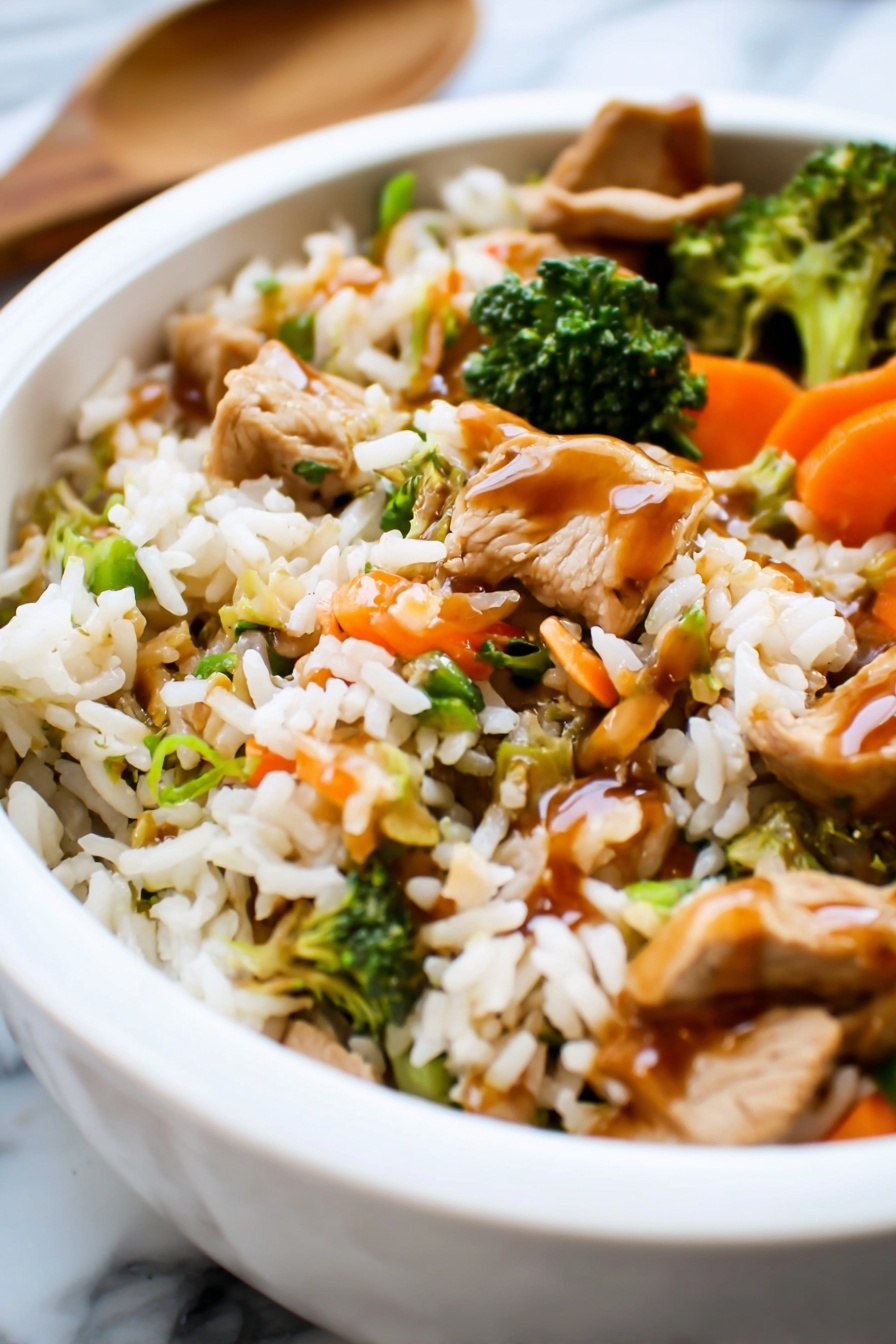
Step 4: Shred Chicken and Combine
Carefully remove the foil (watch out for steam!) and shred the chicken right in the casserole using two forks—it’s so easy once it’s cooked. Add your cooked rice in at this point, pour in most of the remaining sauce, reserving a little for drizzling when serving, and gently toss everything together so that each bite is packed with that incredible teriyaki goodness.
Step 5: Final Bake and Serve
Pop the casserole back in the oven uncovered for about 10 more minutes to heat everything through perfectly. After removing it from the oven, let it rest for 5 minutes—this helps the flavors settle and makes it easier to serve. Drizzle with the reserved sauce when plating for that extra punch of flavor. Yum!
Tips from My Kitchen
- Don’t skip steaming the veggies: It keeps them tender-crisp and full of color instead of soggy.
- Watch the thickening sauce closely: Cornstarch thickens quickly—remove from heat as soon as it coats a spoon nicely.
- Shred chicken right in the pan: This helps the chicken soak up even more sauce and saves extra dishes.
- Don’t overbake after adding rice: Just enough to warm through keeps the rice fluffy, not dried out.
How to Serve Teriyaki Chicken Casserole Recipe
Garnishes
I like to sprinkle the finished casserole with some toasted sesame seeds and a few sliced green onions for a fresh crunch and a little pop of color. Sometimes, a few red pepper flakes or a drizzle of sriracha gives a nice spicy contrast too. Trust me, these simple garnishes take the dish up several notches.
Side Dishes
Although this casserole can stand alone, I often serve it alongside a crisp cucumber salad or a simple miso soup for a well-rounded meal. Steamed edamame or roasted Brussels sprouts also pair nicely if you want to add more veggies on the side.
Creative Ways to Present
For special occasions or when I’m hosting, I like to serve the casserole in individual ramekins topped with fresh cilantro and a wedge of lime. It makes it feel a bit more special and really brings out the layers of flavor. Plus, it’s super cute and perfect for sharing with guests!
Make Ahead and Storage
Storing Leftovers
Once cooled, I store leftovers in an airtight container in the refrigerator, and they usually last for up to 4 days. The flavors actually deepen overnight, so leftovers taste just as good, if not better, the next day.
Freezing
I’ve frozen this casserole a few times with great results. Just portion it into freezer-safe containers and freeze for up to 3 months. When you’re ready, thaw overnight in the fridge and reheat gently in the oven or microwave.
Reheating
To reheat, I usually cover the casserole with foil and warm it in a 350°F oven until heated through—about 20 minutes. This helps keep the rice fluffy and the chicken juicy. Microwave works too for convenience, but the oven gives a much better texture.
FAQs
-
Can I use chicken thighs instead of breasts?
Absolutely! Chicken thighs tend to be juicier and more forgiving if slightly overcooked. Just adjust the baking time as thighs may need a few extra minutes for that perfect internal temperature.
-
Is it okay to make this casserole ahead of time and refrigerate before baking?
Yes, you can assemble the casserole up to a day in advance, cover it tightly, and refrigerate. When ready, simply bake as directed—add a few extra minutes to ensure it’s heated through.
-
Can I substitute the added brown sugar with a sugar-free option?
Sure! You can substitute brown sugar with alternatives like coconut sugar or a sugar-free sweetener that measures 1:1, just keep in mind the flavor profile might change slightly but still stay delicious.
-
What’s the best way to make the sauce thick without lumps?
Mix the cornstarch and water slurry thoroughly until smooth before adding it to the boiling sauce. Stir constantly after adding, and cook just until it thickens to avoid lumps or a gluey texture.
Final Thoughts
This Teriyaki Chicken Casserole Recipe holds a special place in my heart because it’s my go-to when I want comfort food that’s hearty but still wholesome, without spending hours in the kitchen. It’s one of those dishes that feels like a warm hug after a long day, and I just know you’ll love it as much as I do. Give it a try, and don’t be surprised if it quickly becomes a favorite in your home too!
Print
Teriyaki Chicken Casserole Recipe
- Prep Time: 15 minutes
- Cook Time: 40 minutes
- Total Time: 55 minutes
- Yield: 4 servings
- Category: Main Course
- Method: Baking
- Cuisine: Asian American
- Diet: Low Salt
Description
A comforting Teriyaki Chicken Casserole featuring tender shredded chicken, steamed stir-fry vegetables, and flavorful teriyaki sauce baked together with rice for a hearty, easy-to-make meal.
Ingredients
Sauce Ingredients
- 3/4 cup low-sodium soy sauce
- 1/2 cup water
- 1/4 cup brown sugar
- 1/2 teaspoon ground ginger
- 1/2 teaspoon minced garlic
- 2 Tablespoons cornstarch
- 2 Tablespoons water (for cornstarch slurry)
Main Ingredients
- 1 pound boneless skinless chicken breasts
- 1 bag (12 ounces) refrigerated stir-fry vegetables (broccoli, carrots, snow peas, etc.), steamed
- 3 cups cooked brown or white rice
Instructions
- Preheat and prepare pan: Preheat the oven to 350° F. Spray a 9×13-inch baking pan with non-stick spray to prevent sticking.
- Make the teriyaki sauce base: In a small saucepan, combine the soy sauce, 1/2 cup water, brown sugar, ground ginger, and minced garlic. Cover and bring to a boil over medium heat. Once boiling, remove the lid and cook for one minute.
- Thicken the sauce: In a separate small dish, stir together 2 tablespoons cornstarch and 2 tablespoons water until smooth. Add this slurry to the boiling sauce and stir continuously until the sauce thickens. Remove from heat.
- Assemble casserole: Place the chicken breasts in the prepared baking pan. Arrange the steamed vegetables around the chicken. Pour one cup of the teriyaki sauce over the chicken and vegetables. Cover the pan tightly with foil.
- Bake the chicken: Bake for 30 minutes or until the chicken reaches an internal temperature of 165° F. Remove from the oven and carefully remove the foil. Using two forks, shred the chicken directly in the dish.
- Add rice and sauce: Add the cooked rice to the casserole dish. Pour in most of the remaining teriyaki sauce, reserving some for drizzling when serving. Gently toss everything together to combine evenly.
- Final bake: Return the casserole to the oven and bake for another 10 minutes until heated through.
- Serve: Remove from the oven and let stand for 5 minutes. Drizzle each serving with the reserved sauce. Enjoy your warm and flavorful teriyaki chicken casserole!
Notes
- Use low-sodium soy sauce to control salt levels.
- Steaming vegetables beforehand ensures they stay crisp-tender after baking.
- Shredding the chicken in the casserole helps absorb more of the sauce flavor.
- Brown rice adds more fiber and a nuttier taste, but white rice works fine too.
- You can substitute frozen stir-fry vegetables if fresh are not available—just thaw and drain before using.
- For a gluten-free version, use tamari or gluten-free soy sauce.
Nutrition
- Serving Size: 1 serving
- Calories: 464 kcal
- Sugar: 6 g
- Sodium: 700 mg
- Fat: 1.5 g
- Saturated Fat: 0.3 g
- Unsaturated Fat: 1 g
- Trans Fat: 0 g
- Carbohydrates: 21 g
- Fiber: 3 g
- Protein: 31 g
- Cholesterol: 70 mg


