

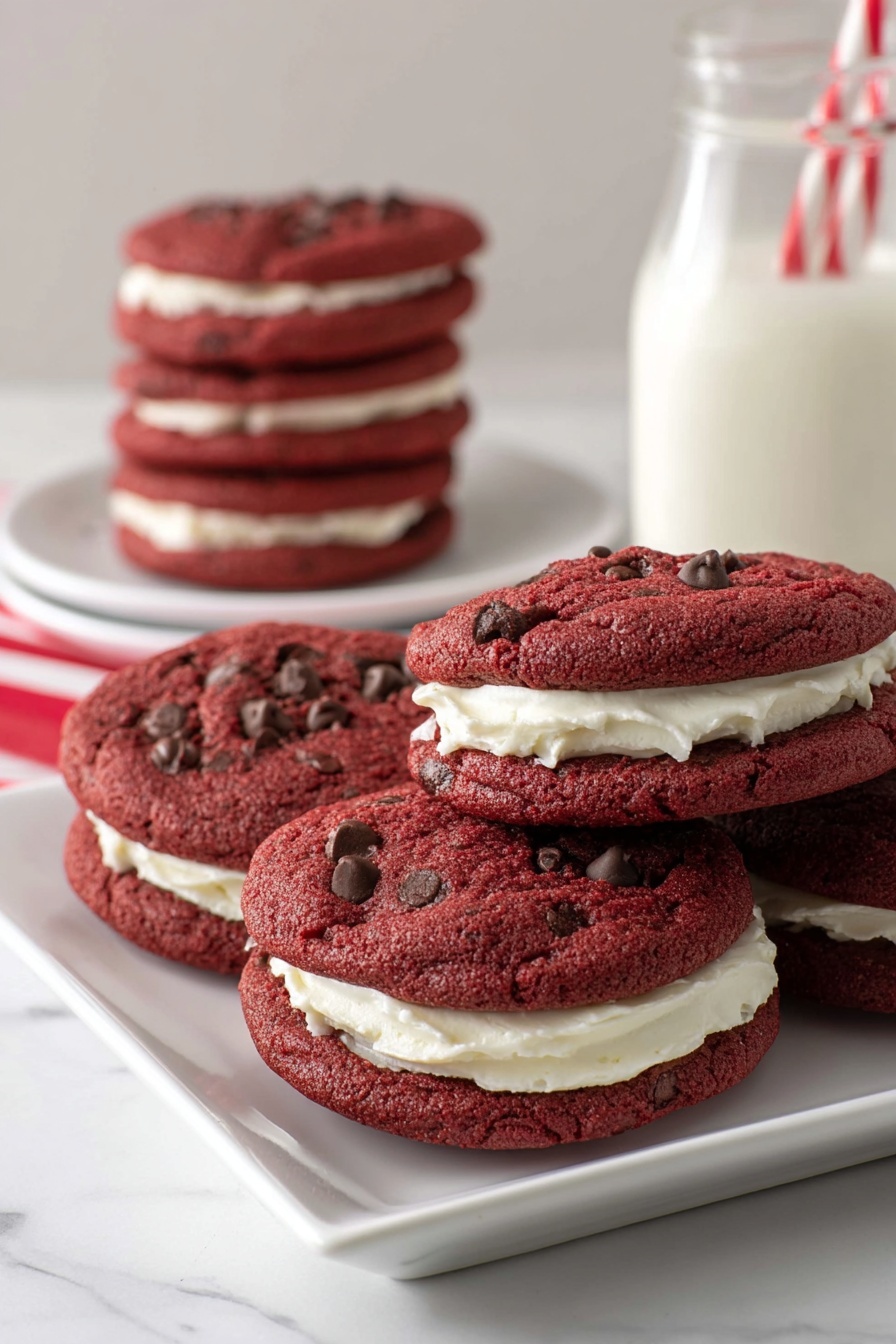
Red Velvet Sandwich Cookies Recipe
If you’ve been searching for a show-stopping treat that’s as fun to make as it is to eat, you’ve got to try this Red Velvet Sandwich Cookies Recipe. These cookies are a delightful twist on classic red velvet flavor, sandwiched with a dreamy cream cheese frosting that sends every bite into cookie heaven. Trust me, once you try these, they’ll quickly become your go-to for parties, holidays, or anytime you want to impress with minimal fuss.
Why This Recipe Works
- Perfect Texture: The cookies come out tender with just the right amount of chew, thanks to the blend of brown and granulated sugar.
- Classic Flavor Boost: Cocoa powder gives that subtle chocolate undertone, mixing beautifully with the red velvet emulsion for an authentic taste.
- Creamy Frosting: The cream cheese frosting is light, fluffy, and not too sweet, making it an irresistible partner for the cookies.
- Easy Assembly: Using a piping bag to sandwich the cookies keeps the frosting neat and gives you those pretty, professional-looking swirls.

Ingredients & Why They Work
Every ingredient in this Red Velvet Sandwich Cookies Recipe plays a special role. From the sturdy flour base to the creamy frosting components, they all come together seamlessly. Here are some tips to keep your baking smooth and the flavors balanced.
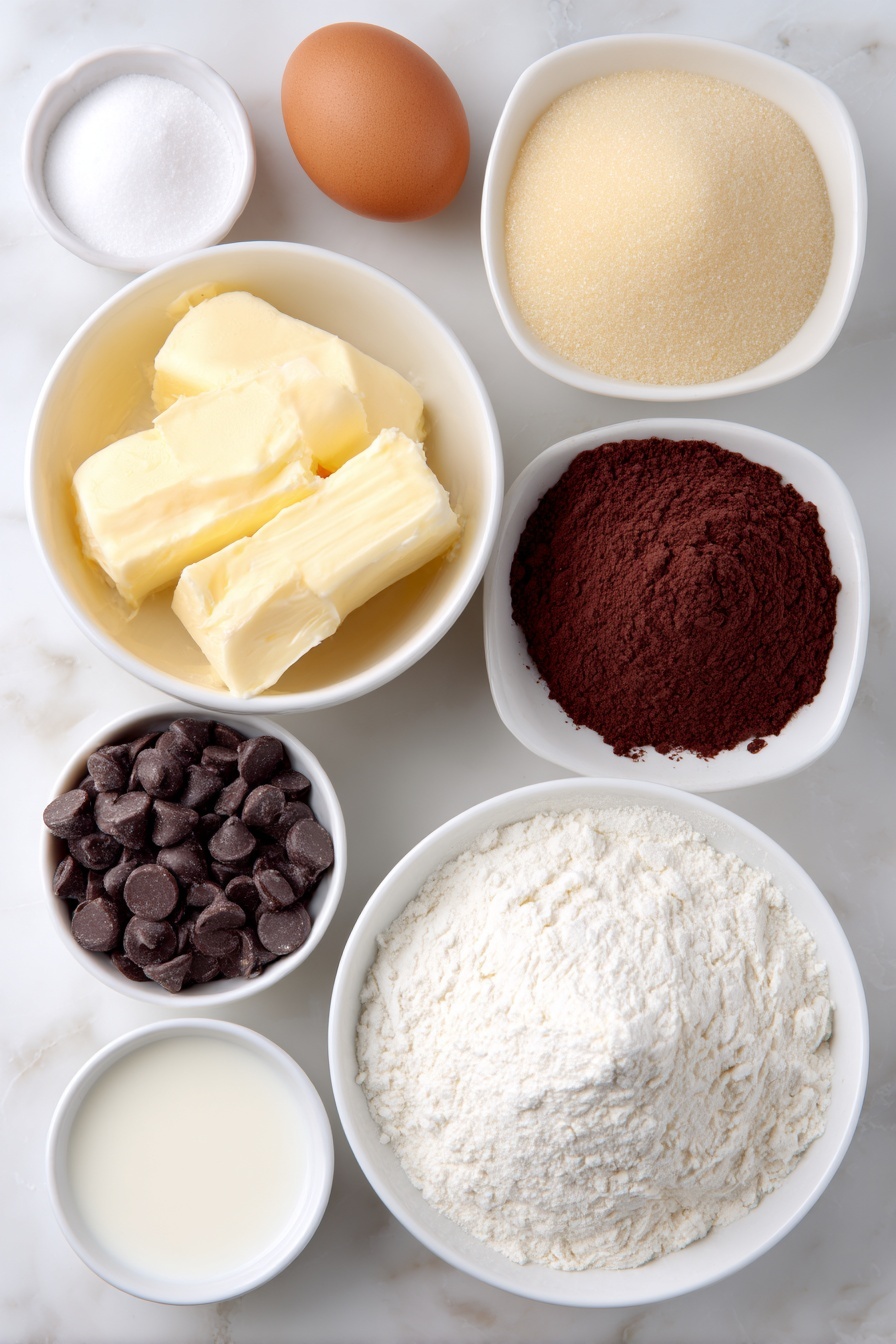
- Unsalted butter: Make sure it’s room temperature for easy mixing and fluffier dough.
- Light brown sugar: Adds moisture and a subtle caramel flavor that enhances softness.
- Granulated sugar: Helps create crisp edges on the cookies for a wonderful texture contrast.
- Egg: Acts as a binder and adds richness; freshness matters here.
- Vanilla extract: Enhances all the other flavors without overpowering them.
- Red velvet bakery emulsion or red gel food color: Gives that iconic red hue and that signature red velvet flavor.
- Baking soda: Helps the cookies spread and rise slightly without getting cakey.
- Salt: Balances sweetness and elevates the chocolate notes.
- Cocoa powder: Use unsweetened for authentic rich flavor in your red velvet cookies.
- All-purpose flour: Provides structure—you don’t want anything too delicate for sandwich cookies.
- Milk chocolate chips: Adds melty pockets of chocolate—you’ll want to reserve some to press on top before baking.
- Cream cheese: Softened to room temperature, it makes the frosting tangy and silky smooth.
- Powdered sugar: Sweetens and thickens the frosting, ensuring it holds its shape when piped.
- Milk: Keeps the frosting just the right consistency for piping and spreading.
Make It Your Way
I love how versatile this Red Velvet Sandwich Cookies Recipe can be. Once you master the base, you’ll find it’s easy to tweak flavors and adapt the frosting depending on what mood you’re in or who you’re baking for.
- Variation: One of my favorite spins is swapping half the milk chocolate chips for white chocolate. It adds a lovely sweetness that pairs beautifully with the tangy cream cheese filling.
- Dietary modification: I’ve also played around with using vegan butter and a flax egg—it works well, just be mindful of slightly longer bake times.
- Seasonal twist: During the holidays, I like adding a pinch of cinnamon to the dough for a warm, festive vibe.
- Difficulty adjustment: If piping frosting intimidates you, spread it with a knife and sandwich gently—the flavor’s the real star.
Step-by-Step: How I Make Red Velvet Sandwich Cookies Recipe
Step 1: Cream the Butter and Sugars to Fluffy Perfection
Start by preheating your oven to 350°F and lining a baking sheet with parchment paper—this helps your cookies release easily later. Then, in a large bowl, blend the softened butter with brown and granulated sugar using a hand mixer on medium speed. Watch as the mixture lightens and becomes fluffy, about two minutes—this step is key for that tender yet slightly crisp cookie texture!
Step 2: Add Egg, Vanilla, and That Beautiful Red Velvet Color
Beat in the egg, vanilla extract, and your red velvet bakery emulsion or gel color until everything is smooth and well combined. The dough will start looking like classic red velvet now—vibrant and inviting!
Step 3: Mix Dry Ingredients and Form the Dough
Switch to low speed and gradually incorporate the baking soda, salt, cocoa powder, and flour. Once you have a shaggy dough, crank your mixer up to high and beat for about 20 seconds—that little burst helps the dough ball up perfectly. Then fold in 1 cup of milk chocolate chips, saving a bit to press on top later.
Step 4: Scoop, Top with Chocolate, and Bake
Using a medium cookie scoop, portion out the dough six at a time on your parchment-lined sheet—give them room because they’ll spread a little. Press 3-4 chocolate chips onto the tops of each cookie for a pretty, melty finish. Bake for 12 minutes, then let them cool on the sheet for 10-15 minutes before transferring to a wire rack to cool completely.
Step 5: Whip Up That Dreamy Cream Cheese Frosting
While your cookies cool, blend the cream cheese and butter until light and fluffy—about two minutes. Add vanilla, powdered sugar, and milk, then beat again on high for another two minutes. The frosting should be airy and pipe-ready.
Step 6: Assemble Your Red Velvet Sandwich Cookies
Fill a piping bag fitted with a 1M tip with the frosting. Pipe generous swirls onto the flat side of a cooled cookie, then gently press another cookie on top to create that perfect sandwich. You’re ready to indulge!
Tips from My Kitchen
- Don’t Skip Chilling: I find chilling the dough for 15-20 minutes isn’t necessary here, but if your kitchen is warm, it helps keep cookies from spreading too much.
- Use Gel Color Over Liquid: For vibrant red without thinning your dough, gel food coloring or a bakery emulsion is best—liquids can mess with the texture.
- Watch Your Bake Time: Cookies continue to firm up as they cool, so don’t overbake—pull them out when edges are set but centers still look slightly soft.
- Pipe the Frosting Cold: I chill my frosting a bit if it starts to get too soft before piping—it makes the swirl hold shape perfectly.
How to Serve Red Velvet Sandwich Cookies Recipe
Garnishes
I love adding a few fresh decorations when serving. A light dusting of powdered sugar or a sprinkle of mini chocolate chips adds sparkle to the cookies. Sometimes, a tiny edible gold star or pearl on top of the frosting swirl jazzes things up beautifully—perfect for gifting or parties.
Side Dishes
These cookies are decadent enough to stand alone, but if you want to round out a dessert spread, pairing them with a cup of chilled milk or rich hot chocolate is classic. I’ve also served them alongside fruit salad for a lighter contrast that guests always appreciate.
Creative Ways to Present
For birthdays or special occasions, I like stacking the sandwiches into little towers tied with a pretty ribbon, turning them into edible bouquets. You can also arrange them on a tiered platter with seasonal flowers peeking through for a stunning dessert centerpiece.
Make Ahead and Storage
Storing Leftovers
I store these sandwich cookies in an airtight container at room temperature, layering parchment paper between them so they don’t stick together. They stay fresh and soft for about 3-4 days—perfect if you want to make them ahead for a get-together.
Freezing
You can absolutely freeze these cookies! After assembling, pop them in a single layer on a baking sheet to firm up, then transfer to a freezer-safe container with parchment between layers. They’ll keep for up to two months, making it a lifesaver for holiday baking prep.
Reheating
When you want to enjoy frozen cookies, let them thaw in the fridge overnight. If you want a fresh-out-of-the-oven feel, warm them gently in the microwave for about 10-15 seconds—just enough to soften the chocolate chips without melting the frosting completely.
FAQs
-
Can I use regular red food coloring instead of bakery emulsion?
Yes, you can! Just be careful with the amount, as liquid coloring can change your dough’s texture slightly. Bakery emulsion adds flavor along with color, so if you want the classic red velvet taste, you might miss that. Using gel food coloring is usually a good middle ground.
-
What if I want to make these cookies gluten-free?
You can try substituting the all-purpose flour with a one-to-one gluten-free baking flour blend. Just make sure it contains xanthan gum to keep the cookies from crumbling. You may need to slightly adjust baking time as gluten-free doughs behave differently.
-
Can I make the frosting ahead of time?
Absolutely! You can prepare the cream cheese frosting up to two days in advance. Store it tightly covered in the fridge and give it a quick whip with your mixer before piping to bring back that fluffy texture.
-
How do I get the frosting to pipe nicely?
The key is using room temperature ingredients and beating the frosting well to incorporate air. If it gets too soft while piping, pop it in the fridge for 10 minutes. Also, a piping bag with a star or round tip like a 1M gives those beautiful swirls.
Final Thoughts
Honestly, this Red Velvet Sandwich Cookies Recipe holds a special place in my baking adventures. It’s that perfect balance of rich, colorful, and cozy all in one bite. If you’re looking for a fun weekend project, or a way to wow guests without fussing with complicated techniques, give this one a shot—you’ll thank yourself. Baking these cookies feels like a little gift to yourself and anyone lucky enough to share them with you. Happy baking, friend!
Print
Red Velvet Sandwich Cookies Recipe
- Prep Time: 20 minutes
- Cook Time: 15 minutes
- Total Time: 35 minutes
- Yield: 9 sandwiches
- Category: Dessert
- Method: Baking
- Cuisine: American
Description
Delicious Red Velvet Sandwich Cookies featuring soft, cocoa-infused cookies filled with creamy vanilla frosting and studded with milk chocolate chips. Perfect for a festive treat or a sweet snack.
Ingredients
Cookies
- 1 cup unsalted butter room temperature
- 3/4 cup light brown sugar packed
- 3/4 cup granulated sugar
- 1 egg
- 1 teaspoon vanilla extract
- 1 tablespoon red velvet bakery emulsion or red gel food color
- 1 teaspoon baking soda
- 1/4 teaspoon salt
- 1/4 cup cocoa powder
- 2 cups all-purpose flour
- 1 1/4 cups milk chocolate chips divided
Frosting
- 4 oz. cream cheese room temperature
- 1/2 cup butter room temperature
- 2 teaspoon vanilla extract
- 2 1/2 cups powdered sugar
- 2 tablespoons milk
Instructions
- Preheat Oven: Preheat your oven to 350 degrees Fahrenheit and line a baking sheet with parchment paper for easy cleanup.
- Mix Butter and Sugars: In a large mixing bowl, combine the butter, light brown sugar, and granulated sugar. Using a hand mixer on medium speed, beat them together until the mixture is light and fluffy, about two minutes.
- Add Wet Ingredients: Add the egg, vanilla extract, and red velvet bakery emulsion or red gel food color. Mix until fully incorporated.
- Add Dry Ingredients: Add baking soda, salt, cocoa powder, and all-purpose flour to the wet mixture. Mix on low speed until almost all flour is combined, then increase to high speed and beat for 20 seconds to form a dough ball.
- Incorporate Chocolate Chips: Fold in 1 cup of the milk chocolate chips. Reserve 1/4 cup chocolate chips for topping the cookies.
- Scoop Dough: Using a medium cookie scoop, portion out the dough onto the prepared baking sheet, spacing 6 cookies at a time to allow spreading.
- Add Topping Chocolate Chips: Press 3 to 4 of the reserved chocolate chips on top of each dough ball.
- Bake Cookies: Bake in the preheated oven for 12 minutes. After baking, allow the cookies to cool on the baking sheet for 10 to 15 minutes as they firm up.
- Cool Completely: Transfer cookies to a cooling rack and let them cool thoroughly before frosting.
- Prepare Frosting: In a mixing bowl, beat together the cream cheese and butter until light and fluffy, approximately 2 minutes.
- Add Frosting Ingredients: Add vanilla extract, powdered sugar, and milk to the cream cheese mixture. Mix until combined, then increase speed to high and beat for an additional 2 minutes until the frosting is fluffy.
- Assemble Cookies: Fill a piping bag fitted with a 1M tip with the frosting. Pipe swirls of frosting onto the bottom side of half the cookies. Top with the remaining cookies and gently squeeze to sandwich them together.
Notes
- If you omit the red velvet dye or emulsion, the cookies will be rich chocolate sandwich cookies instead.
- Be sure cookies have fully cooled before frosting to prevent melting.
- You can substitute milk chocolate chips with semi-sweet or white chocolate chips for variation.
- Store cookies in an airtight container for up to 3 days for best freshness.
- Room temperature butter and cream cheese will help achieve a smooth and fluffy frosting.
Nutrition
- Serving Size: 1 sandwich cookie
- Calories: 280 kcal
- Sugar: 20 g
- Sodium: 150 mg
- Fat: 16 g
- Saturated Fat: 8 g
- Unsaturated Fat: 6 g
- Trans Fat: 0 g
- Carbohydrates: 32 g
- Fiber: 2 g
- Protein: 3 g
- Cholesterol: 35 mg


