

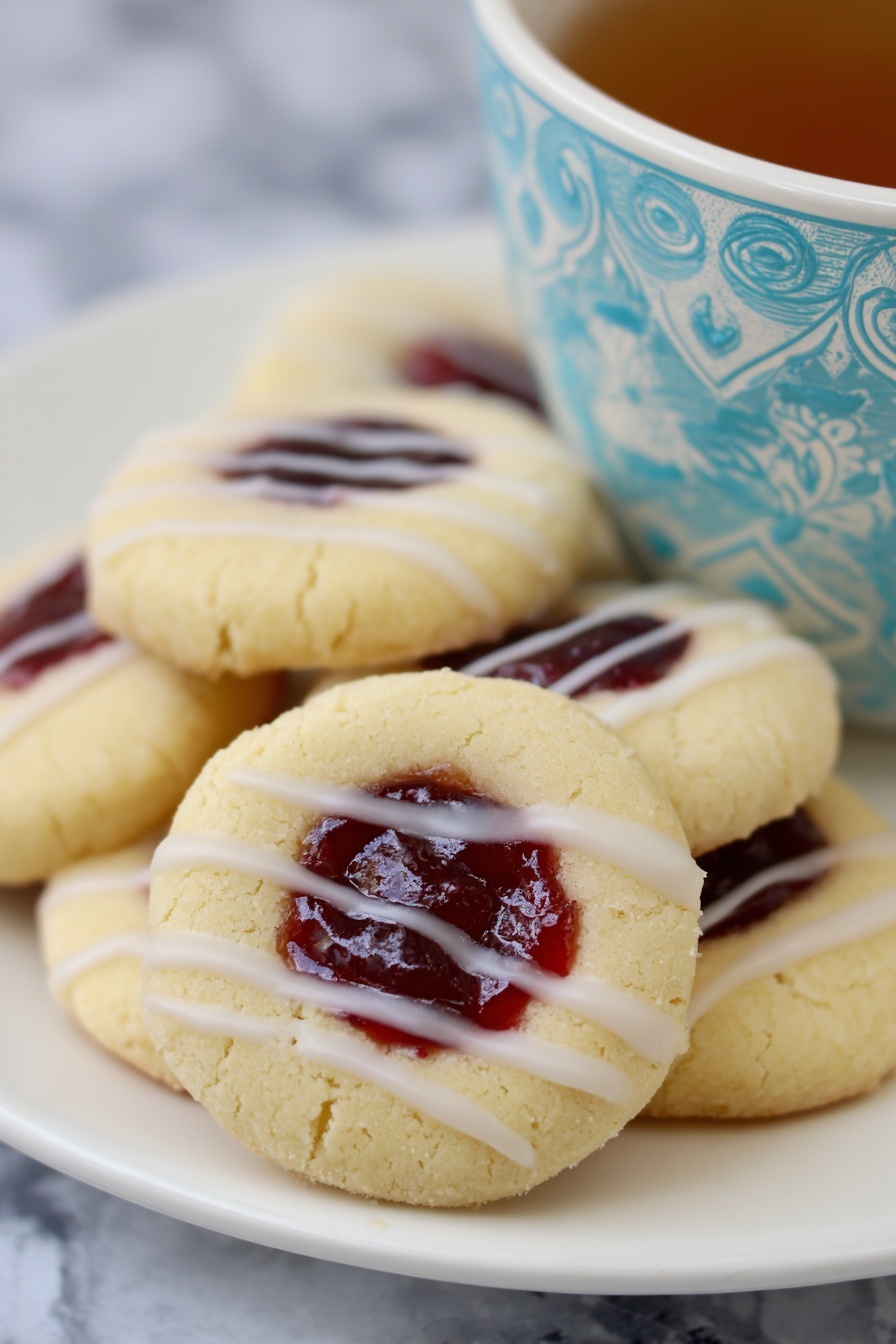
Raspberry Thumbprint Cookies Recipe
If you’re like me and adore cookies that bring both a buttery crunch and a burst of fruity goodness, you’re going to fall head over heels for this Raspberry Thumbprint Cookies Recipe. These little gems are not just adorable with their jam-filled centers but absolutely fan-freaking-tastic in taste — perfect for any occasion from afternoon tea to holiday cookie swaps. Stick around, and I’ll walk you through every step to get them just right.
Why This Recipe Works
- Perfect Texture Balance: The cookies have a tender, buttery crumble with a slight crunch, hitting that delightful spot between soft and crisp.
- Jam-filled Centers: Using melted raspberry jam gives a glossy, beautiful finish and keeps the cookies from being dry.
- Easy to Customize: You can tweak sweetness levels and even swap jams to match whatever flavor you crave or what’s in your pantry.
- Reliable and Time-tested: Chilling the dough just an hour ensures the dough is firm enough for shaping but not rock hard, giving you perfect results every bake.

Ingredients & Why They Work
This Raspberry Thumbprint Cookies Recipe comes together with simple pantry staples that complement each other beautifully. Each ingredient plays a crucial role in getting the classic cookie texture and taste right. Let me share some tips to pick the best components.
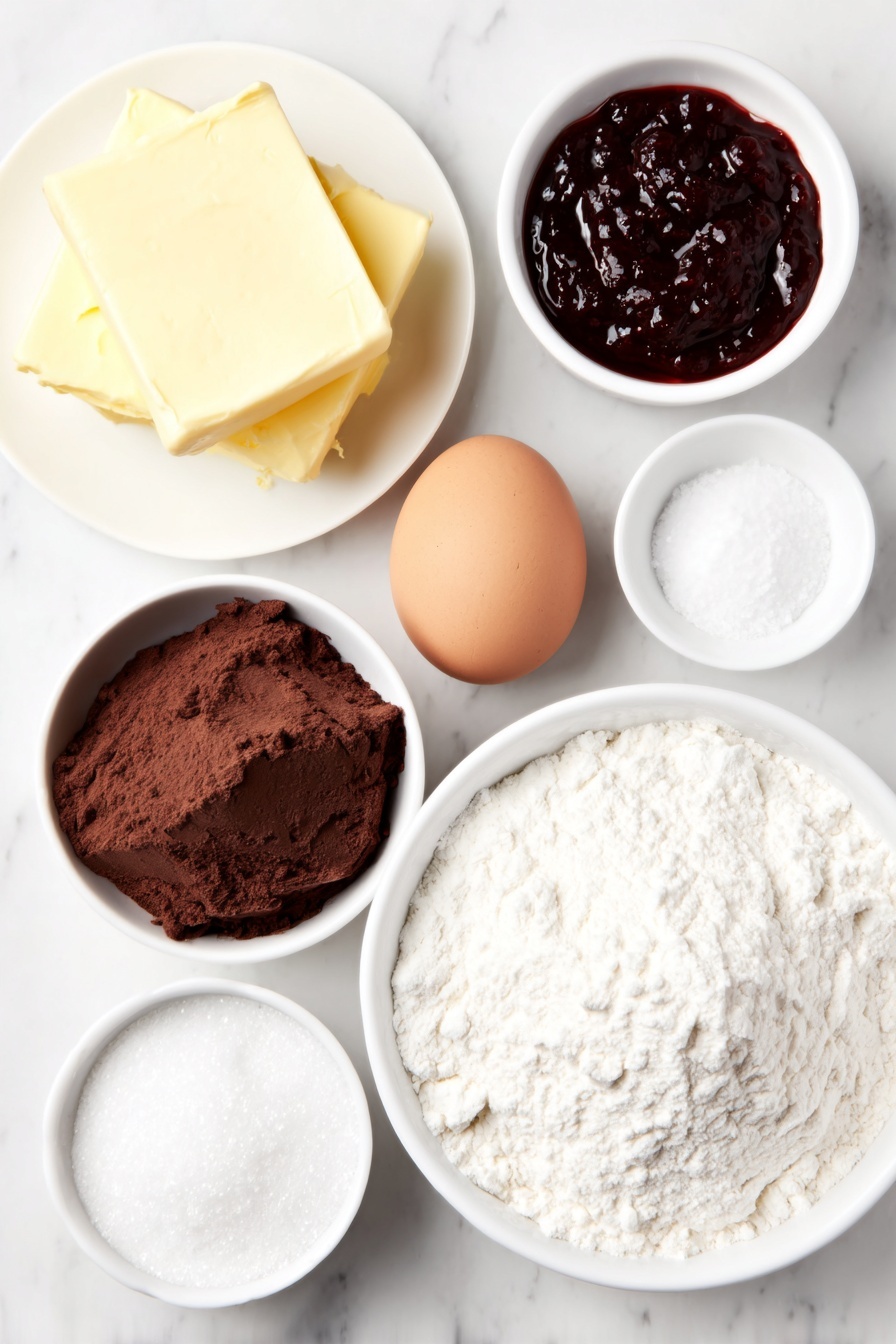
- Butter: Make sure it’s softened but not melted; this gives the dough richness and that melt-in-your-mouth crumb.
- Sugar (granulated and confectioners’): Dividing sugar between dough and rolling helps create a crunchy, sweet exterior, while confectioners’ sugar makes a smooth glaze.
- Egg: Binds the dough and adds moisture – don’t skip it for that nice tender texture.
- Vanilla extract: A splash amps up the flavor, making the cookie taste homemade and cozy.
- Flour: Provides structure. Using all-purpose flour is perfect here – not too much gluten for a tender bite.
- Baking powder: Helps the cookies puff just the right amount without spreading too thin.
- Salt: Just a pinch to balance sweetness and highlight other flavors.
- Seedless raspberry jam: Smooth and vibrant, I prefer seedless for an even filling that doesn’t get stuck in your teeth.
Make It Your Way
One of my favorite things about this Raspberry Thumbprint Cookies Recipe is how easy it is to make it your own. Whether you prefer a different jam flavor or want to make it more festive, there’s room for your creativity here!
- Jam Swaps: I sometimes use apricot or strawberry jam depending on the season. Raspberry’s tanginess is lovely, but mixing it up keeps things exciting.
- Nutty Twist: Adding crushed nuts like pistachios around the jam center before baking gives a fun texture variation — my kids loved it!
- Gluten-Free Version: You can swap the flour with a 1:1 gluten-free blend, just be sure to chill the dough a bit longer as it may be softer.
- Less Sweet Option: Reduce sugar slightly or use a sugar substitute if you prefer a more subtle sweetness.
Step-by-Step: How I Make Raspberry Thumbprint Cookies Recipe
Step 1: Prep the Dough—Get Everything Ready
Start by whisking together your flour, baking powder, and salt in a medium bowl. This little step makes sure your cookies spread evenly and bake up just right. Then, in your mixer, cream the softened butter with half of the sugar and vanilla until it’s fluffy—about 2-3 minutes on medium speed.
Step 2: Mix and Chill for Perfect Texture
Add the egg and beat it well into the butter mixture, then slowly stir in your flour mix. You want a soft, cohesive dough—sticky but manageable. Chill the dough for one hour; trust me, this is the magic step that stops cookies from spreading too thin and produces that perfect buttery bite.
Step 3: Shape, Sugar-Coat, and Make Your Fingerprints
Preheat the oven to 350°F and line your baking sheets with parchment paper (or silicone mats if you have them). Roll the dough into 1-inch balls, then roll each ball in the remaining quarter cup sugar—it adds a lovely crunch on the outside. Place the sugared balls 2 inches apart. Now comes the fun: press your thumb, a spoon handle, or a measuring spoon into the center to make those iconic little indentations.
Step 4: Bake and Add the Raspberry Jam
Bake your cookies for 13-16 minutes, watching for just slightly browned edges—that’s your cue they’re perfectly baked. While they’re cooling, gently melt your raspberry jam in the microwave for about 20 seconds, making it easier to spoon into those fingerprints without tearing the cookies. Spoon warmed jam into each cookie indent and let them cool completely.
Step 5: Glaze It and Enjoy
Whisk together the confectioners’ sugar, vanilla, and water until smooth but thick enough to drizzle. I like to zigzag the glaze over the cookies to add a little sweetness and a lovely finish. Let it set for a bit before you dig in or package them away.
Tips from My Kitchen
- Chilling is Key: I never skip chilling the dough—it really helps keep the cookies thick and prevents excessive spreading.
- Melting the Jam: Warming the jam before spooning in helps keep a neat appearance and you’ll avoid cracks around the edges.
- Use Your Thumb or Spoon: Pressing with your thumb works fine, but I love the rounded back of a wooden spoon or a measuring teaspoon for a uniform indentation.
- Sugar Rolling Trick: Rolling your dough balls in sugar before baking gives the cookie edges a lovely extra crunch and sparkle.
How to Serve Raspberry Thumbprint Cookies Recipe
Garnishes
I like to keep the garnish simple—sometimes a gentle dusting of powdered sugar just before serving adds a pretty snowfall effect. For a festive touch, chopped pistachios around the jam add crunch and a pop of green, making them extra photogenic and delicious.
Side Dishes
These cookies pair beautifully with a hot cup of tea or coffee, especially Earl Grey or chai. I also love serving them alongside fresh berries or a dollop of whipped cream for a simple dessert platter.
Creative Ways to Present
For holiday gifts, I arrange these cookies in decorative tins layered with parchment paper, tied with a ribbon, and include a handwritten recipe note. Another fun idea is placing them on a festive dessert board alongside nuts, dried fruits, and chocolate pieces for a party spread that wows.
Make Ahead and Storage
Storing Leftovers
Once cooled, I store my Raspberry Thumbprint Cookies in an airtight container lined with parchment paper between the layers to keep them from sticking together. They last beautifully for up to a week at room temperature in a cool spot.
Freezing
If I need to keep them longer, these cookies freeze wonderfully. I freeze them flat on a baking sheet first, then transfer to a freezer-safe container with parchment layers. They thaw in about an hour at room temperature without losing their texture or flavor.
Reheating
To refresh the texture, pop leftover cookies in a 300°F oven for 5 minutes. This revives their crunch without drying them out, especially if they’ve been stored for a few days.
FAQs
-
Can I use other types of jam in the Raspberry Thumbprint Cookies Recipe?
Absolutely! While raspberry is classic and delicious, you can swap in strawberry, apricot, blackberry, or even more exotic flavors like fig or mango. Just use a seedless jam for a smooth texture and melted jam for the best presentation.
-
Is it necessary to chill the cookie dough?
Chilling is highly recommended. It firms up the dough, making it easier to roll and shape and preventing the cookies from spreading too much during baking. It yields a better texture and appearance.
-
Can I make this recipe gluten-free?
Yes! Swap the all-purpose flour with a gluten-free flour blend that’s meant for baking. Remember to chill the dough a bit longer if it feels too soft, and watch baking times closely.
-
Why do some thumbprint cookies crack after baking?
Cracks usually happen if the dough dries out or the indentations are too shallow. Make sure to press firmly into the dough balls and avoid overbaking. Chilling the dough will also reduce cracking.
-
How long will Raspberry Thumbprint Cookies stay fresh?
Stored in an airtight container at room temperature, they stay fresh and tasty for about a week. Beyond that, freezing is your best bet for extending shelf life without sacrificing texture.
Final Thoughts
I’ve made this Raspberry Thumbprint Cookies Recipe countless times—from cozy winter evenings to sunny summer bake sales—and it never disappoints. There’s just something about that buttery dough paired with sweet, sticky raspberry jam that always brings smiles around my kitchen table. Give it a try, and I bet it’ll become one of your go-to cookies, too. You’ll be so glad you did!
Print
Raspberry Thumbprint Cookies Recipe
- Prep Time: 40 minutes
- Cook Time: 16 minutes
- Total Time: 1 hour 56 minutes
- Yield: 42 cookies
- Category: Dessert
- Method: Baking
- Cuisine: American
- Diet: Vegetarian
Description
These classic Raspberry Thumbprint Cookies feature a buttery, flavorful dough with a sweet raspberry jam center and a light vanilla glaze. With a slightly crunchy texture and a beautiful presentation, they make a delightful treat perfect for gatherings or any time you crave a homemade cookie.
Ingredients
Cookie Dough
- 1 cup butter softened
- 3/4 cup sugar divided
- 1 egg
- 1 teaspoon vanilla extract
- 2 cups flour
- 1 teaspoon baking powder
- 1/4 teaspoon salt
Filling
- 2/3 cup seedless raspberry jam
Icing
- 1/2 cup confectioners’ sugar
- 1/2 teaspoon vanilla extract
- 1 1/2 teaspoons water
Instructions
- Prepare Dry Ingredients: In a medium bowl, stir together the flour, baking powder, and salt until well combined.
- Cream Butter and Sugar: In a large bowl, cream the softened butter, 1/2 cup granulated sugar, and vanilla extract using an electric mixer on medium speed for 2 to 3 minutes until fluffy.
- Add Egg: Beat in the egg thoroughly until the mixture is smooth and homogeneous.
- Combine Dry and Wet Ingredients: Gradually add the flour mixture to the creamed mixture, beating steadily to form the dough. Once combined, cover and chill the dough in the refrigerator for 1 hour.
- Preheat Oven and Prepare Baking Sheets: Preheat the oven to 350°F. Line baking sheets with parchment paper or silicone mats, or lightly grease the pans.
- Form Dough Balls: Place the remaining 1/4 cup sugar in a small dish. Roll the dough into 1-inch balls, then roll each ball in the sugar to coat. Arrange the balls 2 inches apart on the prepared baking sheets.
- Create Indentations: Using your thumb, a rounded 1/2 teaspoon measuring spoon, or the end of a wooden spoon handle, press gently into the center of each dough ball to make an indentation.
- Bake Cookies: Bake in the preheated oven for 16 minutes, or until the edges of the cookies are slightly browned. Remove the cookies from the oven and transfer to wire racks to cool slightly.
- Heat and Add Jam: Place the raspberry jam in a small bowl and warm it in the microwave until melted. Spoon the melted jam into the indentation of each cookie.
- Cool Completely: Allow the cookies to cool completely so the jam sets and the cookies firm up.
- Prepare Icing: In a small bowl, mix the confectioners’ sugar, vanilla extract, and water until the icing is smooth and fairly thick.
- Drizzle Icing: Drizzle the icing over the cooled cookies for a decorative and flavorful finishing touch.
- Store Properly: Store the cookies in an airtight container in a cool place. To prevent sticking, separate layers with parchment paper.
Notes
- You can add the jam before baking or after baking without melting it, depending on your personal preference.
- Melted jam makes for a prettier presentation and helps with stacking the cookies.
- Over time, the white icing may become tinted by the jam’s color.
- For a chewier texture, reduce baking time slightly or add a bit more moisture to the dough.
- Store cookies with parchment paper between layers to prevent sticking and preserve texture.
Nutrition
- Serving Size: 1 cookie
- Calories: 110 kcal
- Sugar: 8 g
- Sodium: 45 mg
- Fat: 6 g
- Saturated Fat: 3.5 g
- Unsaturated Fat: 2 g
- Trans Fat: 0 g
- Carbohydrates: 14 g
- Fiber: 0.5 g
- Protein: 1 g
- Cholesterol: 20 mg
