

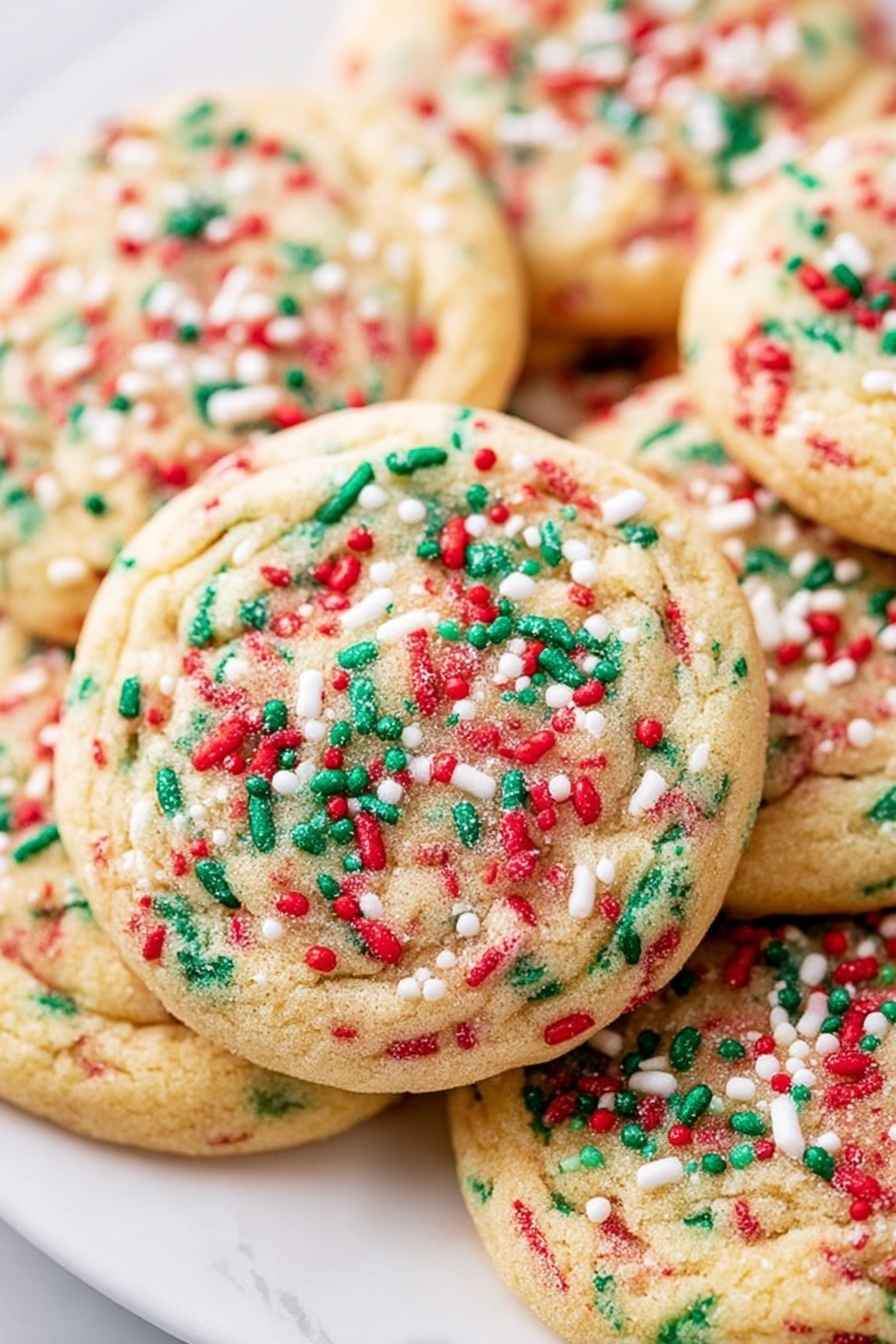
No-Roll Christmas Sprinkle Cookies Recipe
Hey friend, you’re about to discover a gem I’ve made my holiday go-to: the No-Roll Christmas Sprinkle Cookies Recipe. Trust me, these cookies are delightfully soft, packed with festive sprinkles, and the best part? You don’t have to roll out dough or fight with cookie cutters. I’ll walk you through every step and share the little kitchen secrets I learned along the way, so your batch comes out perfect every time.
Why This Recipe Works
- No-Roll Ease: Skips the tedious rolling and cutting, making cookie prep quick and stress-free.
- Chilled Dough Magic: Chilling the dough prevents spreading, so your cookies stay thick and perfectly soft.
- Clear Imitation Vanilla: Adds that nostalgic, bakery-style flavor without overpowering the sprinkles.
- Fun Festive Sprinkles: Loaded with holiday colors that stay vibrant and add crunch in every bite.

Ingredients & Why They Work
Each ingredient in this No-Roll Christmas Sprinkle Cookies Recipe plays a special role, combining to give you soft, flavorful cookies with a delightful holiday pop. Let me share why I chose these and a few shopping tips to help you grab the best stuff.
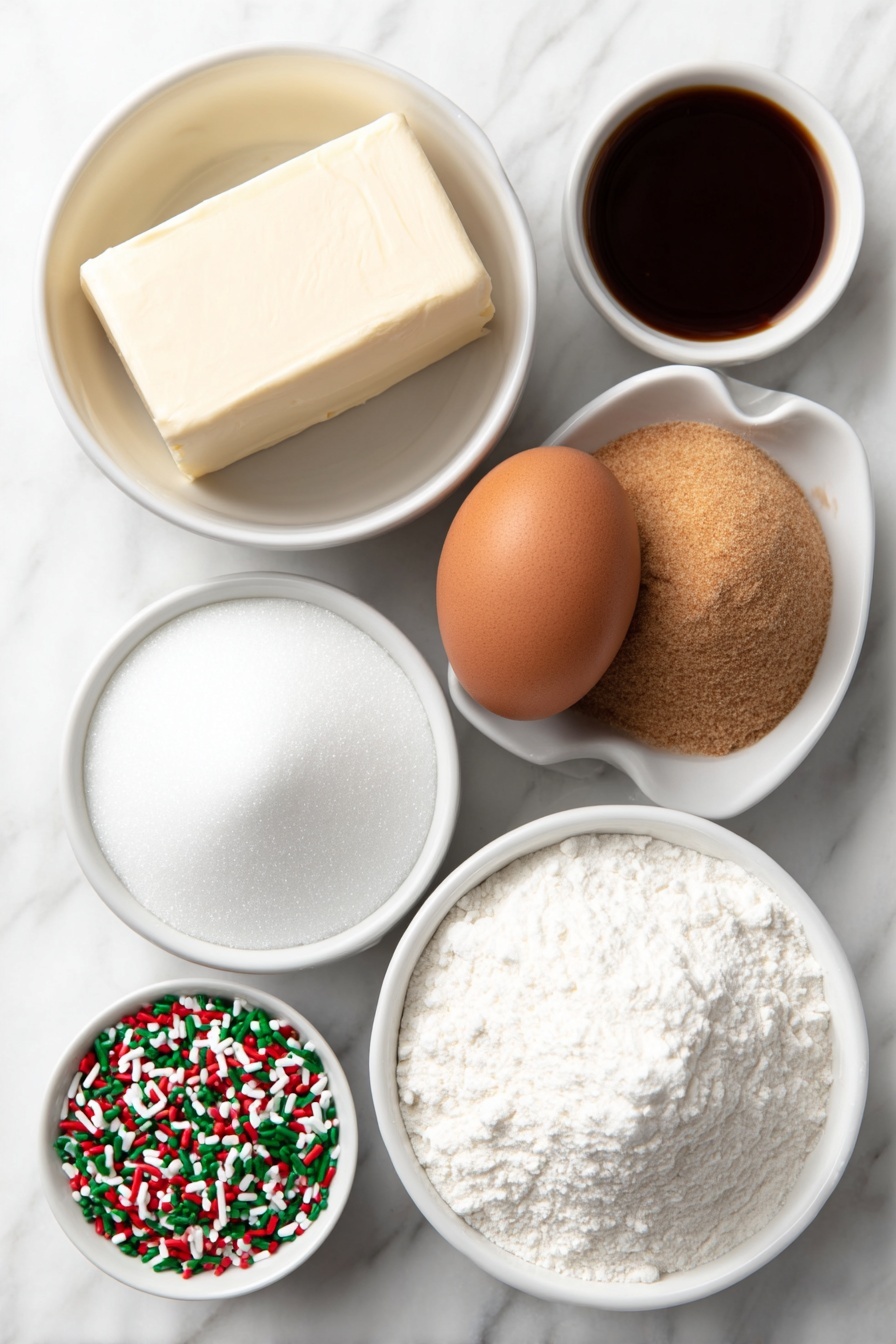
- Unsalted Butter: Using softened butter ensures creamy texture and control over salt, letting the sprinkles shine.
- Granulated Sugar: Adds sweetness and helps cookies crisp slightly on the edges.
- Light Brown Sugar: Packed brown sugar deepens flavor and keeps cookies wonderfully moist.
- Egg: Binds ingredients and contributes to the cookie’s structure and softness.
- Cream or Half-and-Half: Adds just enough moisture for tenderness without weighing the dough down.
- Clear Imitation Vanilla Extract: I love this for its classic bakery aroma that pairs perfectly with sprinkles.
- All-Purpose Flour: The base for the dough with the right protein content for tender cookies.
- Cornstarch: A tiny secret weapon to give the cookies melt-in-your-mouth softness.
- Baking Soda: Leavens the dough gently to spread just the right amount.
- Salt: Balances sweetness and enhances flavors.
- Jimmies (sprinkles): Holiday colors bring vibrant fun and delightful texture.
Make It Your Way
I love when recipes aren’t set in stone, so here’s how I like to play with this No-Roll Christmas Sprinkle Cookies Recipe—and you should, too! Whether you want to change up the sprinkles or tweak texture, your version will be just as magical.
- Nutty Twist: Adding chopped walnuts or pecans gives a lovely crunch and a toasty note. I often do this when I want a bit of extra texture in my cookies.
- Gluten-Free Swap: I’ve had success swapping all-purpose flour with a gluten-free blend—just keep an eye on dough consistency and add a splash more cream if it feels too dry.
- Sprinkle Alternatives: Sometimes I swap out the classic red-green-white jimmies for rainbow sprinkles or mini chocolate chips, depending on the occasion.
- Flavor Boost: Pop in a half teaspoon of almond extract alongside the vanilla for a delicate nutty aroma, which always impresses guests.
Step-by-Step: How I Make No-Roll Christmas Sprinkle Cookies Recipe
Step 1: Cream the Butter and Sugars Until Fluffy
Start by beating the softened butter with both sugars on medium-high speed for about 3 to 4 minutes. The goal here is a light, fluffy mixture—don’t skip or rush this! It sets the base for airy, tender cookies. Scrape down the bowl partway through so everything combines perfectly. If you only do one thing, make it this step slow and thorough.
Step 2: Add the Egg, Vanilla, and Cream
Next, add your egg and that magical clear imitation vanilla extract. Beat again until you see a smooth, glossy mix, about 2 minutes. Then stir in the cream or half-and-half. At this point, the batter might look a little grainy or like it’s separating—don’t worry, that’s totally normal and the flour will fix it.
Step 3: Mix in Dry Ingredients and Sprinkles Carefully
Lower the mixer speed and add your flour, cornstarch, baking soda, and salt. Mix just until combined—overmixing will toughen your cookies. Then fold in your holiday jimmies sprinkles gently on low speed for about 30 seconds. Be sure to scrape the bowl edges again so every sprinkle is evenly spread for maximum festive effect.
Step 4: Chill the Dough—Patience Pays Off
This is a non-negotiable step that changed my cookie game. Using a 2-tablespoon scoop or your hands, form about 17 mounds of dough. The dough is soft, so the scoop is your best friend. Place them on a tray, cover with plastic wrap, and refrigerate for at least 3 hours or up to 5 days. Chilling firms the dough so cookies don’t spread thin and keep that irresistible chewy texture.
Step 5: Shape, Bake, and Sprinkle
When you’re ready, preheat your oven to 350°F and line a baking sheet with a Silpat or nonstick spray. Flatten each dough mound to about half its height—not too thin! Place them spaced about 2 inches apart, top each with a generous pinch of sprinkles pressed lightly so they stick. Bake 8 minutes or until edges set but centers are still a little glossy. That slight underbake results in a melt-in-your-mouth texture after cooling.
Step 6: Cool and Enjoy
Let cookies cool completely on the baking sheet—resist the urge to transfer them while hot or they might break. They firm right up without losing their softness. Then dive in and celebrate your easy-peasy, festival-ready treats!
Tips from My Kitchen
- Don’t Skip the Chill: Chilling dough is what transforms soft dough into thick, perfect cookies—trust me, I used to skip this and paid the price in flat cookies.
- Clear Vanilla Is Your Friend: I switched to clear imitation vanilla from pure vanilla extract because it adds that sweet bakery vibe without altering your cookie’s color or flavor balance.
- Use a Cookie Scoop: It speeds everything up and yields consistent cookie sizes that bake evenly—plus, less mess with sticky dough in your hands.
- Watch Your Oven Time: Pull cookies out when centers still look a bit glossy—not fully set. They’ll finish cooking on the hot baking sheet and come out perfectly soft inside.
How to Serve No-Roll Christmas Sprinkle Cookies Recipe
Garnishes
I like to add an extra sprinkle flourish just before popping cookies in the oven—pressing a few more jimmies on top brightens the look and adds a fresh crunch. For a little sparkle, sometimes I dust with edible glitter or a very light sprinkle of powdered sugar for extra magic.
Side Dishes
These cookies pair so well with a warm mug of hot chocolate or a chilled glass of milk—comfort food holiday style! I’ve also served them alongside a cheese board at Christmas parties where they surprisingly add that sweet balance amidst savory bites.
Creative Ways to Present
One year I stacked these cookies on a festive tiered plate topped with holly leaves and candy canes for a cheerful display. Another time, I wrapped stacks of three in clear cellophane tied with red ribbons—instant thoughtful homemade gifts for friends and neighbors.
Make Ahead and Storage
Storing Leftovers
I store these cookies in an airtight container at room temp—they stay soft and delicious for up to one week, if they last that long! You want to avoid moisture buildup, so I layer parchment paper between them to prevent sticking.
Freezing
I find freezing the unbaked dough mounds works best. Just cover tightly and freeze for up to 4 months. When you want fresh cookies, let them thaw in the refrigerator overnight, gently flatten, and bake as usual. It’s a lifesaver when holiday guests pop in unexpectedly!
Reheating
Reheat cookies briefly in the microwave for 10–15 seconds or warm them in a 300°F oven for about 5 minutes. This revives that just-baked softness and sprinkle crunch without drying them out—a small kitchen trick I use when cookies sit too long.
FAQs
-
Can I use regular vanilla extract instead of clear imitation vanilla?
Yes, you absolutely can. The clear imitation vanilla just gives a classic bakery flavor and keeps the cookie color bright, but regular vanilla extract works fine and adds a richer aroma. Just watch the color—it might be a bit darker.
-
What if I don’t have a cookie scoop—can I shape dough by hand?
Definitely! Using your hands to form the dough mounds works well, just lightly oil or flour your hands to prevent sticking. The scoop makes it faster and more uniform, but hand shaping is just fine.
- Why do I need to chill the dough for so long?
Chilling steepens the flavors and firms up the dough so your cookies don’t spread too much during baking. It gives them that perfect thick, soft texture that’s so hard to get otherwise.
-
Can I substitute sprinkles with chocolate chips?
Yes! Chocolate chips add a different but equally delicious twist. I recommend mini chips so they incorporate nicely into the dough and keep a similar texture to jimmies.
Final Thoughts
This No-Roll Christmas Sprinkle Cookies Recipe is one of those joyful kitchen wins I keep coming back to year after year. They’re hassle-free, filled with nostalgic holiday vibes, and perfect for sharing (or sneaking a few straight from the pan). Give them a try—you’ll love how easy and festive your cookie-making can be with this recipe. I can’t wait to hear what you think!
Print
No-Roll Christmas Sprinkle Cookies Recipe
- Prep Time: 10 minutes
- Cook Time: 8 minutes
- Total Time: 3 hours 18 minutes
- Yield: 17 cookies
- Category: Dessert
- Method: Baking
- Cuisine: American
Description
These No-Roll Christmas Sprinkle Cookies are soft, sweet, and festive with colorful red, green, and white sprinkles mixed into a buttery dough. No rolling is required—just scoop, chill, flatten, and bake for perfectly tender cookies with a nostalgic bakery flavor featuring clear imitation vanilla extract.
Ingredients
Cookie Dough
- ½ cup unsalted butter, softened (1 stick)
- ½ cup granulated sugar
- ½ cup light brown sugar, packed
- 1 large egg
- 2 tablespoons cream or half-and-half
- 1 ½ teaspoons vanilla extract (clear imitation vanilla extract preferred)
- 1 ¾ cups all-purpose flour
- 2 teaspoons cornstarch
- 1 teaspoon baking soda
- ¼ teaspoon salt (or to taste)
- ¾ cup red, green, and white jimmies (sprinkles), plus more for sprinkling
Instructions
- Cream Butter and Sugars: In the bowl of a stand mixer fitted with the paddle attachment (or a large bowl with an electric mixer), beat the softened butter, granulated sugar, and light brown sugar on medium-high speed until the mixture is well creamed and combined, about 3 to 4 minutes.
- Add Egg and Vanilla: Stop and scrape down the sides of the bowl. Add the egg and vanilla extract, then beat on medium-high speed until fully incorporated, about 2 minutes.
- Mix in Cream: Stop and scrape the bowl again. Pour in the cream or half-and-half and beat on medium-high speed until combined, about 1 minute. The batter may look slightly grainy or separated, which is normal.
- Add Dry Ingredients: Stop and scrape down the bowl. Add the all-purpose flour, cornstarch, baking soda, and salt. Beat on low speed until just combined, approximately 1 minute.
- Fold in Sprinkles: Stop and scrape the bowl. Add the ¾ cup of red, green, and white sprinkles and mix on low speed just until evenly distributed, about 30 seconds.
- Scoop and Chill Dough: Using a 2-tablespoon cookie scoop or your hands, form about 17 equal-sized mounds of dough. Place them on a large plate or tray, cover with plastic wrap, and refrigerate for at least 3 hours up to 5 days to prevent spreading during baking.
- Preheat Oven and Prepare Baking Sheet: Preheat your oven to 350 degrees Fahrenheit. Line a baking sheet with a Silpat mat or spray with cooking spray.
- Shape and Top Dough: After chilling, flatten each dough mound to about half its original height. Arrange them on the prepared baking sheet, spacing at least 2 inches apart. Press a generous pinch of sprinkles on top of each flattened mound so they adhere.
- Bake Cookies: Bake in the preheated oven for about 8 minutes, or until the cookie edges have set and the tops appear just set but may still look slightly glossy. Avoid overbaking as cookies will firm up while cooling.
- Cool: Allow cookies to cool completely on the baking sheet; do not transfer to a cooling rack.
Notes
- Store baked cookies airtight at room temperature for up to 1 week.
- Unbaked cookie dough can be stored airtight in the refrigerator for up to 5 days or frozen for up to 4 months.
- Consider baking only as many cookies as desired and saving the remaining dough for fresh baking later.
- Clear imitation vanilla extract is recommended for a nostalgic, bakery-style flavor.
Nutrition
- Serving Size: 1 cookie
- Calories: 120 kcal
- Sugar: 8 g
- Sodium: 85 mg
- Fat: 6 g
- Saturated Fat: 3.5 g
- Unsaturated Fat: 2 g
- Trans Fat: 0 g
- Carbohydrates: 15 g
- Fiber: 0.5 g
- Protein: 1 g
- Cholesterol: 25 mg


