

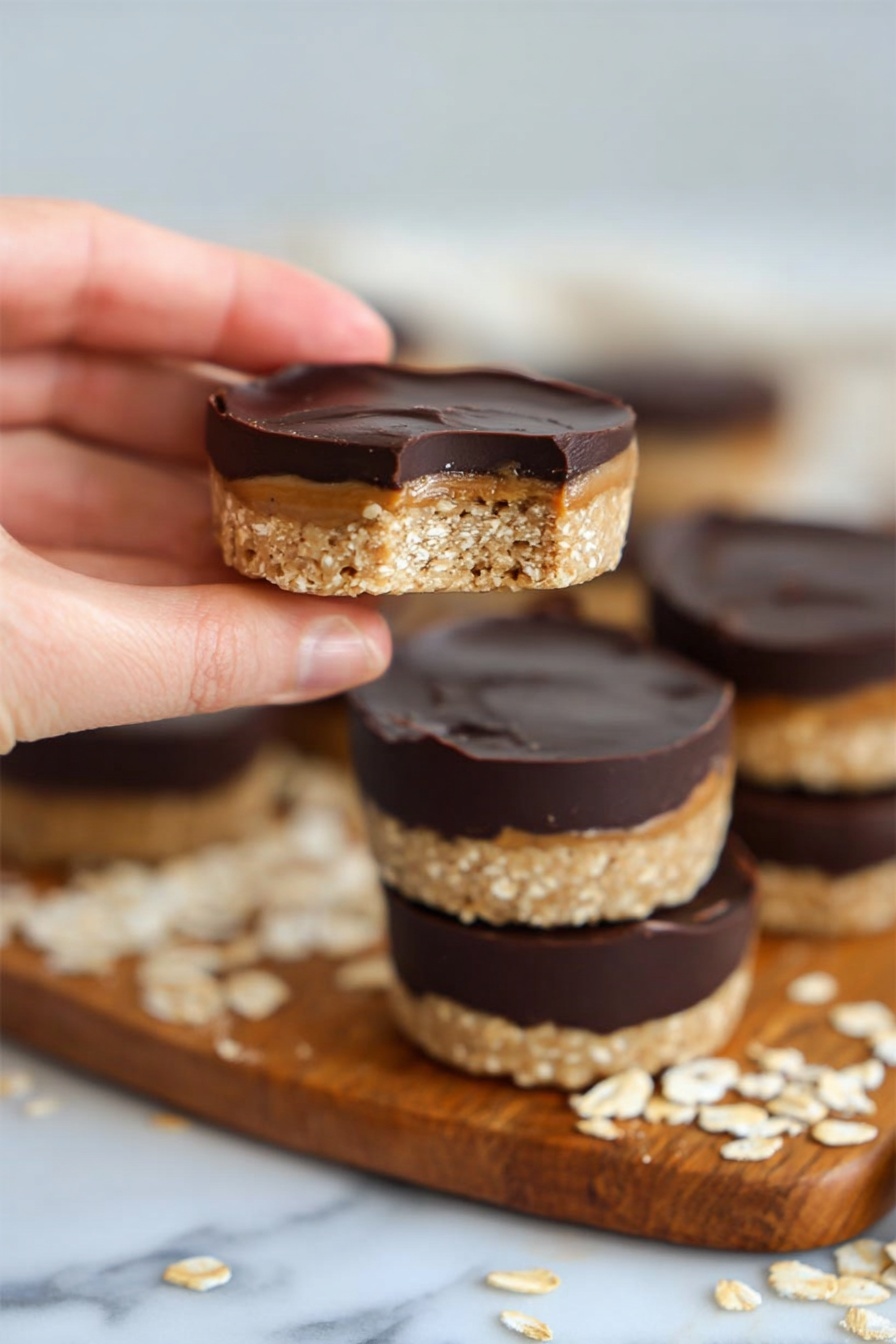
No Bake Peanut Butter Oat Cups Recipe
Hey friend, if you’re anything like me and love simple, tasty treats that don’t involve heating up the oven, then you’re in for a real delight with this No Bake Peanut Butter Oat Cups Recipe. These little cups pack a serious punch of peanut buttery goodness with just the right hint of sweetness and chocolate — perfect for snacks, lunchbox surprises, or anytime cravings. Trust me, once you try them, you’ll be hooked, and the best part? No baking required!
Why This Recipe Works
- No Oven Needed: Perfect for hot days or when you simply don’t want to bake but still crave something chocolaty and peanut buttery.
- Simple Ingredients: Uses pantry staples you likely already have, making it super easy to whip up anytime.
- Customizable Texture: You can adjust the moisture and thickness based on your preferences — more maple syrup or peanut butter if needed!
- Kid-Friendly & Portable: These cups are perfect for little hands and easy to take on-the-go without mess.

Ingredients & Why They Work
This No Bake Peanut Butter Oat Cups Recipe balances creamy peanut butter with wholesome oats finely ground into flour, all sweetened naturally with maple syrup. The chocolate topping adds that crave-worthy finish, while coconut oil smooths out the melting process. Grab quality ingredients to make sure your cups come out perfect every time.
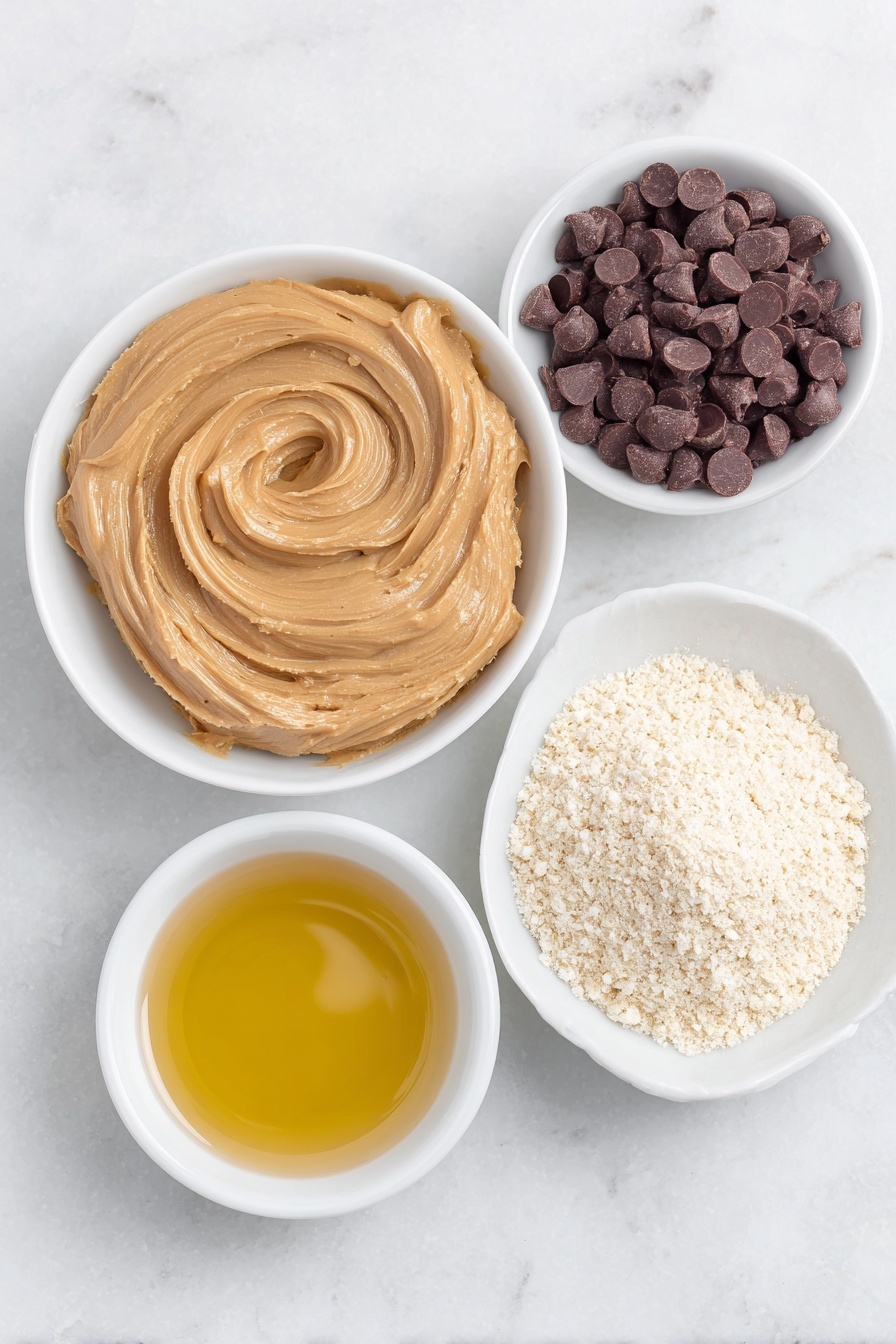
- Peanut Butter: Natural, creamy peanut butter works best for smooth texture and rich flavor. Avoid the runny types to prevent overly loose mixtures.
- Rolled Oats: Blend these into fine oat flour for a cohesive texture that holds the cups together beautifully.
- Maple Syrup: This adds moist sweetness and helps bind the mixture without using refined sugar.
- Chocolate Chips: Use semi-sweet or dark for balance; feel free to try dairy-free versions if needed.
- Coconut Oil (optional): Helps melt chocolate smoothly and gives a lovely shine to the topping.
Make It Your Way
One of the things I adore about this No Bake Peanut Butter Oat Cups Recipe is how easy it is to tweak. I’m all about customizing to fit what you love or what you have on hand. Maybe you want a little more sweetness, or you’re craving a seasonal twist — it’s all fair game!
- Variation: I’ve added pumpkin puree and some pumpkin spice for a fall-inspired version that’s moist and delicious — it totally changed the game for me on chilly afternoons!
- Dietary Switch: Swap peanut butter for almond or sunflower seed butter if you’re dealing with allergies — the flavor changes but the magic remains.
- Add-Ins: Throw in mini chocolate chips or toasted nuts inside the mixture for extra texture.
- Sweetness Level: Adjust maple syrup up or down, depending if you want a sweeter treat or a more nutty, less sugary bite.
Step-by-Step: How I Make No Bake Peanut Butter Oat Cups Recipe
Step 1: Grinding Oats into Perfect Flour
First things first — pop your rolled oats into a food processor or a high-speed blender and pulse until you’ve got a fine oat flour. The finer, the better to get those peanut butter cups holding together without crumbling. This step is quick but key for a smooth, cohesive mix.
Step 2: Warming Peanut Butter and Maple Syrup
Next, mix your peanut butter and maple syrup in a microwave-safe bowl and heat for 40-60 seconds — just until warm and gooey. Stir really well until it’s fully combined, creating a lovely smooth mixture. This warming helps everything meld in the next step.
Step 3: Mixing in the Oat Flour
Slowly add your oat flour to the peanut butter mix. Here’s the trick — it should take some muscle to mix everything together, and you want a thick but moldable consistency. If it’s too dry or crumbly, add a teaspoon of maple syrup or peanut butter at a time — that’s what I do to get the perfect texture. For something extra moist, pumpkin puree is a delightful add-in.
Step 4: Scooping Into Muffin Liners
Line your muffin pan with cupcake liners or use a silicone pan for easy removal — trust me, it’s a game-changer with these cups. Scoop your mixture evenly into each cup and press down firmly with your fingers to compact the mixture well.
Step 5: Melting Chocolate and Topping
In small microwave-safe bowl, heat chocolate chips with coconut oil in 30-second bursts, stirring between each to get a smooth melted topping. Pour a layer of this luscious chocolate over each peanut butter oat cup, smoothing it over with the back of a spoon. Feeling fancy? Toss on flaky sea salt or mini chocolate chips before the chocolate sets.
Step 6: Chill and Unmold
Pop your pan into the fridge for 2-3 hours — patience is key here to let everything set up properly. Once chilled, gently remove each cup from the liner or silicone mold. I find silicone pans easiest for a clean release without breaking the cups. Store these goodness bombs in an airtight container in the fridge for up to five days.
Tips from My Kitchen
- Choose a Good Peanut Butter: I always pick creamy, natural peanut butter without added oils because it blends smoother and tastes so fresh.
- Adjust Sweetness Gradually: I add maple syrup slowly to find that perfect balance — too much can make it overly sticky, too little and it’s dry.
- Use Silicone for Easy Removal: My silicone muffin pans have saved me from many a broken cup; if you use metal, definitely line with parchment liners.
- Microwave Chocolate Carefully: Take it slow with 30-second intervals—burnt chocolate isn’t worth it, trust me!
How to Serve No Bake Peanut Butter Oat Cups Recipe
Garnishes
I like to sprinkle a pinch of flaky sea salt on top of the chocolate layer to highlight that peanut butter-chocolate combo. Sometimes I add mini chocolate chips or crushed peanuts for extra crunch and cuteness. These simple touches make them feel special without extra effort.
Side Dishes
Since these cups are a rich treat, I often serve them alongside fresh fruit like apple slices or banana chunks — it balances the indulgence perfectly. They also make a great after-school snack paired with a cold glass of milk or a creamy smoothie.
Creative Ways to Present
For birthdays or small get-togethers, I’ve arranged these oat cups on a pretty cake stand or tiered tray, adding fresh flowers or nuts around them for a rustic-chic vibe. Wrapping them individually in parchment paper tied with twine also makes a cute gift, especially during holidays.
Make Ahead and Storage
Storing Leftovers
I store leftovers in an airtight container in the fridge — the fridge keeps that maple syrup and peanut butter fresh without drying out the cups. They hold for about five days, making for a ready-to-go snack anytime.
Freezing
I’ve frozen these successfully by placing them in a single layer on a baking sheet then transferring to a freezer-safe container once solid. When you’re ready, just thaw them in the fridge overnight. They lose none of their flavor and still taste fresh, perfect for prepping ahead.
Reheating
Since these are no-bake treats, reheating isn’t necessary, but if you want a slightly softer bite, I pop one in the microwave for about 10 seconds. Just don’t overdo it or the chocolate might melt completely – a quick warm-up is all it needs.
FAQs
-
Can I use crunchy peanut butter instead of creamy?
You totally can! Just be aware that crunchy peanut butter will add texture and may make the mixture a bit chunkier. If you prefer a uniform fill, creamy is your best bet, but crunchy offers a fun twist.
-
Do these cups need to be refrigerated?
Yes, refrigeration is key. Since they contain natural peanut butter and maple syrup with no preservatives, keeping them chilled keeps them firm and fresh for several days.
-
Can I substitute maple syrup with honey or another sweetener?
Absolutely. Honey works well as a natural sweetener and binder, though it might change flavor slightly. Just adjust the quantity to taste and consistency.
-
What if my mixture is too dry or crumbly?
If the mix doesn’t hold together easily, simply stir in a little more maple syrup or peanut butter, one teaspoon at a time, until it’s thick and moldable but not sticky.
-
Can I make these cups vegan?
Yes! This recipe is naturally vegan if you use plant-based chocolate chips and pure maple syrup. Just double-check your peanut butter ingredients in case of added honey.
Final Thoughts
I genuinely love sharing this No Bake Peanut Butter Oat Cups Recipe because it’s one of those rare little gems that’s easy, comforting, and downright addictive. Every time I make these, whether just for myself or for friends, the smiles and compliments pour in. Give it a try — I have a feeling these cups will find a happy home in your kitchen and snack rotation just like they did in mine.
Print
No Bake Peanut Butter Oat Cups Recipe
- Prep Time: 15 minutes
- Cook Time: 0 minutes
- Total Time: 2 hours 15 minutes
- Yield: 12 servings
- Category: Snack
- Method: No-Cook
- Cuisine: American
- Diet: Vegetarian
Description
No Bake Peanut Butter Oat Cups are a simple, delicious treat made with peanut butter, oat flour, and maple syrup, topped with melted chocolate. These easy-to-make cups require no baking and are perfect as a quick snack or dessert, combining wholesome ingredients for a satisfying bite.
Ingredients
Main Ingredients
- 1.5 cups peanut butter
- 1.5 cups rolled oats, processed finely in a food processor to make oat flour
- 1/4 cup maple syrup
- 1 cup chocolate chips
- 1 tsp coconut oil, optional
Instructions
- Make Oat Flour: Blend the rolled oats in a high-speed blender or food processor until they are finely processed into oat flour.
- Mix Wet Ingredients: In a medium microwave-safe bowl, combine the peanut butter and maple syrup. Microwave for 40-60 seconds, then stir well until completely combined.
- Combine Oats and Wet Mixture: Slowly add the oat flour to the peanut butter and maple syrup mixture, mixing thoroughly. The mixture should be thick but moldable. If too dry, add more maple syrup or peanut butter by a teaspoon until the right consistency is achieved. Optionally, add 1/4 to 1/3 cup pumpkin puree for extra moisture.
- Prepare Muffin Pan: Line a muffin pan with cupcake liners or use a silicone muffin pan. This step helps with easy removal later.
- Form Cups: Scoop the peanut butter oat mixture evenly into the muffin pan and press down firmly with your fingers to form the base of the cups.
- Melt Chocolate: In a small microwave-safe bowl, combine chocolate chips and coconut oil. Heat in 30 second increments, stirring between sessions, until the chocolate is smooth and fully melted.
- Add Chocolate Layer: Pour a layer of melted chocolate over each peanut butter oat cup. Smooth the tops with the back of a spoon. Optionally, sprinkle flaky salt, sprinkles, or mini chocolate chips on top before the chocolate hardens.
- Chill to Set: Refrigerate the cups for 2-3 hours until the chocolate is set and firm.
- Store Properly: Carefully remove the cups from the pan or liners and store in an airtight container in the refrigerator for up to 5 days to maintain freshness.
Notes
- Add 1/3 cup pumpkin puree and 1 1/2 teaspoons pumpkin spice to the mixture for a seasonal pumpkin-flavored version.
- Use silicone muffin pans or liners for easier removal of the cups without breaking.
- If the mixture is too dry, increase maple syrup or peanut butter incrementally for better texture.
- Store the finished cups in the refrigerator due to fresh ingredients like maple syrup, which can spoil at room temperature.
Nutrition
- Serving Size: 1 cup (approx.)
- Calories: 220 kcal
- Sugar: 10 g
- Sodium: 50 mg
- Fat: 15 g
- Saturated Fat: 4 g
- Unsaturated Fat: 10 g
- Trans Fat: 0 g
- Carbohydrates: 18 g
- Fiber: 3 g
- Protein: 6 g
- Cholesterol: 0 mg

