

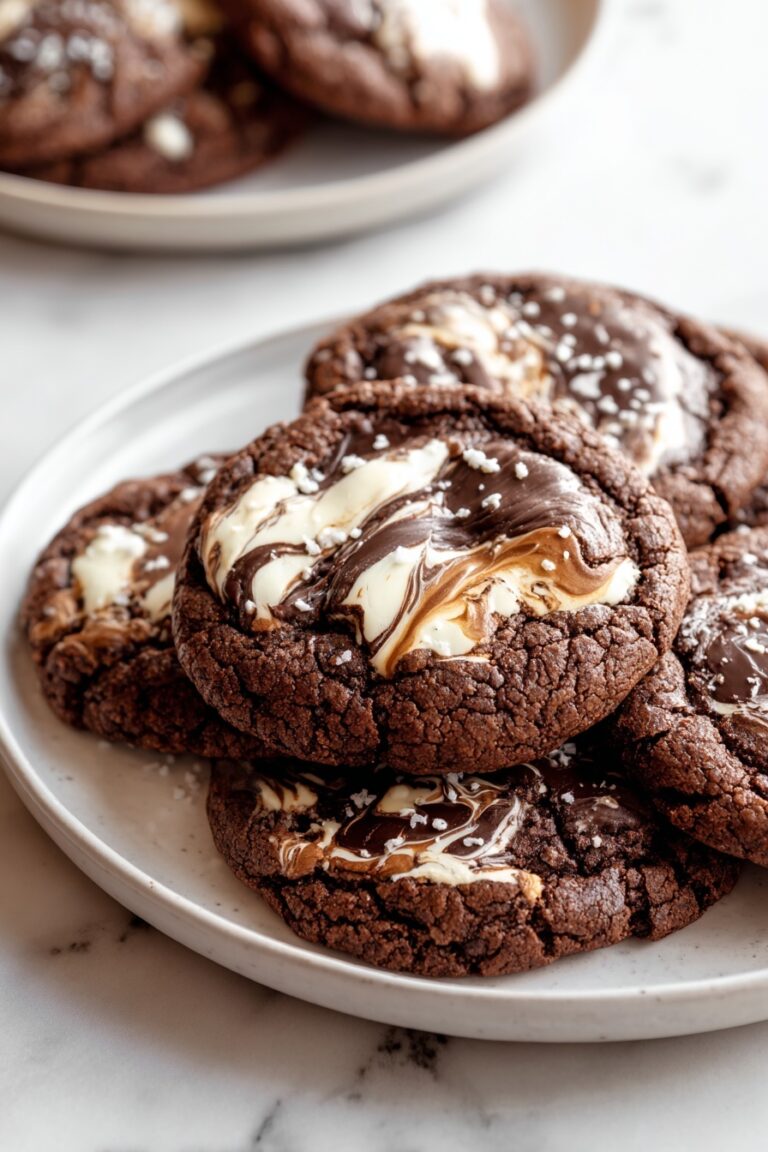
Mummy Halloween Brownies Recipe
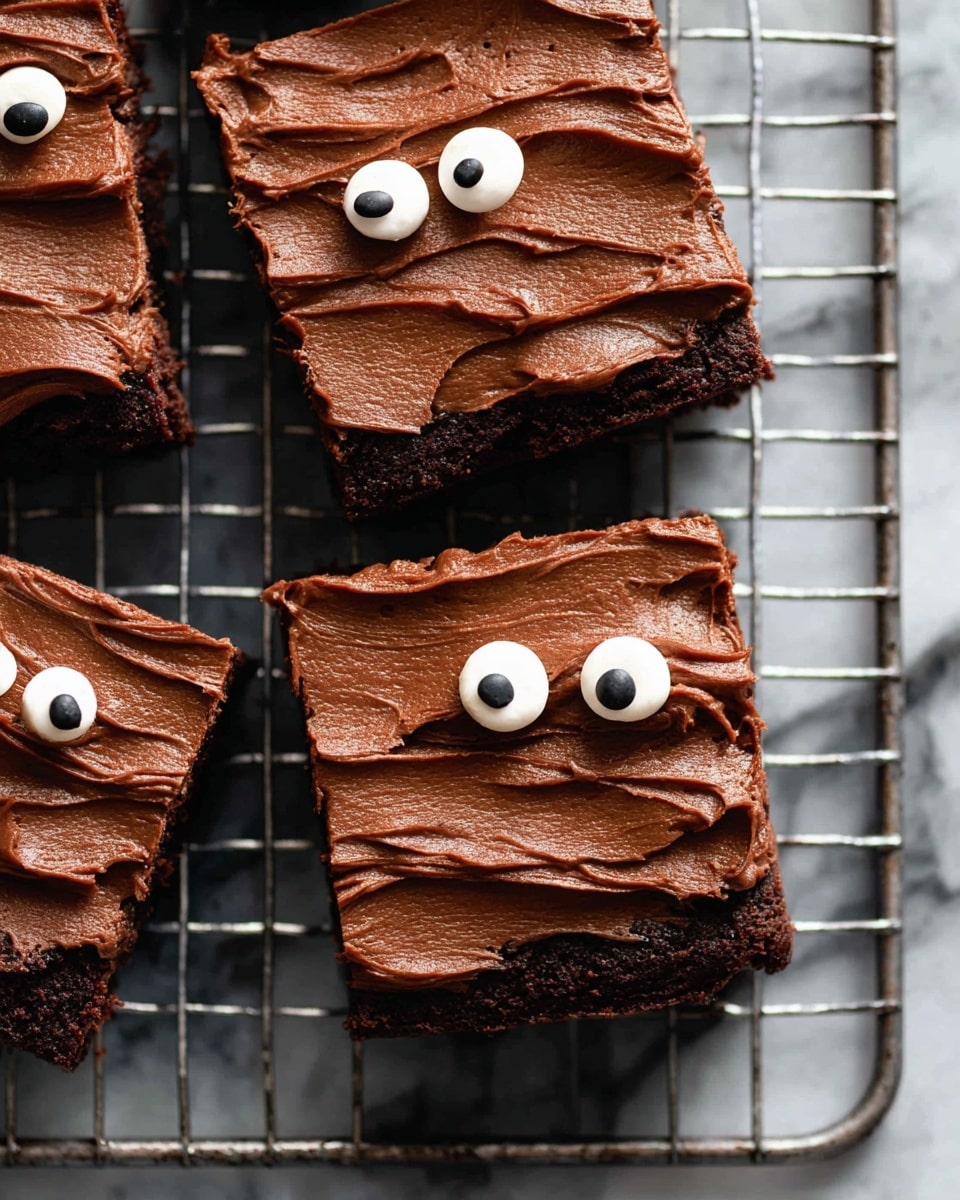
If you’re hunting for a show-stopping Halloween treat that’s as fun as it is delicious, then you’re going to love this Mummy Halloween Brownies Recipe. Trust me, these spooky little mummies wrapped in rich, fudgy brownie goodness with silky chocolate ganache are everything you want for your Halloween party—or just a cozy night in with creepy vibes. Plus, decorating them is such a blast that I guarantee it’s a total crowd-pleaser!
Why This Recipe Works
- Perfectly Fudgy Brownies: The combination of melted butter and dark chocolate creates that rich, moist texture no one can resist.
- Easy Ganache for Wrapping: The simple chocolate ganache is smooth and pipeable, making it the ideal “mummy wrap” without being messy.
- Fun and Kid-Friendly Decoration: Candy eyeballs bring the brownies to life and make decorating a fun afternoon project.
- Built For Success: Step-by-step instructions ensure even beginners can nail this festive recipe—no stressed-out baking here!

Ingredients & Why They Work
This Mummy Halloween Brownies Recipe uses classic brownie ingredients combined with a no-fuss chocolate ganache that transforms simple brownies into festive treats. Each ingredient is chosen to balance flavor, texture, and ease of decorating. Here are a few tips to help you pick the best:
- Unsalted Butter: Using unsalted butter lets you control the salt level better, and ensures the brownies are ultra-rich and fudgy.
- Dark Chocolate: High-quality dark chocolate melts beautifully and deepens the brownie’s flavor—don’t skip on this!
- Granulated Sugar: Dividing the sugar helps build that signature chewy brownie crust and moist interior.
- Eggs: Large eggs give structure and moisture, keeping the brownies perfectly dense but not cakey.
- All-Purpose Flour: Just enough flour to hold everything together without drying the brownies out.
- Kosher Salt: A pinch lifts all the chocolate flavors and balances sweetness beautifully.
- Heavy Cream: Essential for silky smooth ganache that pipes easily and sets perfectly.
- Candy Eyeballs: These little eyes make the spooky mummy effect come to life—they’re super fun to work with!
Make It Your Way
I love keeping this Mummy Halloween Brownies Recipe simple, but you absolutely can tailor it to your taste or occasion. Whether you want to add a pinch of cinnamon or swap dark chocolate for milk or white chocolate in the ganache, there’s room for creativity. You can even swap candy eyes for mini gummy spiders if you want an extra creepy vibe!
- Variation: One year, I added a dash of espresso powder to the brownie batter, and it gave the chocolate a deeper, more intense flavor that everyone raved about.
- Dietary Modification: For gluten-free friends, you can use a gluten-free flour blend. Just be mindful some blends absorb moisture differently, so the baking time might shift a bit.
- Difficulty Level: If you’re short on time, make the brownies a day ahead and skip the ganache wrapping—just sprinkle with powdered sugar and add eyeballs for a quick fix.
Step-by-Step: How I Make Mummy Halloween Brownies Recipe
Step 1: Prep Your Pan and Heat the Chocolate
First things first, preheat your oven to 350°F. I like to line a 9 x 9-inch pan with parchment paper—this makes pulling the brownies out a breeze later—and then spray the parchment lightly with nonstick cooking spray. Next, melt your butter and dark chocolate together in a double boiler over medium-low heat. Stir occasionally so nothing burns. Once smooth, remove from heat and whisk in 1 cup of sugar. This step ensures the brownies get their fudgy texture without being gritty from undissolved sugar.
Step 2: Combine the Eggs and Sugar, Then Fold Everything Together
In a large bowl, whisk together the eggs and remaining cup of sugar until smooth and a bit fluffy. While whisking, slowly pour in the chocolate mixture to gently warm the eggs and combine the flavors. Then, fold in the flour and salt carefully with a rubber spatula just until no streaks remain. Overmixing is the enemy here, so go slow to keep the brownies beautifully dense and fudgy.
Step 3: Bake and Cool Completely Before Decorating
Pour your batter into the prepared pan and bake for 35 to 40 minutes. To test, insert a toothpick in the center—it should come out with just a few moist crumbs, not wet batter. Once baked, let the brownies cool fully on a wire rack. Trust me, decorating warm brownies is a recipe for sticky frustration!
Step 4: Make Ganache and Chill for Perfect Piping
While your brownies are cooling, heat the heavy cream in a small saucepan just to a gentle simmer—don’t boil it! Remove from heat and stir in chopped dark chocolate until silky smooth. Then pop the ganache in the fridge for about 30 minutes to thicken up enough for piping. You want it firm but still squeezable—kind of like chocolate playdough.
Step 5: Cut, Pipe, and Add Those Cute (and Creepy) Eyes
Lift the cooled brownies out using the parchment paper, peel it off, and slice them into 18 long, narrow pieces (6 rows by 3 columns). Whisk the ganache briefly to loosen it, transfer it to a piping bag fitted with a small flat tip (or a sturdy Ziploc with a tiny corner snipped), and pipe back-and-forth lines across each brownie to mimic mummy wrappings. Finally, pop two candy eyeballs on each brownie while the ganache is still soft. Ok, now step back and enjoy that masterpiece!
Tips from My Kitchen
- Double Boiler Magic: I find heating butter and chocolate slowly over simmering water helps keep it smooth and prevents burning, which can ruin the flavor.
- Don’t Overbake: Brownies continue to cook as they cool, so pulling them out when the toothpick has moist crumbs is the sweet spot for fudginess.
- Ganache Consistency: If your ganache is too thick to pipe smoothly after chilling, a quick warm-up in the microwave for 5-10 seconds helps make it pliable again.
- Eye Placement: Place candy eyeballs while ganache is soft so they stick securely—but don’t wait too long or your mummy wrappings will set!
How to Serve Mummy Halloween Brownies Recipe
Garnishes
I usually keep it simple with just the candy eyeballs because they really pop visually and add that creepy-cute vibe. But sometimes I sprinkle a tiny pinch of edible glitter or orange sanding sugar over the ganache for a little sparkle—perfect if you’re serving kids who love bling!
Side Dishes
I like pairing these brownies with a glass of cold milk or a warm cup of spiced pumpkin latte to complement that rich chocolate. For a Halloween party, these go great next to popcorn and caramel apples for a full festive spread.
Creative Ways to Present
One year, I arranged the mummy brownies on a large platter surrounded by fake spider webs, plastic spiders, and a few dry ice chunks for spooky fog—instant Halloween drama! You can also serve them in individual cupcake liners for easy grab-and-go treats.
Make Ahead and Storage
Storing Leftovers
Store leftovers in a single layer inside an airtight container at room temperature for up to 3 days. The brownies stay moist and the ganache wrappings keep their look beautifully. Avoid stacking or the decorations might stick together.
Freezing
I’ve frozen these brownies once after decorating by wrapping them individually in plastic wrap, then placing them in a freezer-safe container. When thawed overnight in the fridge, the texture and look held up well—just add candy eyes fresh if they come off.
Reheating
If you want to warm your brownies, I recommend a quick zap in the microwave (10-15 seconds) just to soften the ganache slightly—this keeps the mummy “wraps” looking great without melting them completely. Perfect for serving fresh the next day!
FAQs
-
Can I use milk chocolate instead of dark chocolate in this Mummy Halloween Brownies Recipe?
Absolutely! Milk chocolate will give you a sweeter and creamier brownie, and you can also use it in the ganache. Just keep in mind it has a lower cocoa content, so your brownies might be less intense but still delicious.
-
How do I make sure the ganache is the right consistency for piping the mummy wraps?
The key is chilling the ganache in the fridge for about 30 minutes after mixing, then whisking it smooth before piping. If it’s too runny, chill a bit longer. Too thick? Warm it gently in the microwave for a few seconds to loosen it up.
-
Can I make the brownies ahead and decorate the next day?
Definitely! Bake and cool the brownies fully, store them wrapped overnight, then prepare your ganache and decorate the next day for the freshest look and taste.
-
What’s the best way to cut the brownies for consistent mummy wraps?
Use a sharp knife and wipe it clean between cuts for neat edges. Cutting into 6 rows by 3 columns creates long, thin brownies that look perfect for the mummy wrapping effect.
Final Thoughts
This Mummy Halloween Brownies Recipe has quickly become one of my favorite Halloween traditions because it’s as fun to make as it is to eat. I love how it brings out my creative side, and that playful spirit totally rubs off on whoever tries them. If you want to wow your friends or just treat yourself to something festive and chocolatey, I can’t recommend this enough—go on, wrap yourself a mummy brownie and enjoy the fun!
Print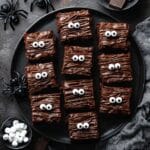
Mummy Halloween Brownies Recipe
- Prep Time: 45 minutes
- Cook Time: 40 minutes
- Total Time: 1 hour 55 minutes
- Yield: 18 brownies
- Category: Dessert
- Method: Baking
- Cuisine: American
Description
A festive Halloween treat featuring rich, fudgy brownies decorated with creamy ganache piped to resemble mummy wrappings, topped with candy eyeballs. Perfect for spooky parties or a fun seasonal dessert.
Ingredients
For the Brownies:
- Nonstick cooking spray
- 2 sticks unsalted butter (8 ounces), cut into tablespoons
- 6 ounces dark chocolate, roughly chopped
- 2 cups granulated sugar, divided
- 4 large eggs
- 1 cup all-purpose flour
- 1 teaspoon kosher salt
For the Ganache:
- ½ cup heavy cream
- 4 ounces dark chocolate, roughly chopped
For Decoration:
- 36 small candy eyeballs
Instructions
- Make the Brownies: Preheat oven to 350 degrees F. Line a 9 x 9-inch pan with parchment paper and spray it with cooking spray to prevent sticking.
- Heat Butter and Chocolate: Using a double boiler, melt the butter and dark chocolate over medium-low heat, stirring occasionally until smooth. Remove from heat.
- Add Sugar to Chocolate Mixture: Stir in 1 cup of granulated sugar into the melted chocolate mixture and whisk until fully combined and smooth.
- Mix Eggs and Sugar: In a large bowl, whisk the 4 eggs and remaining 1 cup sugar together until smooth and slightly thickened.
- Combine Mixtures: Slowly pour the chocolate mixture into the egg mixture while whisking continuously until just combined.
- Add Dry Ingredients: Fold in the all-purpose flour and kosher salt gently with a rubber spatula until no streaks remain but do not overmix.
- Bake the Brownies: Pour the batter into the prepared pan and bake for 40 minutes or until a toothpick inserted in the center comes out just barely clean. Let cool completely on a cooling rack.
- Make the Ganache: In a small saucepot, heat the heavy cream over medium heat until it reaches a gentle simmer. Remove from heat and stir in the chopped dark chocolate until smooth and glossy.
- Chill Ganache: Transfer the ganache to the refrigerator for 30 minutes or until it firms enough to pipe.
- Prepare Brownies for Decoration: Lift the cooled brownies from the pan using the parchment paper and peel it off. Using a sharp knife, cut the brownies into 18 long, thin pieces (6 rows by 3 rows).
- Pipe Ganache Wrappings: Whisk the ganache briefly to loosen and transfer it to a piping bag fitted with a small flat tip or a Ziploc bag with a small hole cut in one corner. Pipe the ganache back and forth over each brownie to create the appearance of mummy wrappings.
- Add Candy Eyeballs: Place 2 candy eyeballs on each brownie over the ganache to complete the mummy look.
- Serve or Store: Serve immediately or store the decorated brownies in a single layer in an airtight container at room temperature for up to 3 days.
Notes
- For a gluten-free option, substitute all-purpose flour with a gluten-free flour blend.
- You can use white chocolate for the ganache to create a different look for the mummy wrappings.
- If you don’t have a piping bag, use a plastic sandwich bag with a small corner cut off to pipe the ganache.
- Ensure brownies cool completely before decorating to prevent ganache from melting.
- Store brownies in a single layer to avoid smudging the ganache decorations.
Nutrition
- Serving Size: 1 brownie
- Calories: 290 kcal
- Sugar: 28 g
- Sodium: 120 mg
- Fat: 18 g
- Saturated Fat: 10 g
- Unsaturated Fat: 7 g
- Trans Fat: 0 g
- Carbohydrates: 32 g
- Fiber: 3 g
- Protein: 4 g
- Cholesterol: 70 mg

