

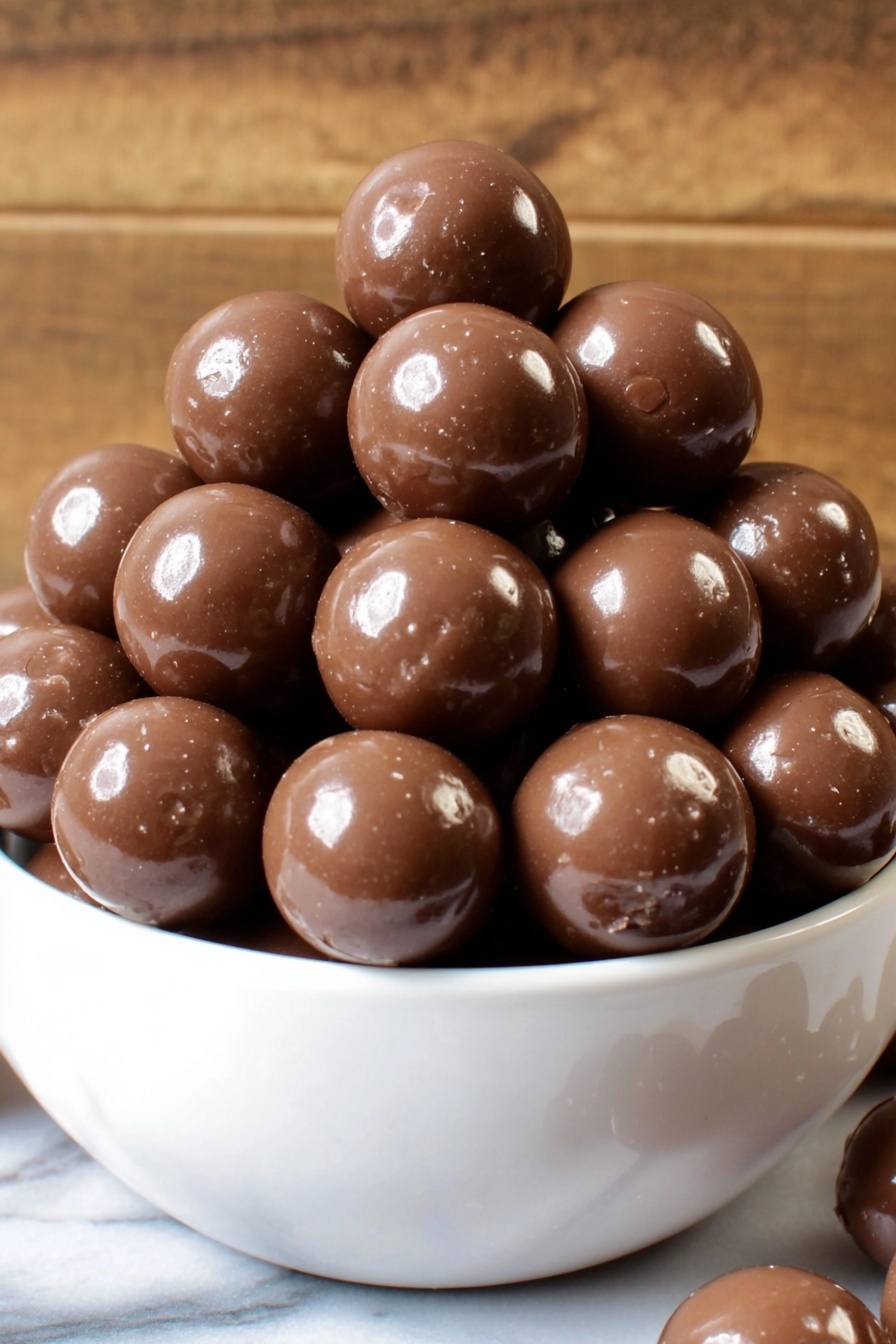
Malted Milk Balls Recipe
If you’ve ever wanted to impress your friends (or just treat yourself) with a nostalgic, melt-in-your-mouth treat, this Malted Milk Balls Recipe is going to be your new best friend. These little delights pack that classic malted milk flavor with a rich chocolatey kick, all rolled into perfect bite-sized balls. I promise, once you try them, you’ll keep coming back for more. Stick around, and I’ll walk you through every step so you end up with flawless, delicious malted milk balls every single time.
Why This Recipe Works
- Simple Ingredients: Uses pantry staples yet results in a gourmet-tasting treat with layers of malt and chocolate flavor.
- No-Bake Ease: You don’t even have to fire up the oven, perfect for a quick dessert or snack anytime.
- Customizable Coatings: Chocolate dip, nuts, sprinkles, or coconut – make these malted balls your own.
- Perfect Texture: Chilling the mixture and freezing after coating ensures a firm but tender bite.

Ingredients & Why They Work
The magic of this Malted Milk Balls Recipe lies in its balance of malty sweetness and rich cocoa depth, brought together with creamy milk and vanilla for smoothness. Grab good quality malted milk powder – it makes all the difference. Here’s why each ingredient is crucial.
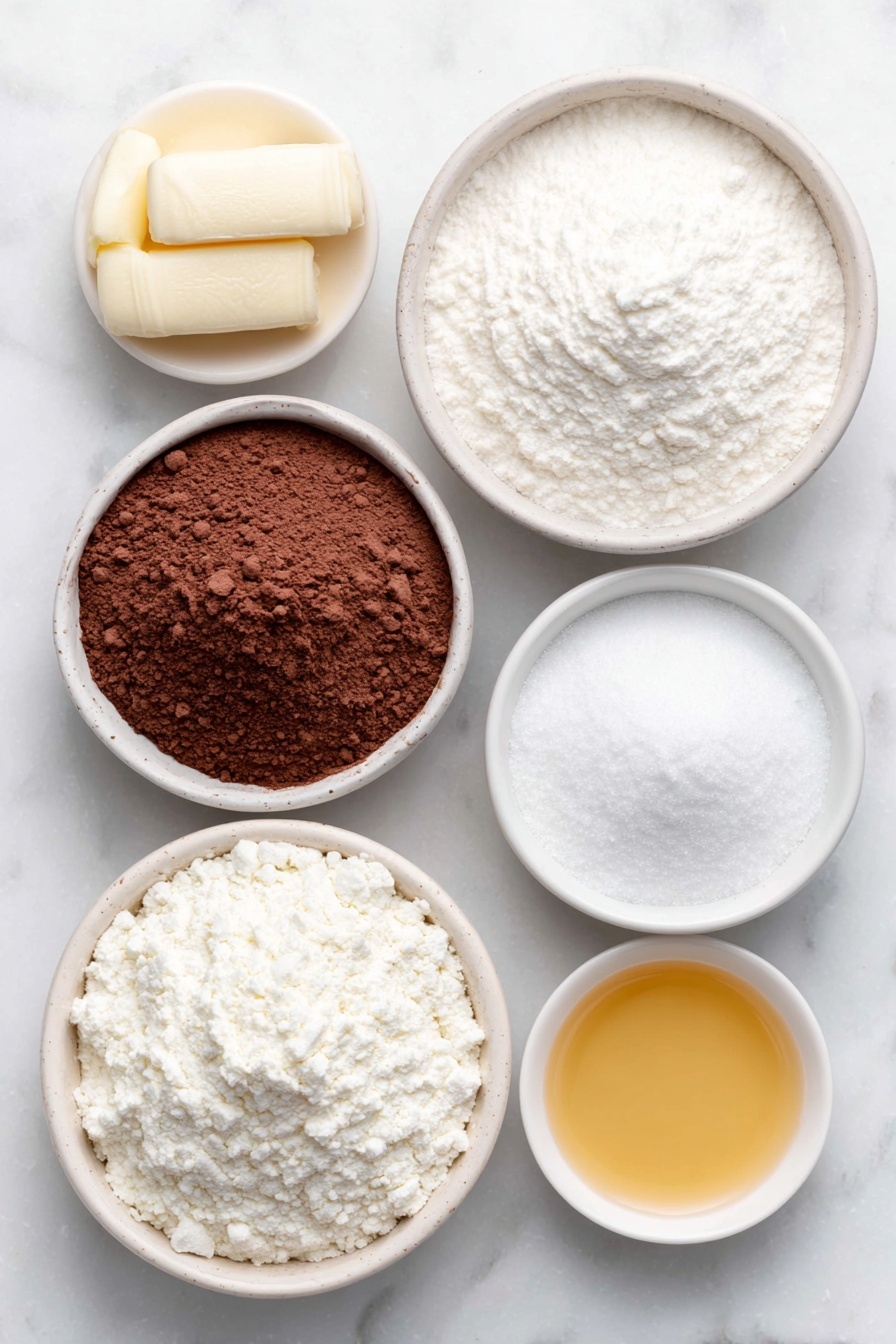
- Malted Milk Powder: This is your star player – it gives the classic malt flavor and subtle sweetness.
- Powdered Sugar: Adds smooth sweetness without any graininess; helps the mixture bind well.
- Cocoa Powder: Gives a rich chocolatey contrast that elevates the malt flavor beautifully.
- Salt: Just a pinch to balance the sweetness and enhance all flavors.
- Milk: Makes the mixture moist enough to roll into balls, adding creaminess.
- Vanilla Extract: Brings warmth and depth, rounding out the flavor profile perfectly.
Make It Your Way
One of my favorite things about this Malted Milk Balls Recipe is how easy it is to tweak. I love experimenting with coatings and add-ins depending on my mood or the occasion, and you should definitely feel free to do the same!
- Variation: Try swapping the cocoa powder for white chocolate powder or adding instant espresso powder for a mocha twist – I’ve done it for holiday parties, and it’s a huge hit.
- Dietary Modifications: Using plant-based milk works great, and to keep it gluten-free, double-check malt powder ingredients – sometimes barley sneaks in.
- Ease of Prep: If you’re short on time, skip the freezer step before dipping and refrigerate the balls for about 2 hours instead – still works well!
Step-by-Step: How I Make Malted Milk Balls Recipe
Step 1: Whisk Dry Ingredients Until Smooth
Start by combining your malted milk powder, powdered sugar, cocoa powder, and salt in a large bowl. Give it a good whisk until everything looks evenly blended. This step ensures your malt and cocoa are perfectly distributed, giving you every bite packed with flavor.
Step 2: Mix Wet Ingredients Separately
In another bowl, whisk together the milk and vanilla extract. Honestly, adding the vanilla separately lets you mix it thoroughly without clumping, which helps get a smooth, creamy texture in the final mix.
Step 3: Combine and Chill the Mixture
Pour the wet ingredients into the dry, stir until everything is just combined. The mixture will be thick but pliable. Pop it in the fridge for about 30 minutes—it firms up perfectly so rolling into balls is a breeze and less sticky on your hands.
Step 4: Roll into Perfect Malted Milk Balls
Once chilled, grab a spoon or use your hands to roll the mixture into about 1-inch balls. Lay them out on parchment-lined baking sheets. I usually make 24, but you can go smaller for bite-sized or bigger for a more decadent treat.
Step 5: Freeze Before Coating
Freeze your malted balls for 30 minutes until firm. This step’s key—it makes coating them in chocolate a lot neater and stops the chocolate from melting off as soon as you dip.
Step 6: Dip in Melted Chocolate and Chill Again
Meanwhile, melt your chocolate using a double boiler or in short bursts in the microwave, stirring often. Dunk each ball carefully into the chocolate, then set them back on parchment paper. Freeze again for at least 30 minutes or until the chocolate hardens completely.
Tips from My Kitchen
- Use Quality Malted Milk Powder: The better your malt powder, the more authentic and rich your flavor will be—something to splurge on.
- Chill Twice for Best Texture: Freezing after rolling and after dipping keeps the balls firm and beautifully coated.
- Avoid Overmixing: Stir gently when combining wet and dry ingredients to keep your mixture from becoming dry or crumbly.
- Prevent Sticky Hands: Dust your hands with cocoa powder or use a little bit of oil on your palms to roll the balls easily.
How to Serve Malted Milk Balls Recipe
Garnishes
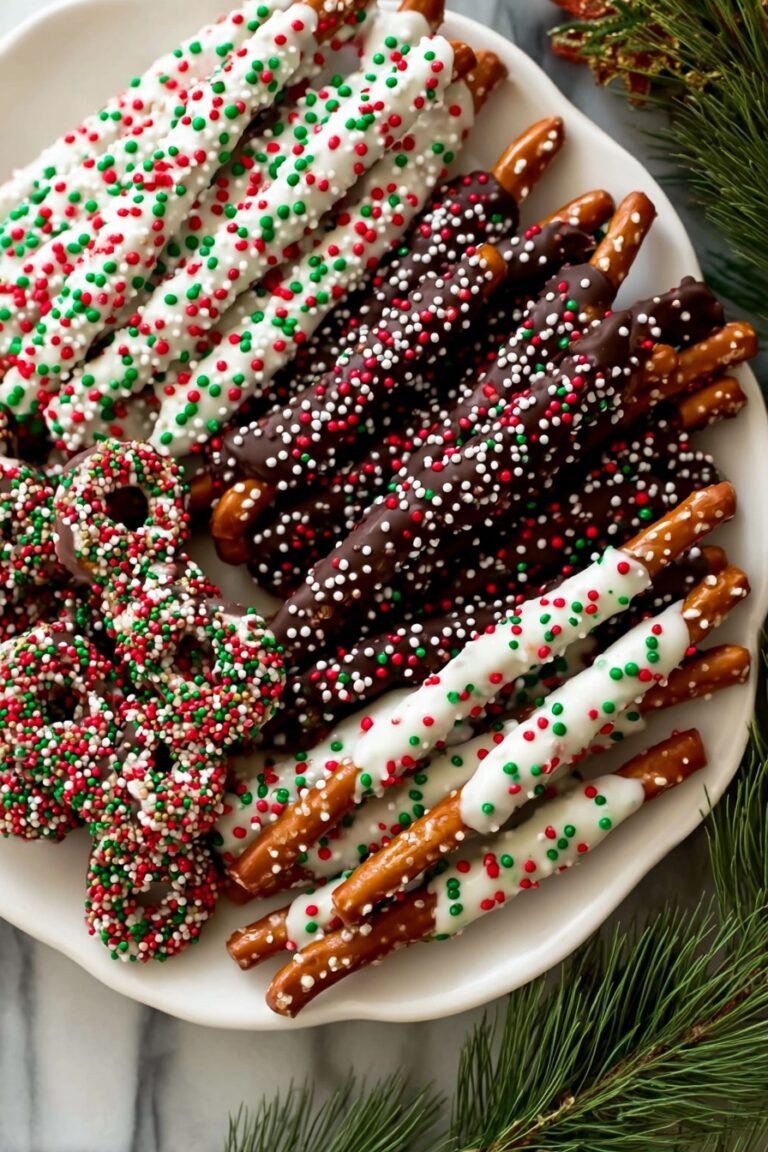
I love sprinkling crushed nuts or shredded toasted coconut on half the balls before the chocolate sets – it adds a wonderful crunch and looks festive. Alternatively, rainbow sprinkles make for fun party treats that kids adore.
Side Dishes
These Malted Milk Balls go beautifully with a chilled glass of milk, a cup of hot coffee, or even vanilla ice cream. I once served them alongside a malted milkshake, and folks were convinced they were at an old-school soda shop!
Creative Ways to Present
For special occasions, I like arranging them in a decorative box lined with parchment and tied with a ribbon for gift-giving or party favors. Displaying them on a tiered tray with some edible flowers gives a charming, elegant vibe perfect for brunch or baby showers.
Make Ahead and Storage
Storing Leftovers
I store leftover malted milk balls in an airtight container in the fridge, where they keep wonderfully fresh for up to two weeks. Just bring them to room temperature before serving so you get that perfect melt-in-your-mouth texture.
Freezing
These balls freeze beautifully! Whether the chocolate coating is on or off, place them in a freezer-safe container separated by parchment layers. They can last for up to three months, and it’s super convenient to have a stash ready for unexpected guests or sweet cravings.
Reheating
To enjoy after freezing, I let them thaw overnight in the fridge, then sit at room temperature for 10–15 minutes. Avoid microwaving as that melts the chocolate and changes the texture. Patience here really pays off!
FAQs
-
Can I use regular milk powder instead of malted milk powder?
You can technically substitute regular milk powder, but it won’t give you the signature malty flavor that makes this recipe special. If malted milk powder isn’t available, you might consider adding a bit of vanilla and a pinch of malt vinegar to boost flavor, but it’s not quite the same.
-
How long do malted milk balls last?
Stored properly in an airtight container in the fridge, these malted milk balls last up to two weeks. For longer storage, freezing is your best bet — they’ll keep well for about three months.
-
Can I make this recipe vegan?
Absolutely! Just swap the milk for your favorite plant-based milk (like almond or oat), and use dairy-free chocolate for dipping. Check that your malted milk powder is vegan-friendly—some contain dairy, so look for a suitable alternative or try malted barley flour.
-
Do I have to dip the balls in chocolate?
Not at all! You can skip the chocolate coating and roll the balls in cocoa powder, crushed nuts, or toasted coconut for a lighter coating. It changes up the texture and flavor, but they’re still delicious in their pure form.
-
Can I make these without freezing?
You can refrigerate the balls instead of freezing if you’re short on time, letting them chill for 2 hours before dipping. The texture might be a little softer, but still tasty and manageable. Freezing just makes the process tidier and ensures the chocolate sets quickly.
Final Thoughts
This Malted Milk Balls Recipe is one I come back to whenever I need a quick, nostalgic treat that feels a little special. The balance of malt and chocolate hits a perfect spot — rich, sweet, and comforting. Plus, the no-bake method means you get to enjoy them in under an hour, which is pure magic when a craving strikes. I really hope you give these a try and make them your own with your favorite add-ins and coatings. Trust me, your kitchen will smell incredible, and your friends will be asking for the recipe in no time!
Print
Malted Milk Balls Recipe
- Prep Time: 10 minutes
- Cook Time: 35 minutes
- Total Time: 45 minutes
- Yield: 24 balls
- Category: Snack
- Method: No-Cook
- Cuisine: American
Description
These Malted Milk Balls are a delicious homemade treat combining the rich, creamy flavor of malted milk powder with cocoa and sweet chocolate coating. Perfect as a snack or dessert, they offer a satisfying blend of texture and taste, easy to prepare and customize with various coatings.
Ingredients
Dry Ingredients
- 1 cup malted milk powder
- 1/2 cup powdered sugar
- 1/2 cup cocoa powder
- 1/2 teaspoon salt
Wet Ingredients
- 1/2 cup milk
- 1 tablespoon vanilla extract
Coating
- Chocolate for melting (approx. 1 cup)
Instructions
- Mix Dry Ingredients: In a bowl, whisk together the malted milk powder, powdered sugar, cocoa powder, and salt until well combined.
- Mix Wet Ingredients: In a separate bowl, whisk together the milk and vanilla extract until fully blended.
- Combine Ingredients: Add the wet mixture to the dry ingredients and stir thoroughly until the dough is smooth and uniform.
- Chill the Mixture: Place the combined mixture in the refrigerator for 30 minutes to firm up and make it easier to handle.
- Form Balls: Once firm, use a spoon or your hands to roll the mixture into 24 evenly sized balls.
- Freeze Balls: Place the balls on a parchment paper-lined baking sheet and freeze for 30 minutes to further solidify.
- Melt Chocolate: Melt the chocolate using a double boiler or in short intervals in the microwave, stirring until smooth.
- Coat Balls: Dip each chilled ball into the melted chocolate, ensuring full coverage, then place it back on the parchment paper.
- Freeze to Set: Return the coated balls to the freezer for another 30 minutes or until the chocolate hardens completely.
- Store Properly: Store the malted milk balls in an airtight container in the refrigerator for up to 2 weeks to maintain freshness.
Notes
- This recipe can be easily doubled or tripled to make larger batches.
- Try coating the balls with sprinkles, chopped nuts, or shredded coconut for added texture and flavor variations.
- If you’re short on time, refrigerate the balls for 2 hours instead of freezing before dipping them in chocolate.
Nutrition
- Serving Size: 1 ball
- Calories: 90 kcal
- Sugar: 8 g
- Sodium: 30 mg
- Fat: 4 g
- Saturated Fat: 2.5 g
- Unsaturated Fat: 1.2 g
- Trans Fat: 0 g
- Carbohydrates: 12 g
- Fiber: 1 g
- Protein: 1 g
- Cholesterol: 5 mg


