

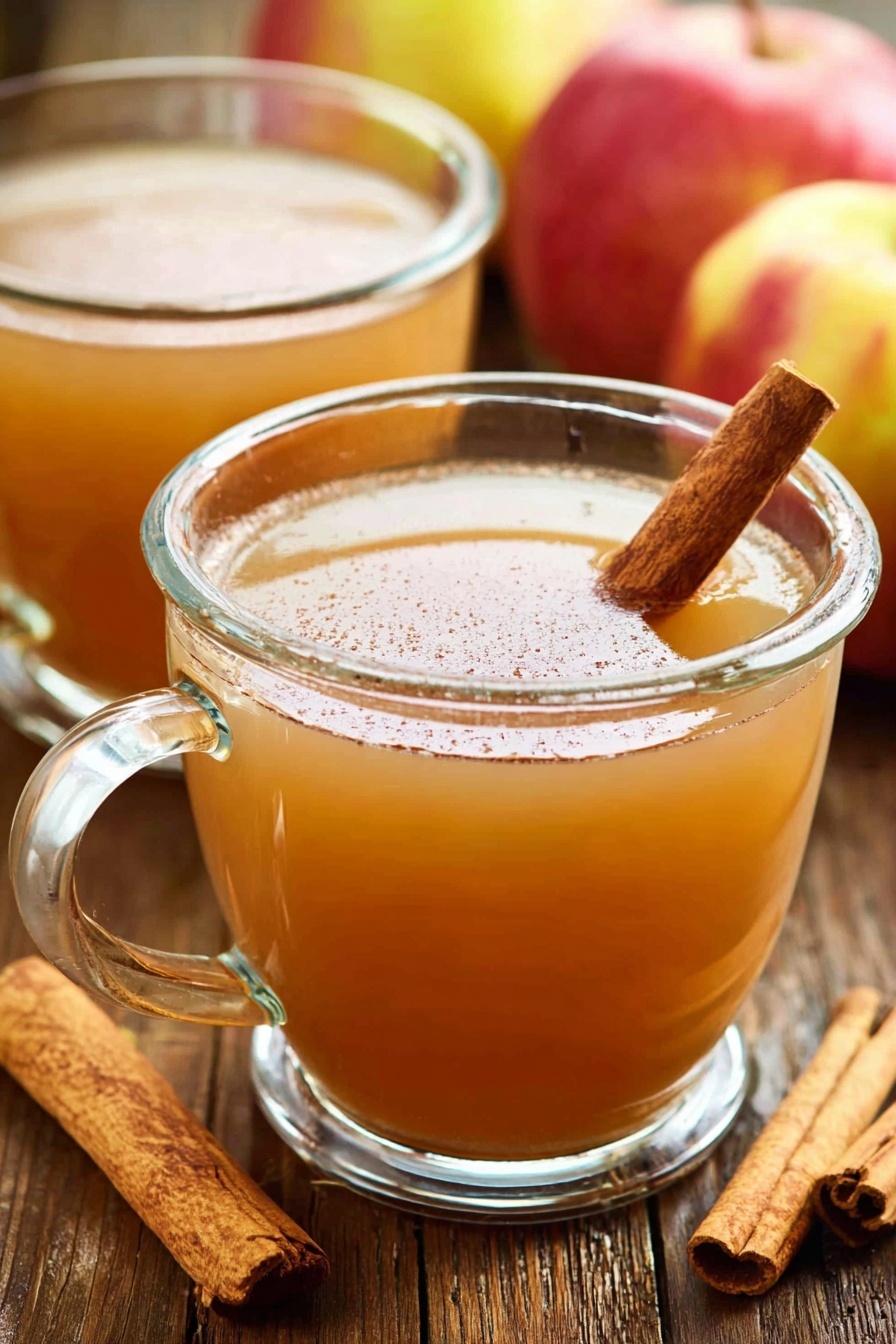
Homemade Apple Cider Recipe
If you adore the cozy, warm feeling that a cup of spiced apple cider brings on a chilly day, you’re going to fall head over heels for this Homemade Apple Cider Recipe. It’s comforting, insanely flavorful, and surprisingly simple to make. Once you try it, you’ll quickly realize there’s just no beating fresh, homemade cider—no store-bought version compares. So grab your biggest pot, and let’s dive into all the delicious details, tips, and tricks to make your batch a total success.
Why This Recipe Works
- Simple Ingredients: Only apples, spices, sugar, and water create a straightforward recipe with maximum flavor.
- Slow Simmering: The long cooking time lets the flavors mingle deeply for a rich, layered taste.
- Straining Twice: Ensures a smooth cider texture, free of pulp or grit, which I know makes all the difference.
- Versatile & Cozy: Perfect hot or cold, customizable with your favorite spices or sweeteners.

Ingredients & Why They Work
Choosing the right ingredients is key to a truly outstanding Homemade Apple Cider Recipe. I always go for a mix of apple varieties to get the perfect balance of sweetness and tartness, and the spices bring a warm comfort that fills your kitchen with that lovely autumn aroma.

- Apples: A blend of sweet and tart apples (like Fuji and Granny Smith) adds complexity and natural sweetness.
- Light Brown Sugar: Adds a mellow, caramel-like sweetness that complements the apples beautifully.
- Cinnamon Sticks: The backbone of warm spice, infusing the cider with familiar fall flavor.
- Ground Allspice: A subtle touch of earthy spice that enhances the overall warmth without overpowering.
- Water: Just enough to cover the apples; it’s the base that helps extract all those rich flavors during simmering.
Make It Your Way
I love tweaking my Homemade Apple Cider Recipe depending on the season and my mood. Some days, I fancy a sweeter cider, other days something more spicy and robust. Feel free to personalize this recipe—it’s surprisingly forgiving and welcoming to your own creative twists.
- Variation: Adding a few orange peel strips or a splash of freshly squeezed lemon juice freshens the cider beautifully—I tried this once, and it really brightened up the flavor.
- Dietary Modification: For a lower sugar version, you can reduce the brown sugar or substitute with honey or maple syrup after cooking.
- Seasonal Touch: Tossing in cloves or nutmeg adds deeper warmth, perfect for holiday gatherings.
Step-by-Step: How I Make Homemade Apple Cider Recipe
Step 1: Prep and Load Your Pot
Start by quartering about 10 medium apples—no need to peel or core them, just chop and toss. I like to use a mix of apples for a richer taste. Place them in your largest stockpot, then add enough water to cover the apples by about two inches once they’re pushed down because those apples love to float! This step is crucial so your apples simmer evenly and release all their juices.
Step 2: Add Sugars and Spices
Next, stir in half a cup of packed light brown sugar for that warm caramel note. Drop in four cinnamon sticks—or if you’re in a pinch, two teaspoons of ground cinnamon work too—and a tablespoon of ground allspice for a little extra autumny magic. Give everything a gentle stir to combine.
Step 3: Bring to a Boil, Then Simmer
Turn the burner on high and bring the entire pot to a boil, uncovered. I usually let it roll for about an hour. This bubbling helps concentrate the flavors and breaks down the apples to release their essence. Then, cover the pot, lower the heat to a gentle simmer, and let it go for another two hours. Patience here pays off—the longer simmer unlocks that deep, layered flavor you’re after.
Step 4: Strain and Savor
Once your cider feels ready and smells heavenly, let it cool a bit so it’s safe to handle. Pour the mixture through a cheesecloth-lined strainer into a large bowl—press the apple solids gently to extract every bit of juice without forcing pulp through. If you want your cider ultra-smooth like I do, strain it once more, either through fresh cheesecloth or a fine-mesh sieve. Discard the solids, and voilà—your homemade cider is ready to drink!
Tips from My Kitchen
- Apple Variety Mix: I always mix sweet and tart apples for a balanced cider that’s neither too sharp nor too sweet.
- Water Level Watch: Keep the water enough to cover apples by about two inches to avoid scorching—adding more is better than less!
- Double Strain for Smoothness: Straining twice really eliminates any unwanted sediment, giving you that silky finish I love.
- Don’t Skip the Simmer: Slow simmering builds flavor depth; rushing this step won’t give the cider that signature rich taste.
How to Serve Homemade Apple Cider Recipe
Garnishes
I love garnishing my homemade apple cider with a cinnamon stick—it doubles as a stirrer and adds a little extra aroma as you sip. Sometimes, I throw in a thin slice of fresh apple or an orange peel twist for a pop of color and a hint of brightness. It’s simple but makes the presentation feel special.
Side Dishes
Pairing this cider with homemade apple donuts or buttery cornbread really takes my gatherings up a notch. It’s also fantastic alongside a cheese platter or roasted nuts when you’re just relaxing with friends. Trust me, the warm aromas complement each other perfectly.
Creative Ways to Present
For holiday parties, I like setting up a little cider bar with mugs, garnishes like star anise, whipped cream, and caramel drizzle on the side—guests can tailor their drinks exactly how they like. Another fun idea I tried was freezing cider into ice cubes that melt slowly in warm drinks for an extra flavor burst.
Make Ahead and Storage
Storing Leftovers
I store leftover homemade apple cider in airtight glass bottles or jars in the fridge. It keeps beautifully for up to a week—just give it a good shake before reheating as a little natural sediment might settle. Plus, it tastes even better the next day as the flavors meld even further.
Freezing
Freezing this cider works quite well! I pour it into freezer-safe containers, leaving room for expansion. When thawed, the flavor and texture remain rich, and it’s a lifesaver for when I want quick access to homemade cider without starting fresh every time.
Reheating
I reheat cider gently on the stove over low heat to avoid scorching or altering the flavor. If you want it extra cozy, add an extra cinnamon stick while warming. Microwave works too if you’re in a hurry—just watch it closely!
FAQs
-
Can I use any type of apple for this Homemade Apple Cider Recipe?
Absolutely! Using a mix of apple varieties gives the best flavor. Sweet apples like Fuji or Gala add natural sweetness, while tangier ones like Granny Smith provide brightness and depth. Avoid only using very sweet apples as the cider might turn out too sugary.
-
How long will homemade apple cider last in the fridge?
Stored in a sealed container, your cider can last about 7 days refrigerated. If you notice any off smells or cloudiness beyond normal sediment, it’s best to discard it. For longer storage, consider freezing.
-
Can I make this cider without brown sugar?
Yes, you can omit or substitute brown sugar with honey, maple syrup, or even plain white sugar. Keep in mind the flavor will slightly change—brown sugar adds that distinct molasses note that really warms up the cider.
-
Do I need to peel or core the apples?
Nope, no peeling or coring needed! Leaving the skins on helps maximize flavor and color. Just make sure to wash the apples well before cutting them into quarters.
Final Thoughts
This Homemade Apple Cider Recipe holds a special place in my heart—it’s the kind of comfort you crave when the weather turns cool and everyone wants a little extra warmth. It’s simple, soulful, and filled with cozy memories. I can’t recommend making this enough—so gather your apples, simmer a pot, and enjoy the delicious ritual of fresh cider with the people you love. Cheers to simple pleasures!
Print
Homemade Apple Cider Recipe
- Prep Time: 15 minutes
- Cook Time: 3 hours
- Total Time: 3 hours 15 minutes
- Yield: 8 servings
- Category: Beverage
- Method: Stovetop
- Cuisine: American
- Diet: Vegetarian
Description
Delicious homemade apple cider made from fresh apples, brown sugar, cinnamon, and allspice. This warm, spiced beverage is perfect for cozy gatherings and festive occasions.
Ingredients
Main Ingredients
- 10 medium apples, quartered
- ½ cup (100 g) light brown sugar, packed
- 4 sticks cinnamon, or 2 teaspoons ground cinnamon
- 1 tablespoon ground allspice
- Water, enough to cover apples by 2 inches
Instructions
- Prepare Apples and Spices: Place the quartered apples in a large stockpot and add enough water to cover the apples by 2 inches when submerged by pushing them down, as apples will float.
- Add Sweeteners and Spices: Stir in the light brown sugar, cinnamon sticks (or ground cinnamon), and ground allspice into the pot with the apples and water.
- Boil Mixture: Bring the mixture to a boil uncovered and allow it to boil for 1 hour, stirring occasionally to help dissolve the sugar and release flavors.
- Simmer Cider: After boiling, cover the pot, reduce the heat, and let it simmer gently for 2 hours to enhance the flavor extraction from the apples and spices.
- Cool and Strain: Let the mixture cool slightly before straining it into a bowl through a cheesecloth or fine-mesh sieve, gently pressing down on the solids to extract as much liquid as possible. Discard the solids and strain the liquid once more for clarity.
Notes
- Use a variety of apples (sweet and tart) for a richer flavor profile.
- If you prefer a stronger spice taste, add extra cinnamon sticks or allspice during simmering.
- Store leftover cider in the refrigerator for up to 5 days and reheat before serving.
- You can substitute ground cinnamon for cinnamon sticks but add it towards the end to avoid bitterness.
- For a mulling option, add cloves or orange peel during the simmering step.
Nutrition
- Serving Size: 1 cup
- Calories: 120 kcal
- Sugar: 20 g
- Sodium: 5 mg
- Fat: 0.2 g
- Saturated Fat: 0 g
- Unsaturated Fat: 0.1 g
- Trans Fat: 0 g
- Carbohydrates: 30 g
- Fiber: 2 g
- Protein: 0.3 g
- Cholesterol: 0 mg


