

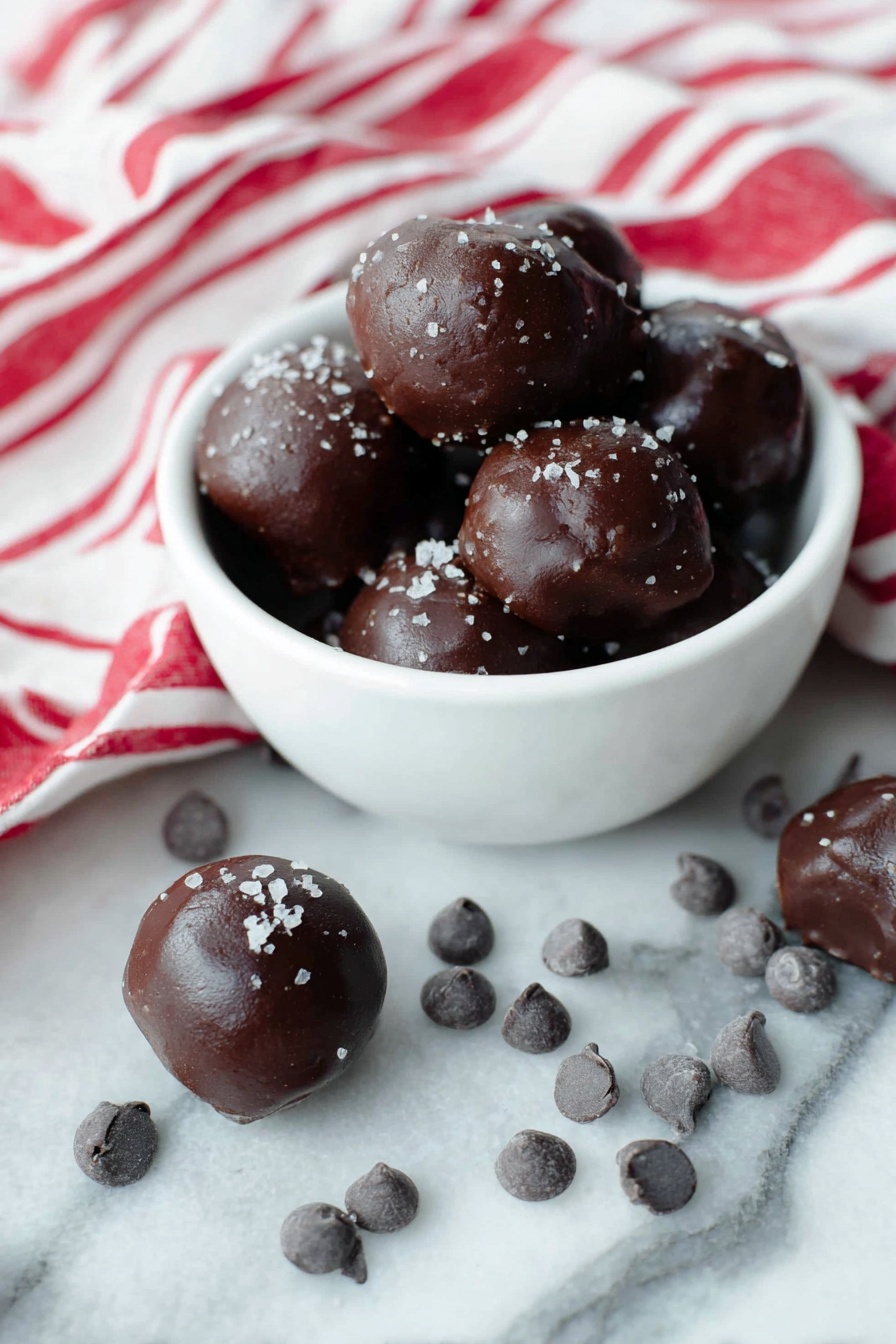
Cocoa Date Truffles Recipe
If you’re on the hunt for a treat that’s simple, delicious, and feels a bit indulgent without the guilt, you’re going to love this Cocoa Date Truffles Recipe. I’ve been making these for friends and family for a while now, and not only are they incredibly easy to whip up, but they’re packed with rich chocolatey flavor and natural sweetness from dates. Trust me, once you try these, you’ll wonder how something so easy can taste so luxe!
Why This Recipe Works
- Naturally Sweetened: The dates give these truffles sweetness without needing refined sugar.
- Rich and Chocolatey: Cocoa powder and dark chocolate layer on that deep, irresistible chocolate flavor.
- Easy to Customize: You can add extracts or toppings to make these your own.
- Quick and No-Bake: With minimal prep and no oven needed, these are perfect for busy days or last-minute guests.

Ingredients & Why They Work
This Cocoa Date Truffles Recipe relies on a handful of wholesome ingredients that complement each other perfectly — the dates bring natural sweetness and chew, cocoa powder adds that rich chocolate depth, and the dark chocolate coating balances everything with a lovely finish. Here’s why I always keep these ingredients on hand and some shopping tips to get the best results.
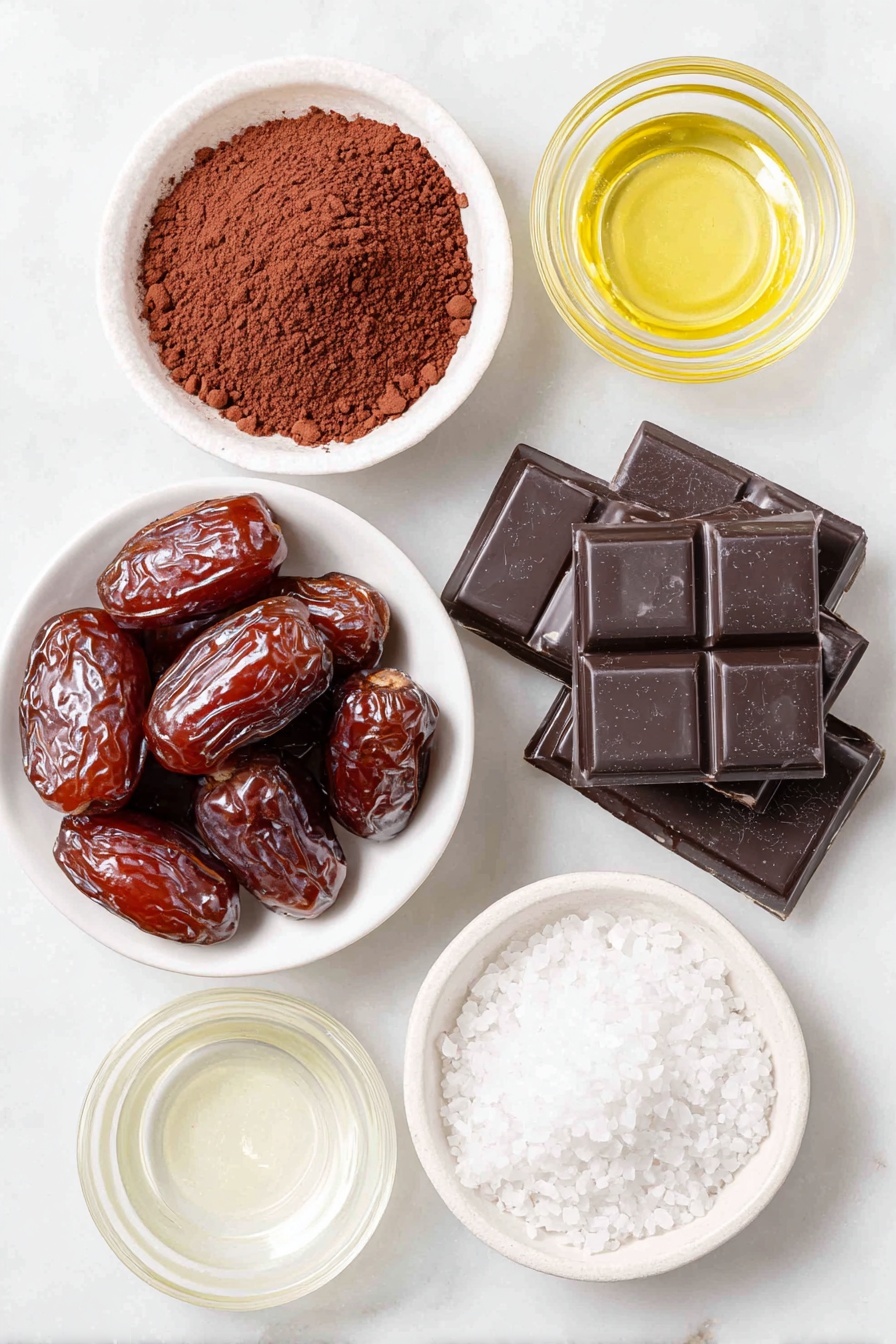
- Dates: Make sure to use soft Medjool dates for ease of blending and natural caramel notes.
- Cocoa powder: Unsweetened cocoa powder works best for a rich, intense chocolate flavor.
- Dark chocolate: Choose high-quality dark chocolate (70% or higher) for that luscious coating.
- Coconut oil (optional): Adds smoothness and helps thin the melted chocolate for easier coating.
- Flavored extracts (optional): Great for adding personal twists — raspberry, orange, or peppermint are my favorites.
- Toppings (optional): From flaky sea salt to shredded coconut or chopped nuts, toppings add texture and a hit of extra flavor.
Make It Your Way
I love how flexible this Cocoa Date Truffles Recipe is — I often switch it up depending on my mood or what I have in the pantry. Feel free to get creative! These little gems are you-ready blank canvases.
- Variation: When I’m craving something refreshing, I add peppermint extract—it turns them into a perfect little holiday treat.
- Dairy-Free Option: Skip the coconut oil or sub with a plant-based alternative; the truffles still taste amazing.
- Nut Allergy Friendly: I steer clear of nut toppings and instead use shredded coconut or freeze-dried raspberries for crunch.
- Extra Crunch: Sometimes, I throw in finely chopped nuts inside the mixture for texture—try walnuts or pecans.
Step-by-Step: How I Make Cocoa Date Truffles Recipe
Step 1: Soften Your Dates
Start by soaking your pitted dates in boiling water for about five minutes to soften them up. This simple trick makes them blend into a creamy, smooth base without any gritty chunks. Don’t toss the soaking water! You’ll use a bit of it to help your mixture get just the right consistency.
Step 2: Blend It Up
Place the soaked dates, cocoa powder, and about two tablespoons of the reserved soaking water into your food processor bowl. If you’re adding an extract, toss it in now. Pulse and process, scraping the sides as you go, until the mixture is very smooth. The texture should be slightly thinner than cookie dough, so add more soaking water—a teaspoon at a time—to help blend if necessary.
Step 3: Chill Before Rolling
Use a cookie scoop or tablespoon to dollop the mixture onto a parchment-lined sheet pan. Don’t try to roll the balls yet — the batter’s too soft. Stick this into the freezer for about 10 minutes to firm up so they’re easier to handle.
Step 4: Melt the Chocolate & Coat
While the truffles chill, melt your chopped dark chocolate with the optional coconut oil in the microwave. Heat for 60 seconds, stir thoroughly, and if needed, microwave in short 15-second bursts until smooth. Once the truffles are firm enough, roll them between your palms into balls, then dip each one into the melted chocolate using a fork. Tap off excess chocolate, and if you want, immediately sprinkle toppings like sea salt or shredded coconut before the chocolate sets.
Step 5: Freeze and Enjoy!
Pop your finished truffles back in the freezer for about 5 minutes so the chocolate hardens. Then dive right in—or store them for later, knowing you’ve got a treat that’s both tasty and wholesome.
Tips from My Kitchen
- Date Soaking Matters: Soaking your dates not only softens them but helps the mixture blend silky smooth without processor strain.
- Chocolate Coating Hack: Adding a little coconut oil thins the chocolate, making dipping easier and coating smoother – but it’s optional.
- Use Parchment Paper: This saves you from sticky situations when setting truffles—it’s a game-changer for cleanup.
- Keep Toppings Fresh: Sprinkle toppings immediately after coating, before the chocolate sets, so they stick beautifully.
How to Serve Cocoa Date Truffles Recipe
Garnishes
In my experience, flaky sea salt is my go-to for garnishing these truffles. It gives that lovely salty-sweet contrast that really brings out the chocolate’s depth. But I also adore rolling some in shredded coconut or chia seeds for a fun texture. If you’re feeling adventurous, a light dusting of freeze-dried raspberry powder is a gorgeous idea!
Side Dishes
I like pairing these truffles with a cup of strong coffee or an herbal tea like peppermint or chamomile. They also go surprisingly well alongside fresh fruit, like sliced oranges or berries, for a little fresh burst between bites.
Creative Ways to Present
For special occasions, I love arranging the truffles in small paper cups or colorful mini cupcake liners to make them feel extra festive. Sometimes, I gift them in a jar layered with parchment paper, which always feels so thoughtful and homemade. If you’re hosting a party, create a little “build-your-own” truffle bar with various toppings on display—guests enjoy customizing their own!
Make Ahead and Storage
Storing Leftovers
I keep leftover truffles in an airtight container in the fridge, where they stay fresh and firm for up to two weeks. Just be sure to let them come to room temperature for a few minutes before serving, so the flavors can shine through nicely.
Freezing
Freezing works like a charm for these truffles. I freeze them on a tray first, then transfer to a sealed bag or container. When you’re ready to enjoy, just thaw them in the fridge overnight—you’ll barely notice they were frozen!
Reheating
Since these truffles are best served cool or room temp, I don’t recommend warming them much. But if the chocolate hardens and you want a slight melt, just leave them out for 10-15 minutes. They soften up perfectly without losing their shape or texture.
FAQs
-
Can I make this Cocoa Date Truffles Recipe without a food processor?
While a food processor makes blending dates and cocoa much easier, you can use a strong blender or chop the dates finely and mash everything by hand. It’ll take more effort and the texture might not be quite as smooth, but the truffles will still taste delicious!
-
What’s the best way to choose dates for this recipe?
I always recommend using Medjool dates because they’re soft, juicy, and naturally sweet, which makes blending easier. If your dates are hard or dry, soak them longer to help soften before using.
-
Can I skip the chocolate coating to keep this recipe sugar-free?
Absolutely! Skipping the chocolate coating makes these truffles even healthier and sugar-free. You can roll them in shredded coconut, chopped nuts, or freeze-dried fruit for extra flavor and texture instead.
-
How long do these truffles last?
Stored properly in an airtight container in the fridge, these truffles will stay fresh for up to two weeks. They also freeze well for longer storage.
Final Thoughts
This Cocoa Date Truffles Recipe is truly one of those gems that feels both fancy and effortless. Whether you need a quick dessert fix, a thoughtful homemade gift, or just a snack that hits the sweet spot without guilt, these truffles deliver every time. I love sneaking a few mid-afternoon with my coffee or serving them at holiday get-togethers, and I’m confident you’ll enjoy making and sharing them just as much as I do. So go ahead, grab those dates, and start blending — your new favorite treat awaits!
Print
Cocoa Date Truffles Recipe
- Prep Time: 10 minutes
- Cook Time: 15 minutes
- Total Time: 25 minutes
- Yield: 12 truffles
- Category: Dessert
- Method: No-Cook
- Cuisine: International
- Diet: Vegetarian
Description
Delicious and easy-to-make Cocoa Date Truffles combining natural sweetness from dates with rich cocoa and chocolate, perfect for a healthy treat or dessert.
Ingredients
Main Ingredients
- 1 cup dates, pitted
- ⅓ cup cocoa powder
- ⅓ cup dark chocolate, chopped
- 1 tablespoon coconut oil, optional
Optional Add-Ins and Toppings
- ½ teaspoon flavored extract, such as raspberry, orange, coconut or peppermint
- ¼ cup flaky sea salt, shredded coconut, chopped nuts or freeze dried fruit, for topping or rolling
Instructions
- Soften Dates: Soak the dates in boiling water for five minutes to soften them and make blending easier. Drain and reserve the soaking water.
- Blend Ingredients: Add the dates, cocoa powder, and 2 tablespoons of the reserved soaking water to a food processor bowl. Add any flavored extract if using. Process for 4-5 minutes, scraping sides often, until very smooth. Add more soaking water, a teaspoon at a time as needed to reach a texture slightly thinner than cookie dough.
- Form Initial Truffle Scoops: Use a cookie scoop or tablespoon to drop the batter onto a parchment-lined sheet pan. The batter will be too soft to roll now. Freeze for 10 minutes until firm enough to roll.
- Melt Chocolate Coating: Place dark chocolate and optional coconut oil in a microwave-safe bowl. Microwave for 60 seconds, then stir. Microwave in 15 second increments if lumps remain, stirring after each, until fully melted. Set aside.
- Roll Truffles and Coat: Once firm, roll each scoop between palms into balls. Using a fork, dip each truffle into melted chocolate to coat completely. Tap fork on bowl edge to remove excess chocolate. Place back on parchment. If desired, sprinkle toppings like sea salt immediately before the chocolate sets.
- Set Chocolate and Serve: Freeze the coated truffles for 5 minutes to harden the chocolate coating. Serve and enjoy!
Notes
- Oil Free Option: Coconut oil thins the chocolate for easier coating but can be omitted; chocolate will be thicker without it.
- Refined Sugar Free Option: Skip chocolate coating and roll truffles in shredded coconut, chopped nuts, or freeze-dried fruit for a natural finish.
- Storage: Store truffles in an airtight container in the fridge for up to 2 weeks.
- For best results, scrape food processor bowl multiple times during blending for smooth texture.
Nutrition
- Serving Size: 1 truffle
- Calories: ninety five kcal
- Sugar: 8 g
- Sodium: 10 mg
- Fat: 5 g
- Saturated Fat: 3 g
- Unsaturated Fat: 2 g
- Trans Fat: 0 g
- Carbohydrates: 12 g
- Fiber: 3 g
- Protein: 1 g
- Cholesterol: 0 mg


