

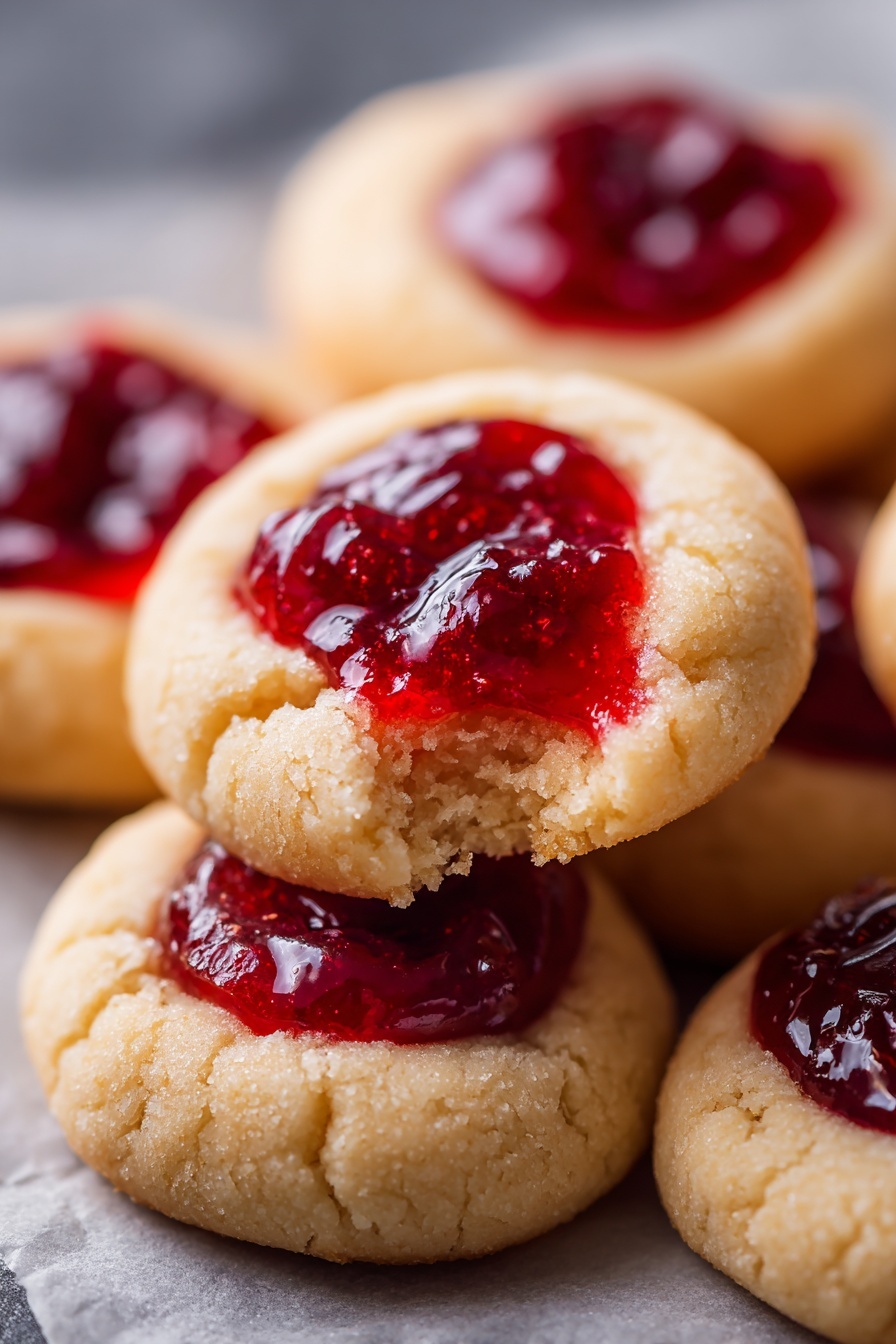
Cherry Cheesecake Cookies Recipe
If you love the idea of combining rich, creamy cheesecake with the juicy sweetness of cherries in a handheld treat, then you’re in for a real treat with this Cherry Cheesecake Cookies Recipe. These cookies feel like a mini celebration every time you bite into them — soft, tender dough that wraps around a burst of cherry filling, and just that hint of tangy cream cheese magic. Trust me, you’ll want to keep this recipe on speed dial for birthdays, parties, or any day that needs a little extra sweetness.
Why This Recipe Works
- Creamy Texture: The whipped cream cheese mixed into the dough makes these cookies tender and moist, unlike your classic sugar cookie.
- Sweet & Tangy Balance: Cherry pie filling adds bright bursts of sweetness and a luscious fruity finish to every cookie.
- Simple Ingredients: Using refrigerated sugar cookie dough saves time but still lets you add your own special touch.
- Easy Assembly: With a simple scoop, roll, and fill method, even novice bakers will feel like pros.

Ingredients & Why They Work
Every ingredient in this Cherry Cheesecake Cookies Recipe plays a key role in delivering that irresistible bite—creamy, sweet, and a hint of tart. Plus, I’ll share my tips on picking ingredients that’ll make these cookies shine.
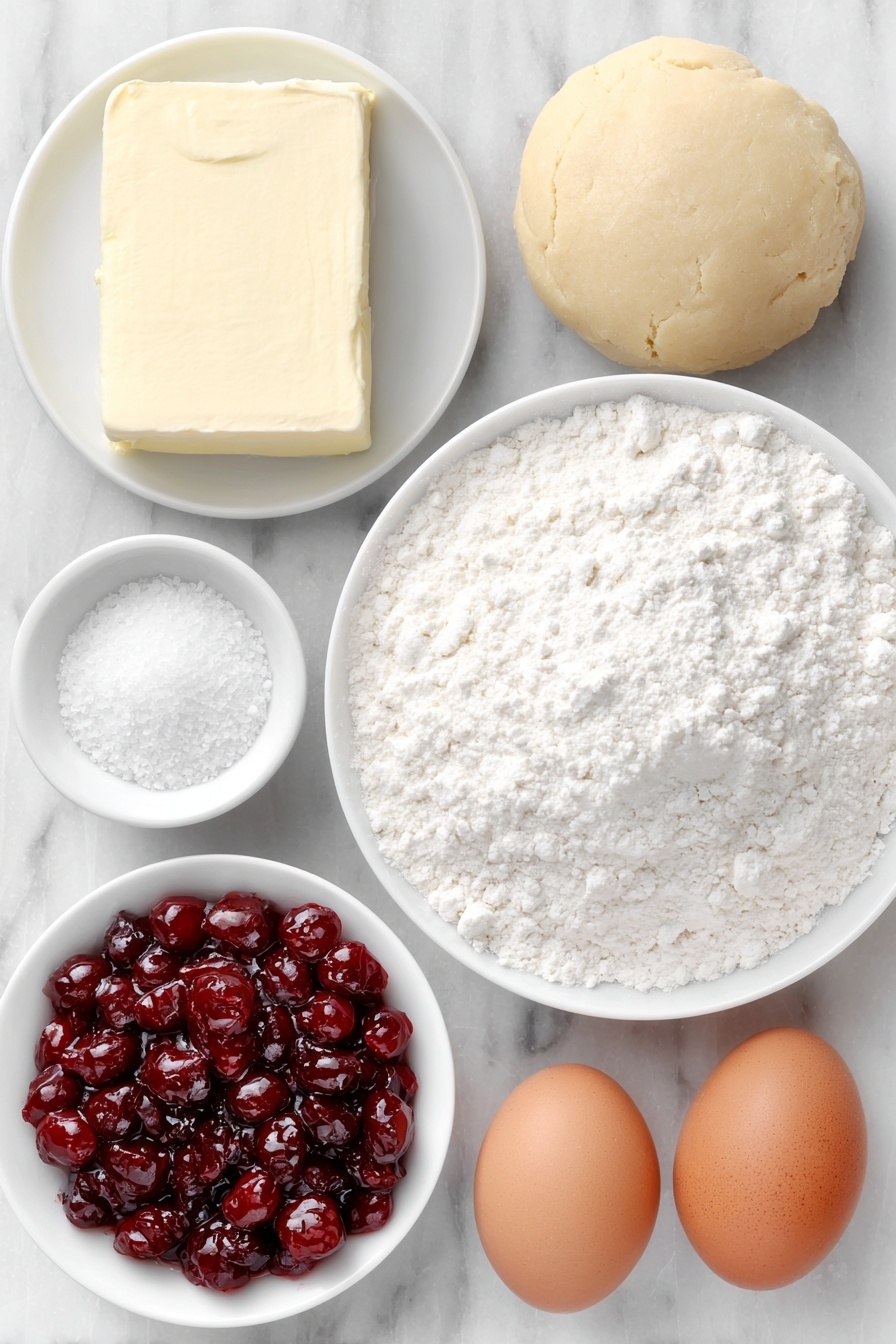
- Refrigerated Sugar Cookie Dough: Using pre-made dough cuts down your prep time without compromising on that buttery cookie base.
- Whipped Cream Cheese: Adds moisture and tang, giving the cookies a cheesecake-like softness without being heavy.
- All-Purpose Flour: Helps stabilize the dough so it holds shape well during baking, preventing overly flat cookies.
- Granulated Sugar: Used as a coating, it lends a subtle crunch and a bit of sparkle—totally optional but highly recommended.
- Cherry Pie Filling: The star of the show, it offers juicy sweetness and vibrant color, making each cookie a little jewel.
Make It Your Way
I love how versatile this Cherry Cheesecake Cookies Recipe is — you can easily tweak it to suit what you’ve got on hand or even how adventurous you’re feeling that day. Sometimes I swap the cherry filling for raspberry jam or even add white chocolate chips for a little more decadence.
- Variation: I’ve made these with regular (non-whipped) cream cheese by just softening it really well; they turn out just as tasty though I add a couple extra minutes baking time.
- Dietary Twist: Want gluten-free? You can try a gluten-free sugar cookie dough and flour blend, but watch the baking times closely.
- Seasonal Change: Around the holidays, I sometimes sprinkle cinnamon sugar instead of plain granulated sugar for a cozy twist.
Step-by-Step: How I Make Cherry Cheesecake Cookies Recipe
Step 1: Bring It All Together
Start by preheating your oven to 350°F and lining a baking sheet with parchment paper—that step is non-negotiable for me to avoid sticky cleanup. Then, mix your refrigerated sugar cookie dough, whipped cream cheese, and flour in a large bowl or stand mixer. I use my paddle attachment and occasionally scrap down the sides—this part takes about 3-4 minutes until everything is smooth and fully combined. The dough will be soft but manageable.
Step 2: Scoop, Roll & Sugarcoat
Use a small cookie scoop (about 4 teaspoons) to portion the dough, then gently roll each scoop into a ball with your hands. I always keep my hands slightly floured so the dough doesn’t stick. Next, roll each ball in granulated sugar for a delicate crunch on the outside—this step is optional but I swear it elevates the texture. Space the cookies about 2 inches apart on your baking sheet to give them room to puff.
Step 3: Bake & Create Cherry Wells
Bake your cookies for 10 to 12 minutes until the edges are lightly set but the centers still look soft. Remove from the oven and while they’re still warm, press the back of a round teaspoon gently into the center of each cookie to make a well. This is the perfect little nook for your cherry filling later on. Transfer the tray to a wire rack and let the cookies cool completely before filling.
Step 4: Fill and Enjoy!
Once cooled, scoop about one cherry (with some syrup) into each well using your teaspoon. Don’t overload or the cookies might get soggy. They’re best eaten within a day or two, but if you want to save some for later, keep reading for my storage tips!
Tips from My Kitchen
- Softened Cream Cheese: Make sure your cream cheese is completely softened to prevent lumps and ensure smooth blending.
- Don’t Overbake: Take the cookies out as soon as edges set to keep them tender and cakey inside.
- Make Wells Warm: Press the wells right out of the oven while the cookies are still warm so they don’t crack.
- Use Parchment Paper: This prevents sticking and helps you remove cookies easily without mess or crumbling.
How to Serve Cherry Cheesecake Cookies Recipe
Garnishes
I love adding a light dusting of powdered sugar right before serving for a pretty snowy look, which contrasts so nicely with the bright red cherries. Sometimes I’ll also add a tiny mint leaf on top for a fresh visual pop when serving at gatherings.
Side Dishes
Pair these cookies with a cup of strong coffee or a chilled glass of milk—the perfect combo for that sweet-tart balance. If you’re serving dessert after dinner, I like to bring out a light fruit salad or vanilla yogurt to complement the richness.
Creative Ways to Present
For parties, I arrange these cherry cheesecake cookies on a tiered dessert stand with some fresh cherries scattered around for extra charm. Wrapping a small stack in parchment tied with twine also makes for adorable, edible gifts!
Make Ahead and Storage
Storing Leftovers
I keep leftover cookies in an airtight container at room temperature for up to two days—that’s when they taste freshest. Refrigeration tends to dry them out, in my experience, so I prefer to enjoy them within that window.
Freezing
If you want to make these ahead, you can freeze the dough balls before baking. Just scoop and roll the dough, freeze them on a tray, then transfer to a bag. When you’re ready, bake directly from frozen—add a minute or two to baking time. Alternatively, freeze baked and cooled cookies without cherry filling, then add the filling after thawing.
Reheating
To warm up leftovers, I pop a cookie or two in the microwave for about 10 seconds—just enough to get soft without melting the cherry filling. Avoid reheating in the oven unless you’re taking just a couple out, as it can dry them.
FAQs
-
Can I use regular cream cheese instead of whipped?
Yes! Just be sure it’s softened well so you don’t end up with lumps in the dough. Baking time may be a bit longer—keep an eye on the edges to know when they’re done.
-
How do I prevent the cookies from flattening too much?
Using flour in the dough helps maintain structure. Also, chilling the dough slightly before scooping can help. Finally, avoid over-mixing, which can add too much air and cause spreading.
-
Can I use fresh cherries instead of pie filling?
You can, but keep in mind fresh cherries are less syrupy and won’t hold the shape of the well as nicely. You might want to make a quick cherry compote to mimic the pie filling texture.
-
How do I store these cookies if I want to keep them longer?
For longer storage, freeze the baked cookies without filling, then thaw and add filling before serving, which keeps them fresh and prevents sogginess.
Final Thoughts
This Cherry Cheesecake Cookies Recipe has quickly become one of my favorites for sharing with friends and family. It strikes such a perfect balance of creamy, fruity, and just sweet enough, and there’s something so satisfying about the little cherry surprise in each cookie. Whether you’re a seasoned baker or just looking to try something new, I hope you’ll enjoy making these as much as I do. Gather your ingredients, pull out your mixer, and let’s bake some happiness!
Print
Cherry Cheesecake Cookies Recipe
- Prep Time: 15 minutes
- Cook Time: 12 minutes
- Total Time: 27 minutes
- Yield: 24 cookies
- Category: Dessert
- Method: Baking
- Cuisine: American
- Diet: Vegetarian
Description
These Cherry Cheesecake Cookies combine the soft, buttery texture of sugar cookie dough with a creamy cream cheese blend and a burst of cherry pie filling in the center for a delightful treat perfect for any occasion.
Ingredients
Cookie Base
- 1 (16 oz.) package refrigerated sugar cookie dough
- 4 ounces whipped cream cheese
- ⅓ cup all-purpose flour
Coating
- ½ cup granulated sugar
Filling
- ¾ cup cherry pie filling
Instructions
- Preheat Oven: Preheat your oven to 350°F and line a baking sheet with parchment paper to prevent the cookies from sticking.
- Mix Ingredients: In a large bowl or a stand mixer fitted with a paddle attachment, beat together the refrigerated sugar cookie dough, whipped cream cheese, and all-purpose flour until the mixture is fully combined, scraping down the sides as needed to ensure even mixing.
- Portion Dough: Use a small cookie scoop measuring about 4 teaspoons to portion out the dough, then lightly roll each portion into a ball with your hands.
- Coat Dough Balls: Roll each dough ball in the granulated sugar coating to add a sweet, slightly crunchy exterior.
- Arrange on Baking Sheet: Place the sugar-coated dough balls on the prepared baking sheet, spacing them about 2 inches apart to allow room for spreading during baking.
- Bake Cookies: Bake in the preheated oven for 12 minutes or until the edges are set but the centers still look slightly soft.
- Create Wells: Remove the cookies from the oven and while still warm, gently press the back of a rounded teaspoon into the center of each cookie to create a small well for the filling.
- Cool Cookies: Transfer the baking sheet to a wire rack and let the cookies cool completely; this helps them set and prevents the filling from melting.
- Add Cherry Filling: Once cooled, use the teaspoon to scoop about one cherry each from the cherry pie filling into the well of each cookie, adding a sweet and fruity center.
Notes
- To store, place the cookies in an airtight container at room temperature and consume within two days for optimal freshness and flavor.
- If using regular cream cheese instead of whipped, ensure it is softened completely before mixing; the baking time may increase by a couple of minutes.
- Using parchment paper on the baking sheet prevents sticking and makes cleanup easier.
- Spacing cookies 2 inches apart allows even baking and prevents them from merging.
- The cherry filling adds moisture and a pop of flavor, but can be substituted with other fruit preserves if desired.
Nutrition
- Serving Size: 1 cookie
- Calories: 150 kcal
- Sugar: 12 g
- Sodium: 90 mg
- Fat: 7 g
- Saturated Fat: 3 g
- Unsaturated Fat: 3 g
- Trans Fat: 0 g
- Carbohydrates: 20 g
- Fiber: 1 g
- Protein: 2 g
- Cholesterol: 15 mg


