

Cheesy Bean and Rice Burritos Recipe
When it comes to comfort food that’s both simple and satisfying, you can’t go wrong with a good burrito. Today, I’m excited to share my favorite take on a classic that’s guaranteed to become a staple in your kitchen: the Cheesy Bean and Rice Burritos Recipe. This recipe is ridiculously easy to make, packed with flavor, and perfect for busy weeknights or feeding a hungry crowd. You’ll love how the melted cheese blends perfectly with creamy refried beans and seasoned rice inside warm, toasty tortillas. Seriously, these burritos are fan-freaking-tastic — grab a tortilla and let’s get rolling!
Why This Recipe Works
- Simple Ingredients: Uses pantry staples that are budget-friendly and easy to find.
- Perfect Texture: Creamy refried beans meet fluffy rice and melty cheese for a mouthwatering bite every time.
- Hands-On Friendly: Great for beginner cooks or anyone who wants a quick, no-fuss meal.
- Bakes to Crispy Perfection: The final oven step crisps up the tortillas while heating the filling just right.

Ingredients & Why They Work
This Cheesy Bean and Rice Burritos Recipe comes together with a handful of ingredients that balance convenience and flavor beautifully. Each element plays a role—creamy beans, zesty salsa, seasoned rice, and two kinds of cheese create layers of taste and texture, while soft flour tortillas wrap it all up into handheld perfection.
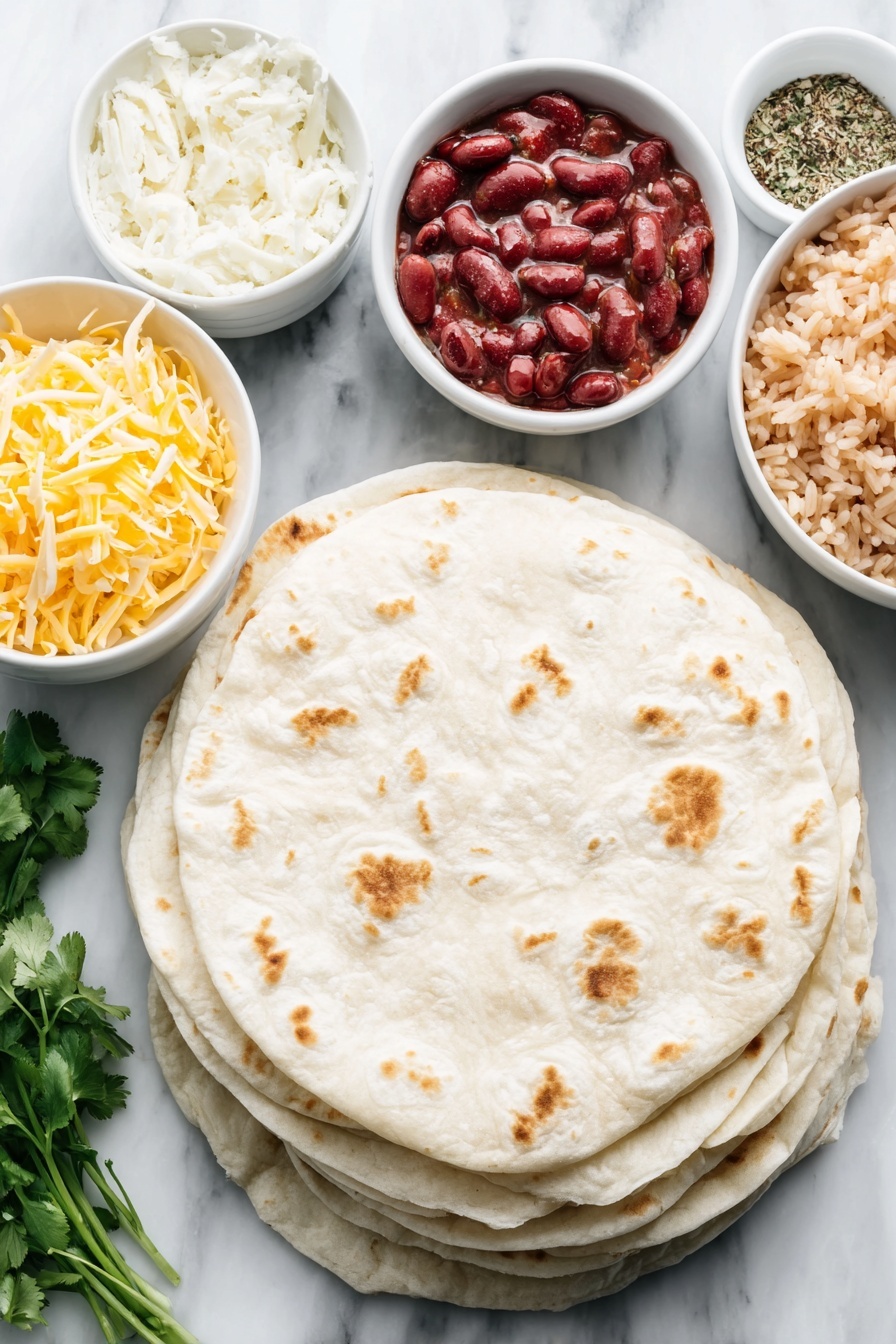
- Refried Beans: Provides a creamy base and protein, perfect for binding the burrito filling.
- Jarred Salsa: Brings a little kick and moisture to the beans, making every bite flavorful.
- Taco Seasoning Mix: Adds that classic Mexican-inspired flavor blend without extra work.
- Flour Tortillas: Soft, pliable, and just the right size to hold all the fillings while baking crisp.
- Restaurant Style Mexican Rice: Fluffy and lightly seasoned—my secret little upgrade for texture.
- Sharp Cheddar Cheese: Gives a bold, tangy cheese flavor that melts just right.
- Monterey Jack Cheese: Adds creaminess and meltability, balancing the sharper cheddar.
Make It Your Way
One of the things I love most about this Cheesy Bean and Rice Burritos Recipe is how adaptable it is. Whether you like to kick the heat up a notch or sneak in some veggies, these burritos are a blank canvas for your cravings.
- Variation: Personally, I like to add sautéed bell peppers and onions for a bit of sweetness and crunch—totally changes the texture and ups the veggie count.
- Protein Boost: If you want to add meat, shredded chicken or ground beef seasoned with extra taco spices blends well into the filling.
- Make It Vegan: Skip the cheese or use your favorite plant-based cheese to keep it dairy-free but still delicious.
- Spice Level: Add some chipotle sauce or diced jalapeños if you love a little heat.
Step-by-Step: How I Make Cheesy Bean and Rice Burritos Recipe
Step 1: Prep Your Filling
Start by preheating your oven to 400°F and lining a baking sheet with foil—don’t forget to spray that foil generously with nonstick cooking spray. Then, grab a small bowl and mix the refried beans with your taco seasoning and salsa. This simple combo is where the flavor magic happens, and mixing it well ensures every bite is perfectly seasoned.
Step 2: Warm Your Tortillas
Pop your stack of flour tortillas in the microwave for about 20 seconds. This little trick softens them just enough to make wrapping the burritos a breeze without tearing. I’ve learned that warming the tortillas prevents frustrating breakage when you roll them up with all the filling inside.
Step 3: Assemble the Burritos
Lay one tortilla flat on your work surface, then spoon a couple tablespoons of that creamy bean mixture down the center. Next, add a couple tablespoons of the fluffy Mexican rice, followed by a generous sprinkle of both sharp cheddar and Monterey Jack cheese. Fold in both edges and roll the tortilla tightly to form a neat little burrito. Place the seam side down on your prepared baking sheet. Rinse and repeat until you’ve rolled all 10.
Step 4: Bake and Flip for Perfect Crisp
Give the tops of the burritos a quick spray with nonstick cooking spray to help them crisp up. Bake for about 10 minutes until golden on one side, then use tongs to flip each burrito carefully. Bake for another 5 to 10 minutes, until both sides are beautifully browned and the cheese inside is melted to gooey perfection.
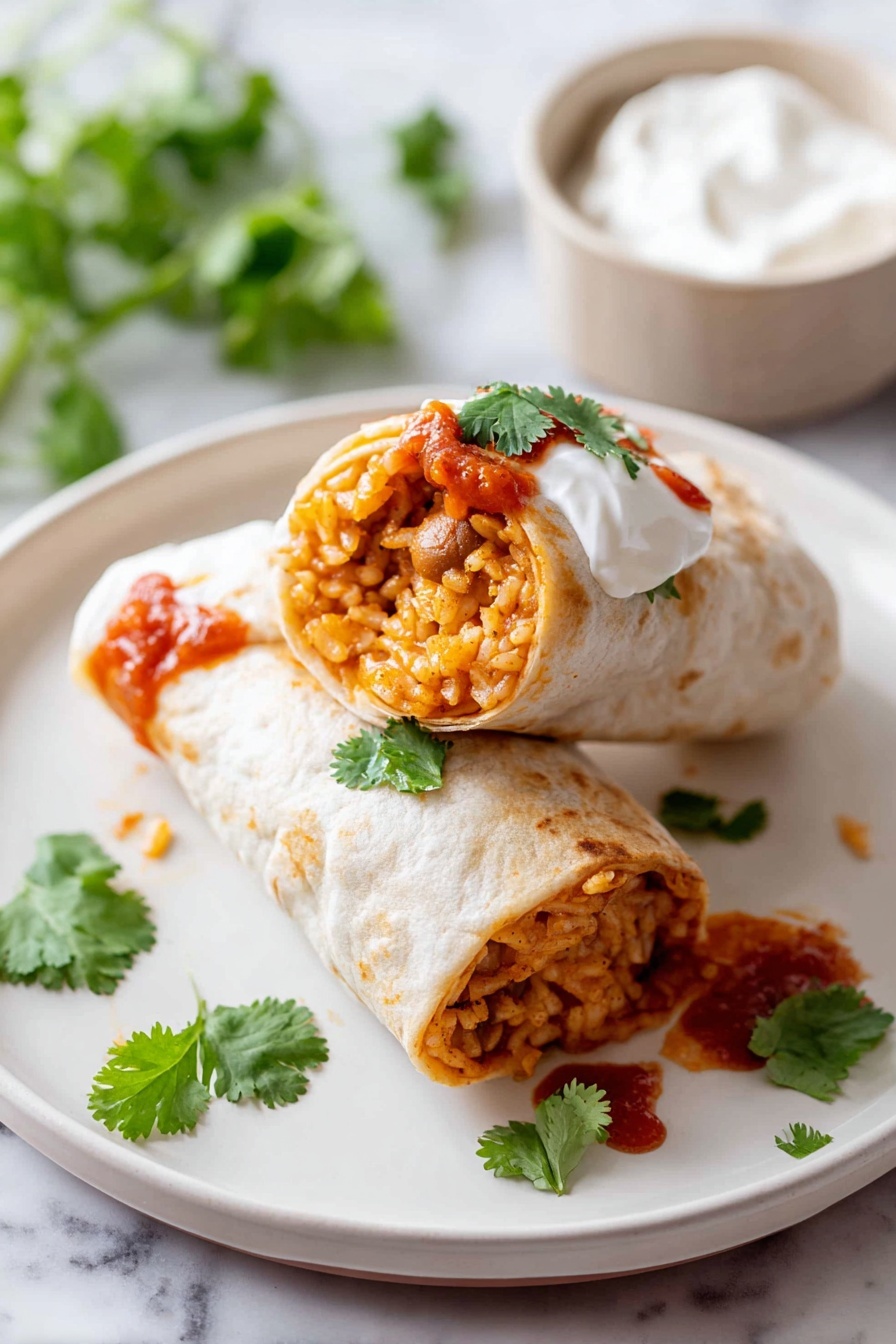
Step 5: Serve with Your Favorites
I always serve mine with extra salsa and a dollop of sour cream on the side. It adds that perfect cool, fresh contrast to the warm, cheesy filling. Trust me, the dipping game makes these even more irresistible!
Tips from My Kitchen
- Don’t Overstuff Your Burrito: It’s tempting to pack in every bite, but too much filling can tear your tortilla or make rolling tricky.
- Use Two Cheeses for Best Melt: Sharp cheddar adds tang, Monterey Jack melts beautifully—that combo is a winner every time.
- Flip Carefully: I like using tongs to flip the burritos so they don’t unpack on me. Trust me, it saves a mess!
- Warm Tortillas Right Before Rolling: This step helped me avoid cracked tortillas and keeps the burritos looking neat and Instagram-worthy.
How to Serve Cheesy Bean and Rice Burritos Recipe
Garnishes
For garnishes, I usually reach for chopped fresh cilantro, a squeeze of lime, and some diced avocado to brighten things up. A drizzle of sour cream or creamy guacamole adds a cool richness that perfectly balances the warm, cheesy filling. Plus, a sprinkle of pickled jalapeños adds a fun little punch if you’re feeling adventurous.
Side Dishes
To keep things classic, I often serve these burritos alongside a simple green salad or my favorite spicy corn salad. Some crispy tortilla chips and a fresh pico de gallo salsa make for an amazing combo—and you’ve got yourself a full Mexican-inspired meal with minimal fuss!
Creative Ways to Present
For gatherings, I like to slice the burritos in half and arrange them on a platter with bowls of different salsas, guacamole, shredded lettuce, and cheese. It turns dinner into an interactive, communal experience. It’s a hit every time with friends and family—plus, it’s a colorful, appetizing spread.
Make Ahead and Storage
Storing Leftovers
If you have leftover burritos, store them in a zippered plastic bag to keep them fresh in the fridge. They’ll last for about 3-4 days, which is perfect for quick lunches or dinners later in the week.
Freezing
I recommend assembling and then freezing the burritos before baking if you want to prep ahead. Wrap each one tightly in wax paper or freezer-safe wrap first, then foil to avoid freezer burn. Pop them into a freezer bag, and you’re set for up to three months! When you’re ready, just bake them straight from frozen—adding a few extra minutes to the baking time.
Reheating
To reheat, I either zap them in the microwave for a quick fix or, if I want that crispy tortilla texture back, I place them on a baking sheet sprayed with nonstick spray and bake at 400°F for about 5-6 minutes. Your burritos come out warm, melty, and PERFECTLY crisped on the outside.
FAQs
-
Can I use canned refried beans for this recipe?
Absolutely! Canned refried beans work wonderfully and save you time. Just give them a good stir and mix with the salsa and taco seasoning as outlined. Homemade refried beans are great too, but canned is a terrific shortcut.
-
What kind of rice should I use for the filling?
Restaurant-style Mexican rice is my top pick because it’s flavorful and fluffy, but any long-grain white rice cooked with a bit of tomato, garlic, and mild seasonings will work well. Avoid sticky or mushy rice, which can make the burritos soggy.
-
Can I make these burritos vegan?
Yes! Just skip the cheese or swap in your favorite vegan cheese alternative. You’ll still get that creamy, comforting filling with refried beans and rice, and the salsa adds plenty of flavor.
-
How do I prevent the tortillas from getting soggy?
Warming the tortillas before assembling softens them without making them soggy, and baking the burritos on a foil-lined, well-sprayed pan ensures they get crispy on the outside. Also, don’t overfill them, which can cause leaks and sogginess.
-
Can I prepare these burritos ahead of time?
Yes! You can assemble the burritos ahead and freeze them (preferably before baking). When you’re ready to eat, just bake them straight from the freezer, adding a few extra minutes to the bake time.
Final Thoughts
Honestly, this Cheesy Bean and Rice Burritos Recipe has become one of my absolute go-tos when I want something that’s quick, comforting, and crowd-pleasing. It’s perfect for busy days when you don’t want to sacrifice flavor or that satisfying homemade feel. I love how easy it is to customize, too—every time I make it, it feels a little different but always delicious. Give it a try the next time you want a simple, flavorful dinner that feels like a warm hug. I promise, once you make these, you’ll find yourself turning to them again and again!
Print
Cheesy Bean and Rice Burritos Recipe
- Prep Time: 10 minutes
- Cook Time: 20 minutes
- Total Time: 30 minutes
- Yield: 10 small burritos
- Category: Main Course
- Method: Baking
- Cuisine: Mexican
- Diet: Vegetarian
Description
Delicious and easy Cheesy Baked Bean and Rice Burritos made with seasoned refried beans, Mexican rice, and a blend of cheddar and Monterey jack cheeses, baked to golden perfection. Perfect for a quick lunch or dinner with a crispy exterior and melty, flavorful filling.
Ingredients
Filling
- 16 ounces refried beans
- 2 tablespoons jarred salsa
- 1 teaspoon homemade taco seasoning mix (or store bought)
- 1 cup restaurant style Mexican rice
- 1 cup shredded sharp cheddar cheese
- 1 cup shredded Monterey jack cheese
Other
- 10 8-inch flour tortillas (soft taco sized)
- Nonstick cooking spray
Instructions
- Preheat Oven: Preheat your oven to 400 degrees Fahrenheit. Line a large rimmed baking sheet with foil and generously coat the foil with nonstick cooking spray to prevent sticking.
- Prepare Bean Mixture: In a small mixing bowl, combine the refried beans, taco seasoning, and salsa. Stir well to mix and set aside for later use.
- Warm Tortillas: Warm the stack of 10 tortillas in the microwave for about 20 seconds to soften them slightly, making them easier to roll.
- Assemble Burritos: Lay a tortilla on a clean work surface. Spread a couple of tablespoons of the refried bean mixture down the center, top with a couple of tablespoons of Mexican rice, and sprinkle with some shredded cheddar and Monterey jack cheese. Fold in both sides of the tortilla, then roll it up tightly. Place the burrito seam side down on the prepared baking sheet. Repeat for all tortillas.
- Prepare for Baking: Lightly coat the tops of the burritos with nonstick cooking spray to help create a crispy crust while baking.
- Bake Burritos: Bake the burritos in the preheated oven for about 10 minutes. Remove the baking sheet and carefully flip each burrito over using tongs to brown the other side.
- Finish Baking: Return the baking sheet to the oven and bake for an additional 10 minutes or until both sides are nicely browned and crispy.
- Serve: Remove from oven and serve warm with additional salsa and sour cream on the side for dipping if desired.
Notes
- This recipe yields 10 small burritos using 8-inch tortillas. For larger, more substantial burritos, use bigger tortillas or increase the filling amount, which will yield about 6 to 8 burritos.
- Store leftover burritos in the refrigerator in a zippered plastic storage bag. Reheat in the microwave or crisp in the oven at 400 degrees Fahrenheit for 5 to 6 minutes.
- For freezing, wrap each burrito tightly in wax paper or freezer-safe plastic wrap, then foil to prevent freezer burn. Freeze for up to 3 months.
- Bake frozen burritos from frozen, increasing baking time by a few minutes until heated through and crispy.
- You can substitute salsa with your favorite homemade salsa or add chopped jalapeños for extra heat.
Nutrition
- Serving Size: 1 small burrito
- Calories: 320 kcal
- Sugar: 3 g
- Sodium: 550 mg
- Fat: 12 g
- Saturated Fat: 6 g
- Unsaturated Fat: 5 g
- Trans Fat: 0 g
- Carbohydrates: 38 g
- Fiber: 7 g
- Protein: 13 g
- Cholesterol: 25 mg


