Chocolate Madeleine Mummies Recipe
If you’re on the lookout for the perfect spooky treat that’s as delightful to make as it is to eat, I’ve got just the thing for you. This Chocolate Madeleine Mummies Recipe is a total crowd-pleaser — rich, chocolatey, and topped with the cutest (and eeriest) mummy decorations you can imagine. Trust me, once you try this recipe, you’ll want to whip up a batch every Halloween season… or honestly, pretty much whenever chocolate cravings strike!
Why This Recipe Works
- Moist and Buttery Texture: The use of butter and cream creates that classic melt-in-your-mouth madeleine feel that’s just heavenly.
- Deep Chocolate Flavor: Combining both dark and cocoa powder adds layers of rich chocolate without overpowering sweetness.
- Easy Yet Impressive Decoration: White chocolate piped mummy wrappings and candy eyes turn simple treats into festive fun without being complicated.
- Chilling Boosts Flavor and Shape: Refrigerating the batter and pan ensures you get that iconic madeleine “belly” and more consistent bake every time.
Ingredients & Why They Work
This Chocolate Madeleine Mummies Recipe is all about balancing rich chocolate with light, airy textures, plus a touch of honey for natural sweetness. Each ingredient is chosen to ensure a tender crumb and a clear chocolate flavor that’s neither too bitter nor overly sweet. Here’s what pulls it all together:
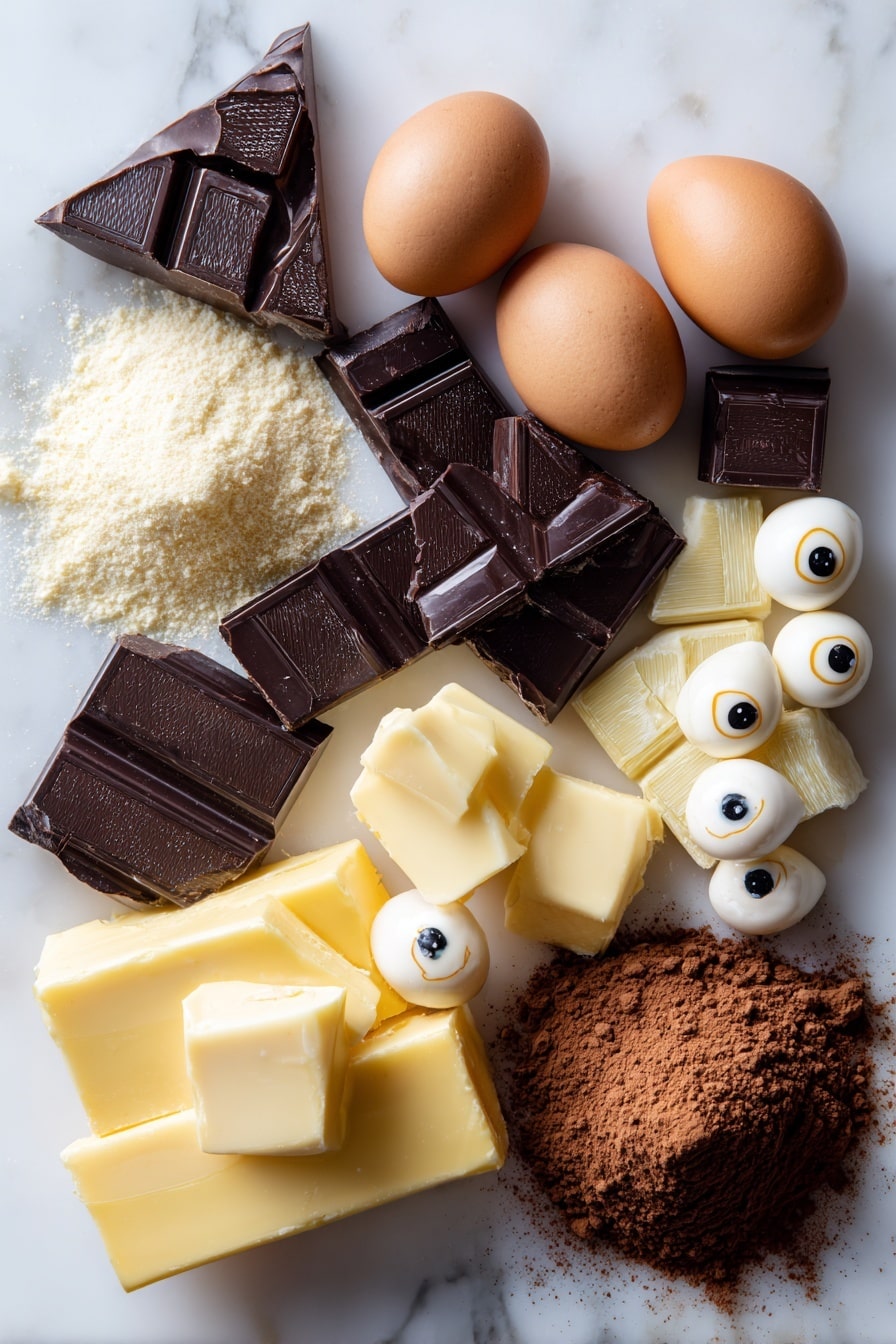
- Unsalted Butter: Gives the classic buttery flavor and tender crumb, and melting it with dark chocolate blends the fats for smooth batter.
- Dark Chocolate: Adds intense chocolate richness without being too sweet, perfect for contrast against the sweet mummies’ white chocolate decorations.
- Vanilla Extract: Elevates flavor depth and balances bitterness from cocoa and dark chocolate.
- Eggs: They provide structure and help create that delicate, spongy texture typical of good madeleines.
- Honey: Adds natural sweetness and moistness, making the treats feel special beyond just granulated sugar.
- Granulated Sugar: Gives sweetness and helps develop the light crust that accents a madeleine’s texture.
- Whipping Cream: Lends richness and moisture, making the batter silky and luxurious.
- Pastry Flour: The lower-protein flour ensures a tender, soft crumb rather than a chewy one.
- Almond Flour: Adds subtle nuttiness and moistness, plus works well with the chocolate for a more complex flavor profile.
- Cocoa Powder: Offers a deep chocolate hit and that signature dark color for spooky vibes.
- Baking Powder: Lightens the batter and helps the batter rise to form that beautiful raised “belly” on the madeleine.
- White Chocolate (for decoration): Melts easily and creates the perfect mummy wrapping effect when piped.
- Candy Eyes: Bring these little guys to life — or DIY your own if you can’t find some at the store!
Make It Your Way
One of my favorite things about this Chocolate Madeleine Mummies Recipe is how easily it invites personal touches. Whether you’re baking with kids, adjusting to dietary needs, or simply mixing up flavors, you can tailor it to your mood and your guest’s tastes. Here’s what I’ve tried over the years:
- Variation: Sometimes I swap the dark chocolate for milk chocolate for a sweeter, less intense flavor that my niece loves—perfect for little ones who shy away from bittersweet chocolate.
- Diet-Friendly Options: I’ve experimented using gluten-free pastry flour blends, and they work surprisingly well if you’re sensitive to gluten. Also, swapping almond flour for ground oats can add a subtle texture change.
- Seasonal Twists: Adding a pinch of cinnamon or chili powder into the cocoa mix gives a fun seasonal twist for autumn gatherings — a tiny kick makes these mummies extra memorable.
Step-by-Step: How I Make Chocolate Madeleine Mummies Recipe
Step 1: Melt Butter and Dark Chocolate Perfectly
Start by setting up a simple water bath — just boiling water in a pot with a heat-safe bowl resting on top, making sure the bowl doesn’t touch the water. Melt your chopped dark chocolate and unsalted butter together here, stirring gently until smooth and glossy. It should be fluid but not too hot. Once melted, stir in vanilla extract and set aside. I like this step because the gentle heat preserves the chocolate’s flavor and keeps the mixture silky, which folds beautifully into the batter later.
Step 2: Whisk Eggs, Sugar, Honey, and Cream
In a large bowl, whisk together your eggs and granulated sugar until combined. Add in the whipping cream and whisk again. Now, drizzle the honey in and whisk the whole mixture over your water bath for about a minute, just until the sugar melts and the mixture warms slightly. This step is key — it keeps the batter smooth and helps the sugar dissolve without cooking the eggs, so watch that whisk and temperature carefully. Don’t let it get hot enough to scramble!
Step 3: Fold in Dry Ingredients Gently
Sift the pastry flour, almond flour, cocoa powder, and baking powder together. Gently fold these dry ingredients into your warm egg mixture. Take your time here — you want a smooth batter without overmixing, which can make the madeleines tough. The batter should start thickening up, ready for that rich chocolate addition next.
Step 4: Incorporate Melted Chocolate Mixture and Chill
Add your melted dark chocolate and butter mix into the batter in three batches, folding carefully between each addition until fully combined. It might feel thick at first, but keep folding until everything is silky and uniform. Once combined, cover your batter and pop it into the fridge for at least 30 minutes. Trust me on this one — a little chill means bigger, puffier madeleine “bellies” in the oven.
Step 5: Prepare Madeleine Pan & Pipe Batter
Brush your madeleine pan lightly with butter, then dust with cocoa powder — tapping out any excess. This helps prevent sticking and adds a subtle chocolate aroma. Using a pastry bag (or a sturdy zip-top bag with a corner snipped) pipe your batter into the wells, filling each about 3/4 full. If you like, refrigerate the filled pan an additional 30 minutes; a cold pan plus cold batter makes those signature madeleine domes rise even better. I almost never skip this step now.
Step 6: Bake Carefully & Cool
Bake at 340°F (170°C) for about 8 to 10 minutes. Don’t open your oven early — I learned the hard way that the sudden air can cause deflation! Your mummies are done when they spring back lightly to touch and your kitchen smells like chocolate heaven. Tap the pan gently to release the madeleines, then transfer to a wire rack to cool completely before decorating.
Step 7: Decorate Your Mummies
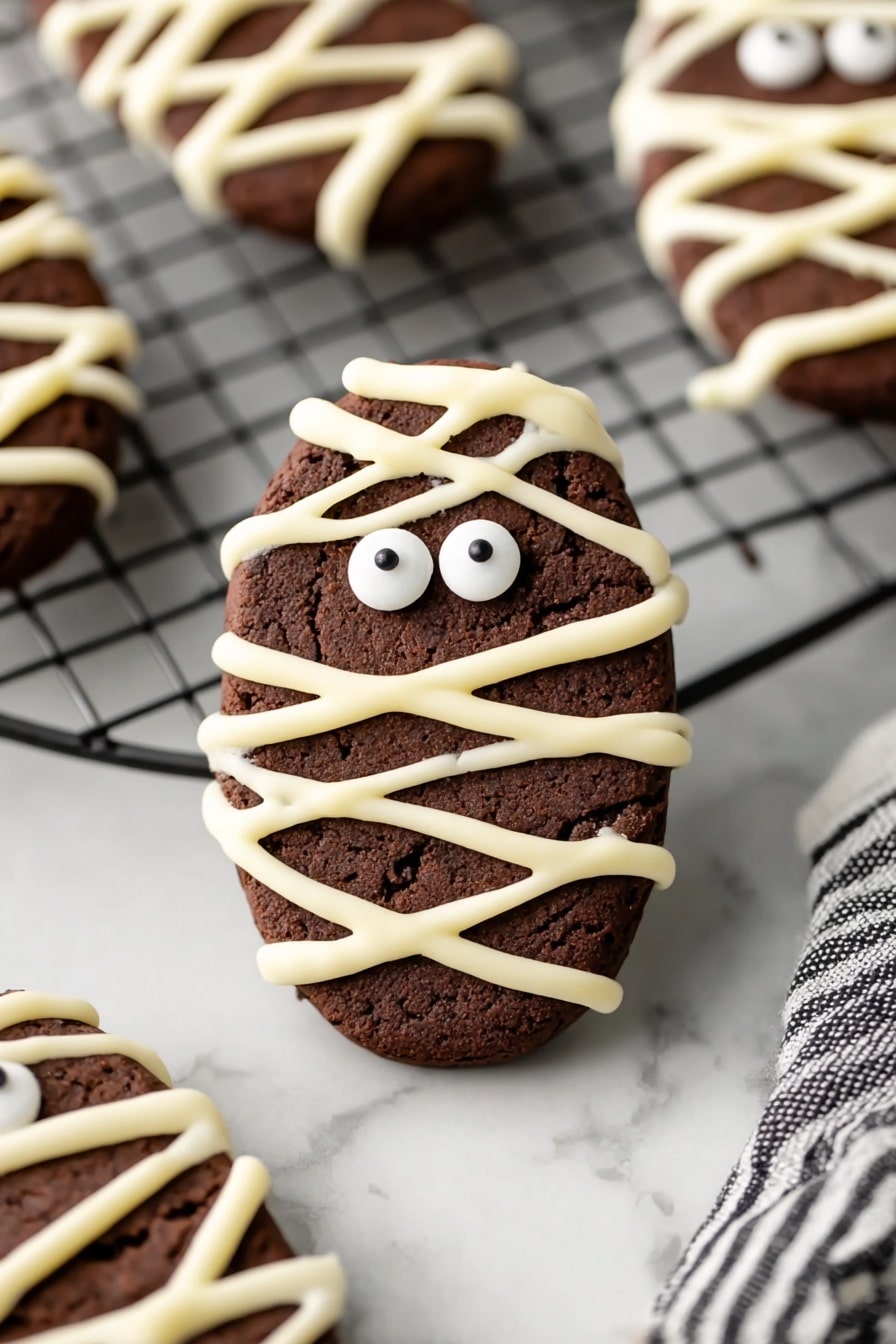
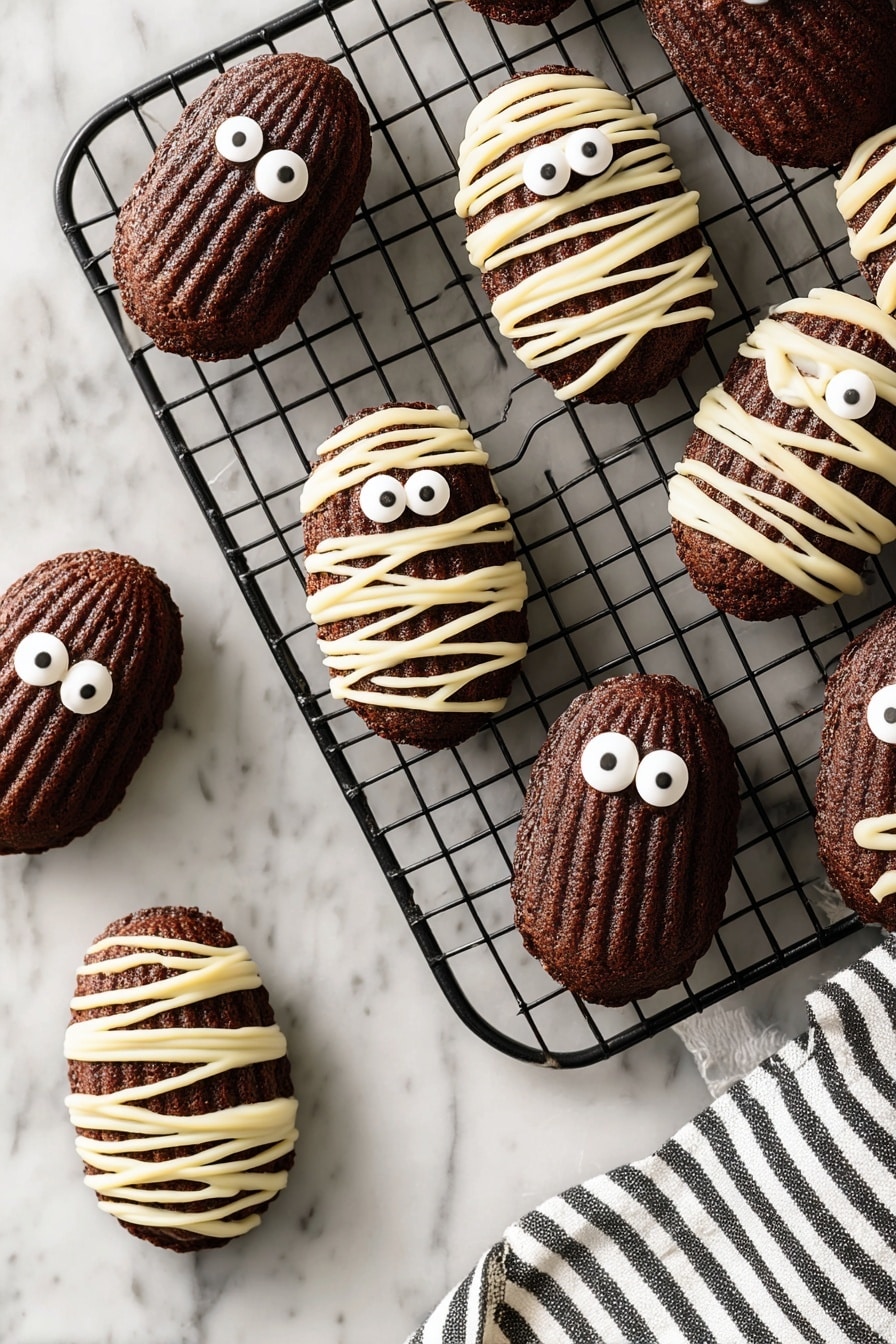
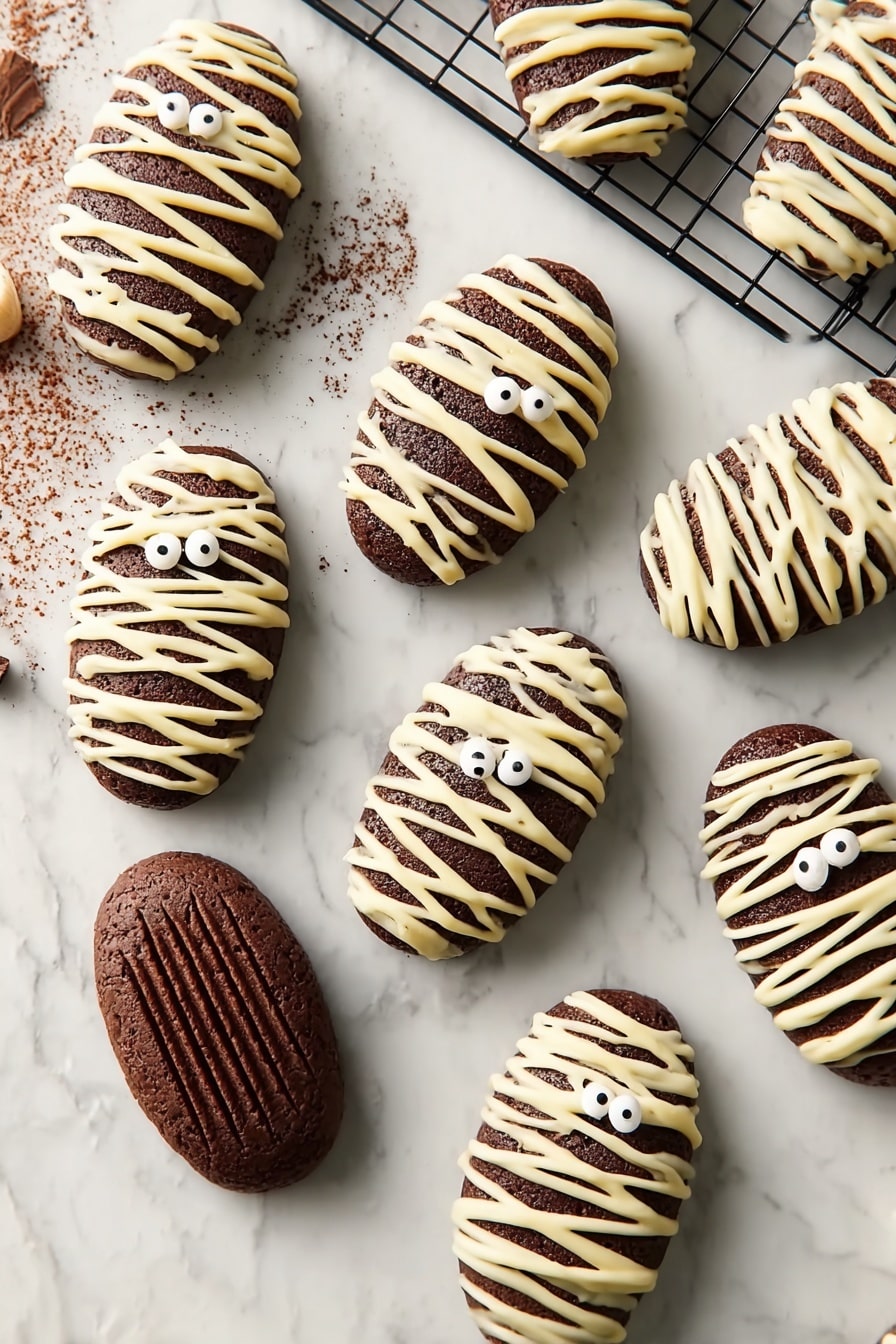
Melt white chocolate and put it in a pastry bag fitted with a small round tip. Pipe the “mummy wrappings” in a messy criss-cross pattern over each madeleine, making sure to leave areas for the eyes. Press candy eyes gently into place — if they need a little help sticking, use a tiny dab of white chocolate as glue. This step is a blast for Halloween parties and always gets smiles once kids (and adults!) see their spooky faces.
Tips from My Kitchen
- Don’t Overheat in Water Bath: Keep the egg mixture warm but not hot — whisk just until sugar dissolves to avoid scrambled eggs in your batter.
- Cold Batter, Cold Pan: Chilling both helps create the characteristic madeleine hump and a better rise.
- Messy Is Perfect: Don’t strive for pipe-perfect mummy wrappings; a little imperfection makes them charming and spooky.
- DIY Candy Eyes: If you can’t find candy eyes, make your own with small dots of white and dark chocolate on parchment — it’s fun and super cute!
How to Serve Chocolate Madeleine Mummies Recipe
Garnishes
I love to keep the decorations simple but impactful — white chocolate mummy wrappings paired with candy eyes are the stars here. Sometimes, we’ll dust a tiny bit of powdered sugar or even edible glitter on top for an extra magical Halloween sparkle. And if you’re feeling extra fancy, a drizzle of raspberry coulis on the side makes a lovely tart contrast to the rich chocolate.
Side Dishes
This treat pairs beautifully with a warm cup of spiced chai or a hearty hot chocolate, especially on chilly October afternoons. For a little savory balance, I like serving them alongside roasted pumpkin seeds or a small cheese plate with mild cheeses like brie or gouda — the sweet and salty combo is unexpected but delicious.
Creative Ways to Present
For parties, I arrange the mummies standing up on a Halloween-themed platter with little “graveyard” decorations — think edible soil made from crushed cookies and tiny tombstone signs. Another fun idea is to wrap them loosely in clear cellophane with orange and black ribbons for spooky gift-giving. Kids especially love making their own “mummy” faces with extra candies!
Make Ahead and Storage
Storing Leftovers
I keep leftover Chocolate Madeleine Mummies in an airtight container at room temperature in a cool spot, and they stay fresh and tender for up to 3 days. Make sure they’re completely cooled before storing to keep their texture just right.
Freezing
If you want to prep in advance, these mummies freeze wonderfully. After cooling and decorating, place them in a single layer on a baking sheet to flash freeze, then transfer to a freezer-safe container. They keep well for up to 1 month. Just be gentle when thawing to protect those delicate white chocolate wrappings!
Reheating
Reheat frozen or refrigerated mummies gently in a warm oven (about 300°F / 150°C) for 3–5 minutes to freshen them up. Avoid microwaving if possible, since it can melt decorations and alter texture. A quick toast in a pan with light butter also works to restore warmth with some extra buttery goodness.
FAQs
-
Can I use regular all-purpose flour instead of pastry flour for the Chocolate Madeleine Mummies Recipe?
Absolutely! While pastry flour gives a lighter, more tender texture because of its lower protein content, regular all-purpose flour will still work fine. Your madeleines might be a tad denser, but still delicious. Just avoid overmixing the batter to keep them soft.
-
What if I don’t have a madeleine pan—can I make this recipe without it?
You can definitely get creative! Using mini muffin pans can be a handy substitute, though the shape and texture will differ slightly. Just reduce baking time slightly and watch closely for doneness.
-
How do I prevent the madeleines from sticking to the pan?
Brush your madeleine pan well with melted butter and then dust with cocoa powder (for chocolate madeleines) or flour (for vanilla). Make sure to tap out any excess and refrigerate the pan before piping the batter — this combo helps the cakes release easily once baked.
-
Can I make the mummy decoration ahead of time?
It’s best to decorate the mummies the same day you plan to serve them so the white chocolate doesn’t dull or melt. However, if you need to prepare ahead, you can melt white chocolate and prepare your piping bag, storing it at room temperature to be ready right when the madeleines cool.
-
How do I make my own candy eyes if stores don’t have them?
Easy and fun! Pipe small white chocolate dots on parchment paper, then add a tiny dark chocolate dot in the center once the white sets. Let these firm up in a cool place, and you’ve got homemade googly eyes ready to mummy-ify your madeleines.
Final Thoughts
Honestly, this Chocolate Madeleine Mummies Recipe holds a special place in my heart because it’s the perfect blend of crafty and delicious — the type of treat that brings smiles to faces young and old. I love how approachable yet impressive it feels, making it my go-to for Halloween gatherings or when I want to treat myself with a bit of playful indulgence. You’ll enjoy how easy it is to make these spooktacular bites and proud knowing you nailed the balance of rich chocolate with tender, buttery goodness. So grab your pan, summon your inner chocolatier, and let’s get baking some adorable little mummies that taste as fun as they look!
Print
Chocolate Madeleine Mummies Recipe
- Prep Time: 15 minutes
- Cook Time: 10 minutes
- Total Time: 25 minutes
- Yield: 16 madeleines
- Category: Dessert
- Method: Baking
- Cuisine: French
- Diet: Vegetarian
Description
These Chocolate Madeleine Mummies are a spooky twist on the classic French madeleine, featuring rich chocolate flavor and fun Halloween mummy decorations made from piped white chocolate and candy eyes. Perfect for festive gatherings, these treats combine tender, cocoa-infused madeleines with playful mummy wrappings for a delightfully eerie dessert.
Ingredients
Chocolate Madeleines
- ⅝ cup unsalted butter (140 grams)
- ⅕ cup dark chocolate, chopped (34 grams)
- 1 teaspoon vanilla extract
- 2 large eggs
- 1 ½ tablespoons honey (30 grams)
- ½ cup granulated white sugar (80 grams)
- 2 ½ tablespoons whipping cream
- ½ cup pastry flour, sifted (56 grams)
- ⅓ cup almond flour, sifted (30 grams)
- ⅓ cup cocoa powder (30 grams)
- 1 teaspoon baking powder (8 grams)
Halloween Madeleine Mummy Decorations
- ½ cup white chocolate, melted
- 32 small candy eyes
Instructions
- Prepare chocolate and butter: In a small bowl, melt the dark chocolate and butter together over a water bath until fluid. Add vanilla extract and set aside.
- Mix wet ingredients: In a large bowl, whisk together eggs and sugar. Add whipping cream and whisk again. Add honey and whisk the mixture over a water bath for about 1 minute until sugar has melted and ingredients are fully incorporated.
- Combine dry ingredients: Sift pastry flour, almond flour, cocoa powder, and baking powder into the wet mixture. Gently fold the dry ingredients in to form the madeleine batter.
- Incorporate chocolate mixture: Add the melted chocolate and butter mixture to the batter in three batches, folding gently until combined.
- Chill the batter: Cover the batter and refrigerate for at least 30 minutes while preheating the oven to 340 degrees F.
- Prepare madeleine pan: Lightly brush the madeleine pan with butter and dust with cocoa powder, tapping out excess cocoa.
- Pipe batter into pan: Transfer the batter into a pastry bag and pipe into the madeleine wells. Optionally, cover and refrigerate for another 30 minutes for a better rise.
- Bake: Bake the madeleines for 10 minutes without opening the oven door prematurely. Once done, tap to release and cool on a wire rack.
- Decorate mummy madeleines: Transfer melted white chocolate into a pastry bag with a thin tip. Pipe messy crosshatch mummy wrappings on each madeleine, leaving space for the eyes.
- Apply candy eyes: Attach candy eyes using a small amount of white chocolate as glue if needed. Store in a cool place until serving.
Notes
- A simple water bath (boiling water in pot with bowl above) is sufficient for melting sugar without cooking eggs—avoid over-heating to prevent scrambled eggs.
- After chilling, the batter will be stiff; gently stir it before piping.
- Perfect piping shape is not required; madeleine pans are forgiving.
- Keeping the pan cold helps produce a puffier madeleine belly.
- Lighter colored pans tend to bake slightly faster; adjust timing as needed.
- If candy eyes are unavailable, create your own by piping white chocolate dots on parchment with smaller dark chocolate dots in the center.
Nutrition
- Serving Size: 1 madeleine
- Calories: 140 kcal
- Sugar: 9 g
- Sodium: 40 mg
- Fat: 9 g
- Saturated Fat: 5 g
- Unsaturated Fat: 3 g
- Trans Fat: 0 g
- Carbohydrates: 14 g
- Fiber: 2 g
- Protein: 2 g
- Cholesterol: 50 mg

