Halloween Cake Pops Recipe
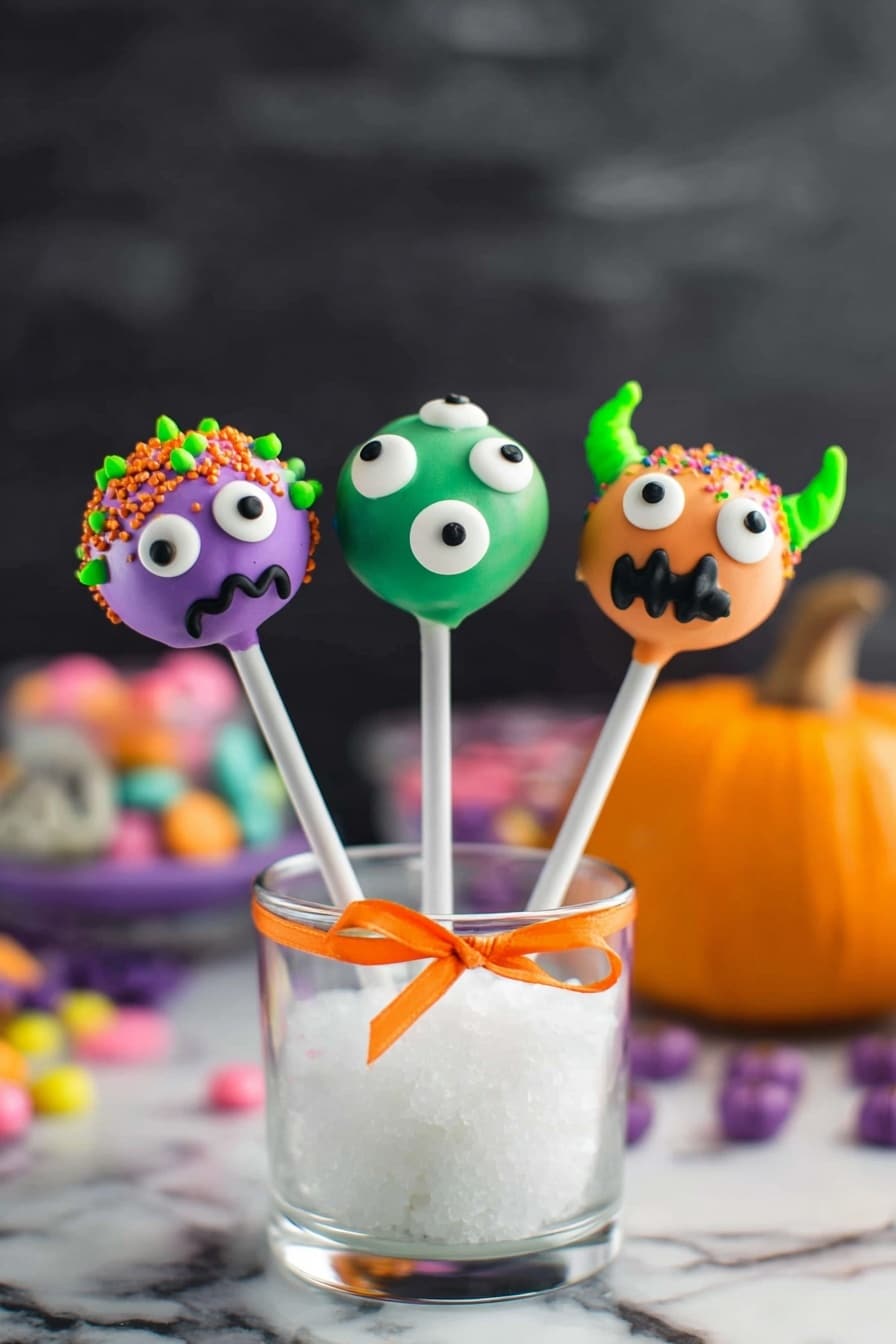
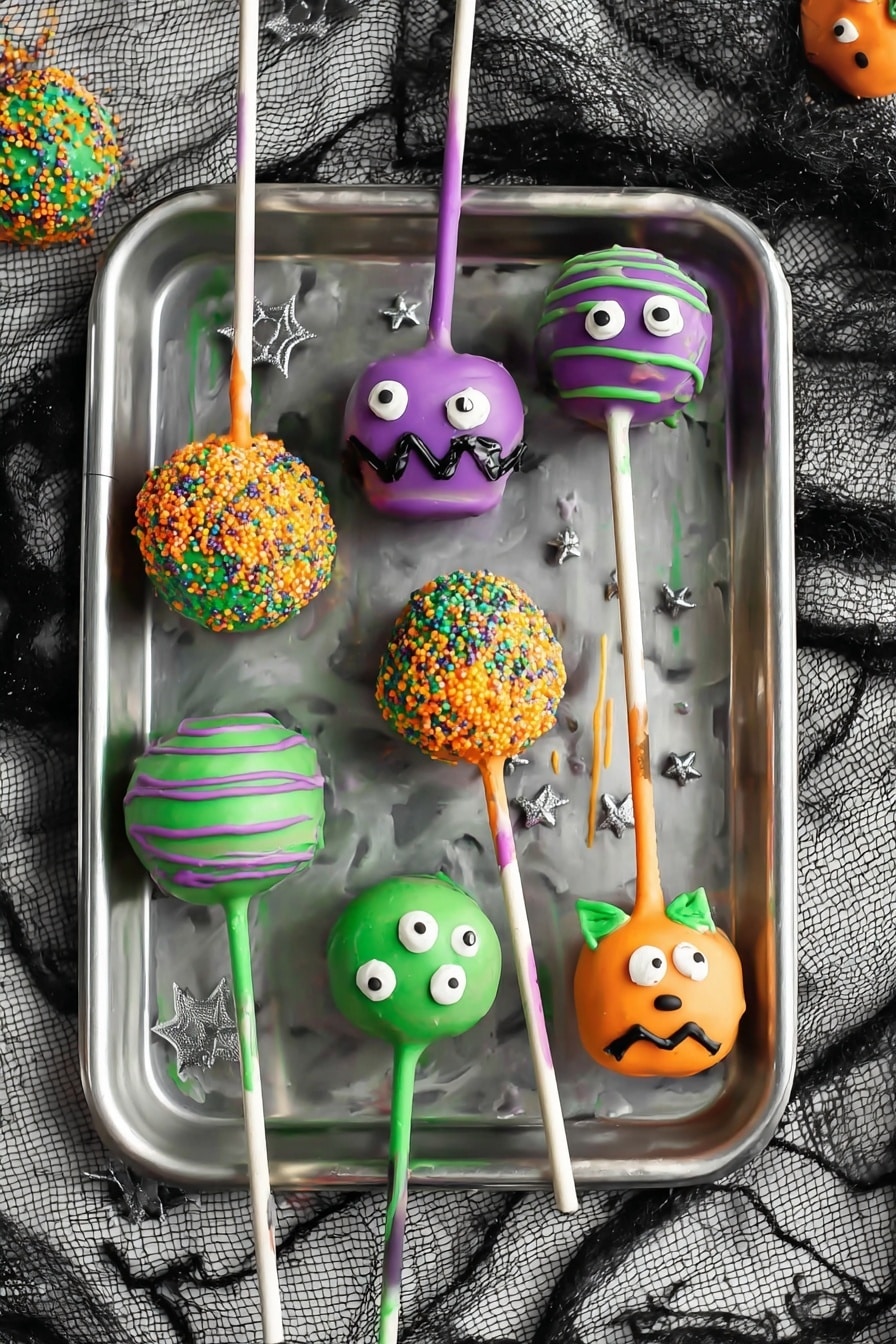
If you’re looking for a festive, fun, and downright adorable treat to wow your friends and family this season, then you’ve got to try this Halloween Cake Pops Recipe. These little donuts on a stick dipped in colorful candy melts and decorated with spooky eyeballs and sprinkles are seriously cute and surprisingly simple to make. Trust me, once you try them, they’ll become your go-to party dessert. So let’s get popping—figuratively and literally!
Why This Recipe Works
- Quick & Easy: Uses mini donuts instead of baking from scratch, saving tons of time without sacrificing flavor.
- Customizable Decor: Candy melts in Halloween colors and fun toppings let you make spooktacular designs your way.
- Perfect Party Snack: Individually portioned and neat to eat, great for kids and adults alike.
- Make Ahead Friendly: You can prep these up to 24 hours before your event—just keep them at room temp!
Ingredients & Why They Work
Each ingredient in this Halloween Cake Pops Recipe is chosen for ease and effect—mini donuts for a cakey base, candy melts for a vibrant coating, and fun toppings to bring your spooky ideas to life. Here’s a quick rundown so you know what to look for when shopping.
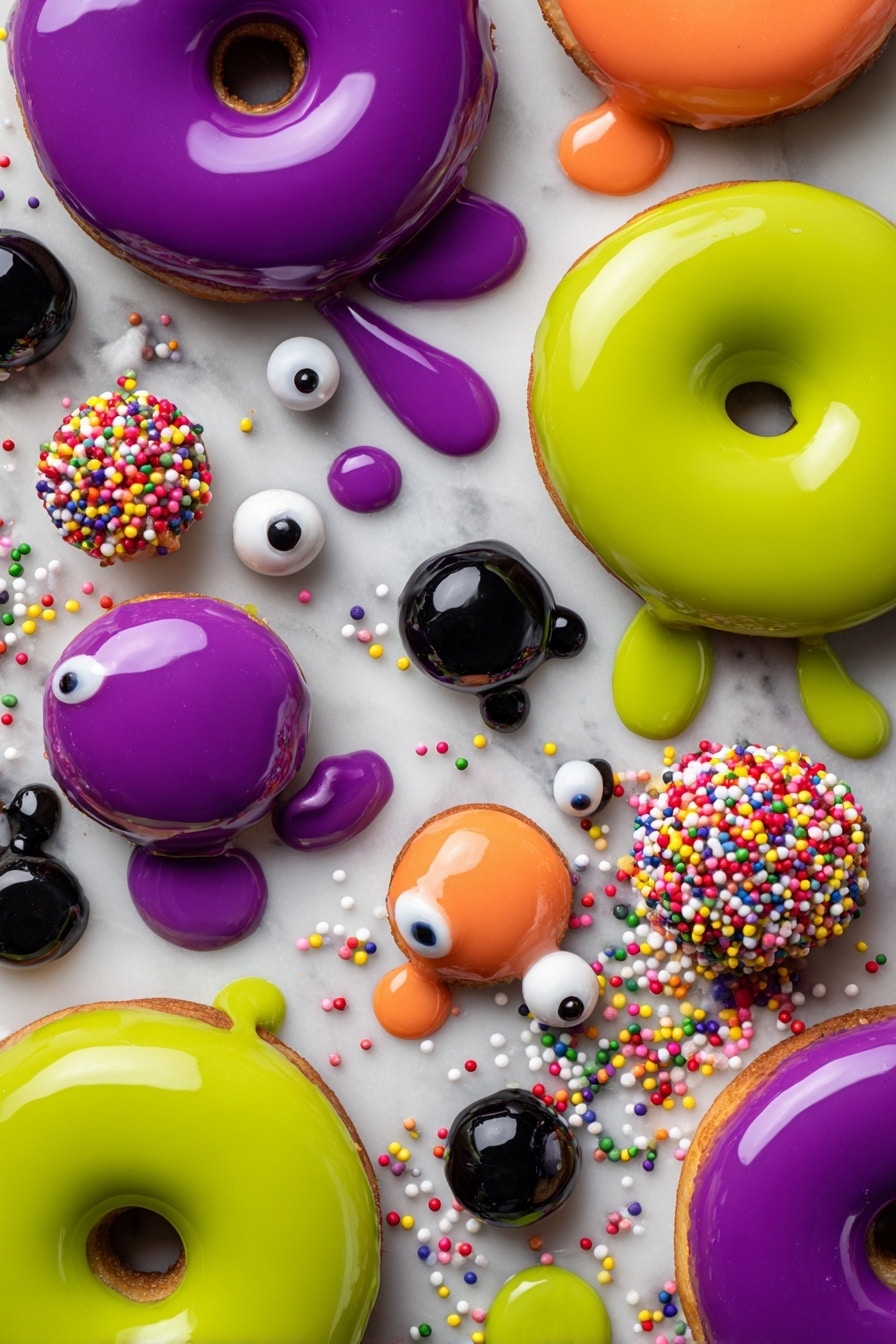
- Candy melts: Feel free to pick your favorite Halloween colors—green, purple, and orange all work wonderfully and melt smoothly for easy dipping.
- Lollipop sticks: Standard 6- to 7-inch sticks give you enough length to hold your pops comfortably without worrying about messy fingers.
- Mini donuts/donut holes: Plain mini donuts are best for letting your decorations shine; donut holes work well if you want slightly rounded pops.
- Candy eyeballs: These instantly add personality, turning simple pops into “monster” masterpieces.
- Sprinkles: Get creative with assorted Halloween-themed sprinkles for bursts of color and texture.
- Black decorating gel: Perfect for drawing spooky faces and finishing touches with precision.
Make It Your Way
One of the things I love most about this Halloween Cake Pops Recipe is how flexible it is. Whether you want to make them kid-friendly, gluten-free, or simply experiment with different colors and textures, it’s all possible. Play around with decorations—after all, each pop is a mini canvas for your creativity.
- Monster Mix-Up: I once made a batch with neon green and black candy melts, using googly candy eyes and sharp teeth drawn with black gel—kids loved how “scary” they looked!
- Gluten-Free Version: Swap the mini donuts for your favorite gluten-free mini cakes or donut holes, then decorate as usual.
- Spooky Sweet or Subtle: Use more pastel candy melts if you want a less intense look; the recipe adapts well to those color choices.
Step-by-Step: How I Make Halloween Cake Pops Recipe
Step 1: Melting the Candy Magic
The first thing I do is melt my candy melts according to the package directions—usually in the microwave in short bursts, stirring in between to avoid burning. Make sure to get a nice, smooth consistency that’s not too runny (or your coatings will be thin and drippy) and not too thick (which makes dipping tricky). Pro tip: use a tall, narrow container to dip donuts easily without drowning your candy melts.
Step 2: Anchoring the Lollipop Sticks
Dip the tip of each lollipop stick about 1/4- to 1/2-inch into the melted candy and then poke it straight into the center of each mini donut. This sticky dip acts like glue, so let them sit upside down on wax paper for a few minutes until the candy hardens and the stick stays securely in place. This step is crucial—trust me, I learned the hard way that skipping it makes the pops fall apart when you dip them later!
Step 3: Coating the Donuts in Candy Melt
Once your sticks are firmly anchored, carefully dip each donut into the melted candy melts, using a gentle rotation motion to fully coat each one. Don’t rush this part—you want an even layer without air bubbles or gaps. Set them upside down again on wax paper until the coating is completely hardened. This usually takes about 10 minutes if your kitchen isn’t too warm.
Step 4: Decorate Your Spooky Pops
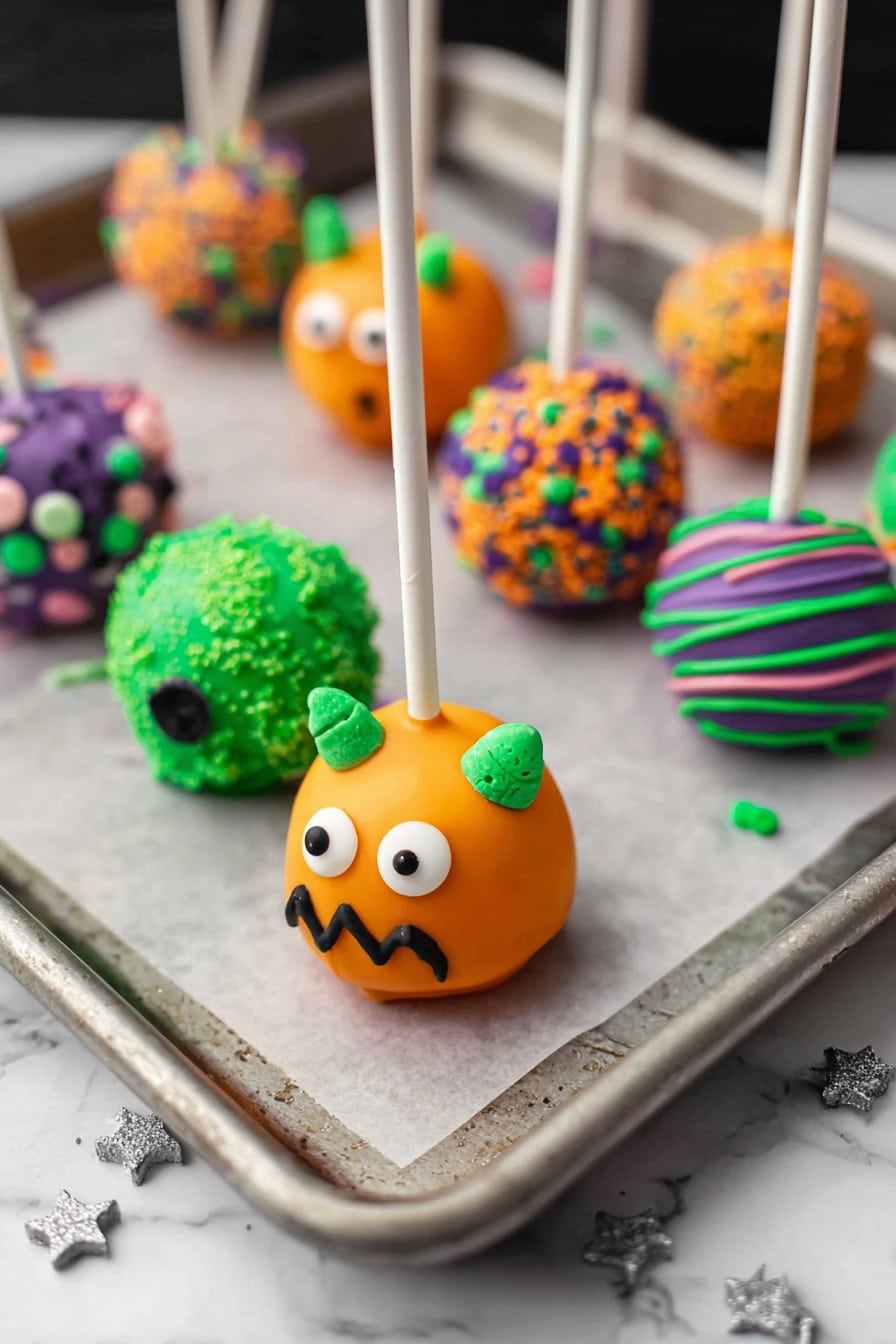
Now for the fun part! While the candy coating is still slightly tacky, press on those candy eyeballs, sprinkle the assorted Halloween sprinkles, and use the black decorating gel to add scary smiles or monster furrows. If you want to try some drizzle effects or layered colors, follow the notes below to get the timing just right. Your creativity can run wild here!
Tips from My Kitchen
- Use a Deep Container: Melting your candy melts in a tall, narrow cup makes dipping donuts less messy and more controlled.
- Keep Candy Melts Warm: If your candy thickens mid-way, reheat gently in 10-second bursts to keep that perfect dipping texture.
- Decorate Quickly but Carefully: Candy melts set fast, so keep your decorating items close and ready for swift work after dipping.
- Avoid the Fridge: Storing these in the fridge causes sweat and cracking—room temperature storage keeps their smoothness intact.
How to Serve Halloween Cake Pops Recipe
Garnishes
I love using candy eyeballs—they immediately turn a simple pop into a quirky monster or spooky critter. For extra flair, I sprinkle on Halloween-themed confetti sprinkles or edible glitter to add texture and shimmer. Black decorating gel lets you draw fun faces, and if you want to get really creative, piping candy horns or fangs is a blast (and a sweet challenge!).
Side Dishes
While these pops are a party all on their own, I like pairing them with a simple punch like sparkling apple cider or a pumpkin spice latte to complement the sweet candy coating. For savory balance, some classic popcorn or roasted pumpkin seeds nearby works great. It’s all about keeping your Halloween spread varied and fun!
Creative Ways to Present
One of my favorite presentation tricks is sticking the pops vertically into a block of floral foam covered with an orange or purple fabric—it’s like a spooky cake pop bouquet! I’ve also arranged them in Halloween-themed cups or mason jars filled with candy corn to hold them steady. For kid parties, I sometimes wrap individual pops in clear cellophane and tie with a Halloween ribbon for easy grab-and-go favors.
Make Ahead and Storage
Storing Leftovers
If you have leftover cake pops (though I doubt it will happen!), store them in a single layer in an airtight container at room temperature. Avoid stacking because the coating can get damaged. I’ve found that 24 hours max is the sweet spot for freshness—any longer and the candy melt starts to bloom and lose its shine.
Freezing
Freezing these isn’t my favorite because the candy coating doesn’t thaw well—it can crack or sweat, ruining the look. But if you have to, wrap each pop individually in plastic wrap and place in an airtight container. When thawing, bring them to room temperature slowly to minimize condensation.
Reheating
Since these pops are best served cold or at room temp, I don’t reheat them. If you find the candy melts have lost some of their shine, a gentle wipe with a soft cloth can help remove minor sugar bloom. Otherwise, fresh is best for that crisp snap!
FAQs
-
Can I use store-bought cake instead of mini donuts for this Halloween Cake Pops Recipe?
Absolutely! If you want a more traditional cake pop, crumble your favorite store-bought or homemade cake and bind it with frosting to form balls. Then follow the candy melt dipping and decorating steps. However, using mini donuts speeds things up and adds a fun twist!
-
How do I prevent the candy melts from cracking on my cake pops?
Keep your kitchen at a moderate temperature and avoid moving the pops around too much while drying. Also, never refrigerate cake pops coated in candy melts, as condensation can cause cracking and color bleeding when brought back to room temperature.
-
What if I don’t have candy eyeballs for decorating?
No worries! You can draw eyes with black decorating gel or use small round sprinkles or edible pearls to create eyes. Alternatively, cut tiny circles from fondant and add dots of gel for a similar effect.
-
Can I make these cake pops vegan or allergy-friendly?
Definitely. Look for vegan mini donuts and dairy-free candy melts. For allergies, check all ingredient labels carefully and substitute as needed. These pops are versatile enough to accommodate many dietary preferences!
-
How long does it take to make Halloween Cake Pops Recipe from start to finish?
This recipe typically takes about 30 minutes of active prep time plus 10 minutes of cooling, making it around 40 minutes in total—perfect for a quick yet festive Halloween treat!
Final Thoughts
This Halloween Cake Pops Recipe is one of those magical treats that blends simplicity with endless fun and creativity. I love how easy it is to bring a smile to everyone’s face with just a few ingredients, some candy melts, and your favorite spooky decorations. Whether you’re new to cake pops or a seasoned pro, these pops are a no-stress way to add a festive touch to your holiday celebrations. Give them a try—you’ll see how sharing them becomes a highlight of your Halloween festivities!
Print
Halloween Cake Pops Recipe
- Prep Time: 30 minutes
- Cook Time: 0 minutes
- Total Time: 40 minutes
- Yield: 24 servings
- Category: Dessert
- Method: No-Cook
- Cuisine: American
Description
These festive Halloween Cake Pops are a fun and colorful treat made with mini donuts and candy melts, decorated with candy eyeballs, sprinkles, and black decorating gel. Perfect for parties and spooky celebrations, these pops are easy to assemble and delightfully sweet.
Ingredients
Cake Pops
- 1 cup candy melts (green, purple, and/or orange)
- 24 6- to 7-inch lollipop sticks
- 24 plain mini donuts and/or donut holes
Decorations
- Candy eyeballs
- Assorted sprinkles
- Black decorating gel
Instructions
- Melt Candy Melts: Melt the candy melts according to the package directions until smooth and ready for dipping.
- Insert Sticks: Carefully dip each lollipop stick about 1/4- to 1/2-inch into the melted candy melts, then insert the stick into each mini donut. Place the donuts upside down on a wax paper-covered surface with sticks pointing upward and allow the candy melts to harden for a few minutes.
- Coat Donuts: Dip each mini donut into the melted candy melts, rotating to fully coat the donut. Set them upside down again on wax paper and let the coating harden completely.
- Decorate: Use candy eyeballs, assorted sprinkles, and black decorating gel to decorate the cake pops as desired to create spooky and fun Halloween designs.
- Serve and Store: Serve once the candy melts are fully set. These cake pops are best enjoyed the day they are made. If making in advance, store at room temperature in an airtight container for up to 24 hours, avoiding refrigeration or freezing to prevent candy melt sweating and cracking.
Notes
- For sprinkle-topped pops, let the first candy melt layer set for 3 minutes before dipping the tops in sprinkles to help them adhere properly.
- For drizzled pops, allow the first candy melt layer to almost set before drizzling on additional candy melt for best results.
- To create monster pops, let the first candy melt layer fully dry, then attach candy eyeballs with extra melted candy melt and decorate with sprinkles and black gel.
- Make monster horns by piping candy melt shapes onto wax paper, then attach to pops using melted candy melt; support large horns with a sprinkle stuck inside the horn head.
Nutrition
- Serving Size: 1 cake pop
- Calories: 150 kcal
- Sugar: 15 g
- Sodium: 80 mg
- Fat: 7 g
- Saturated Fat: 4 g
- Unsaturated Fat: 3 g
- Trans Fat: 0 g
- Carbohydrates: 20 g
- Fiber: 1 g
- Protein: 1 g
- Cholesterol: 5 mg

