Halloween Graveyard Pudding Cups Recipe
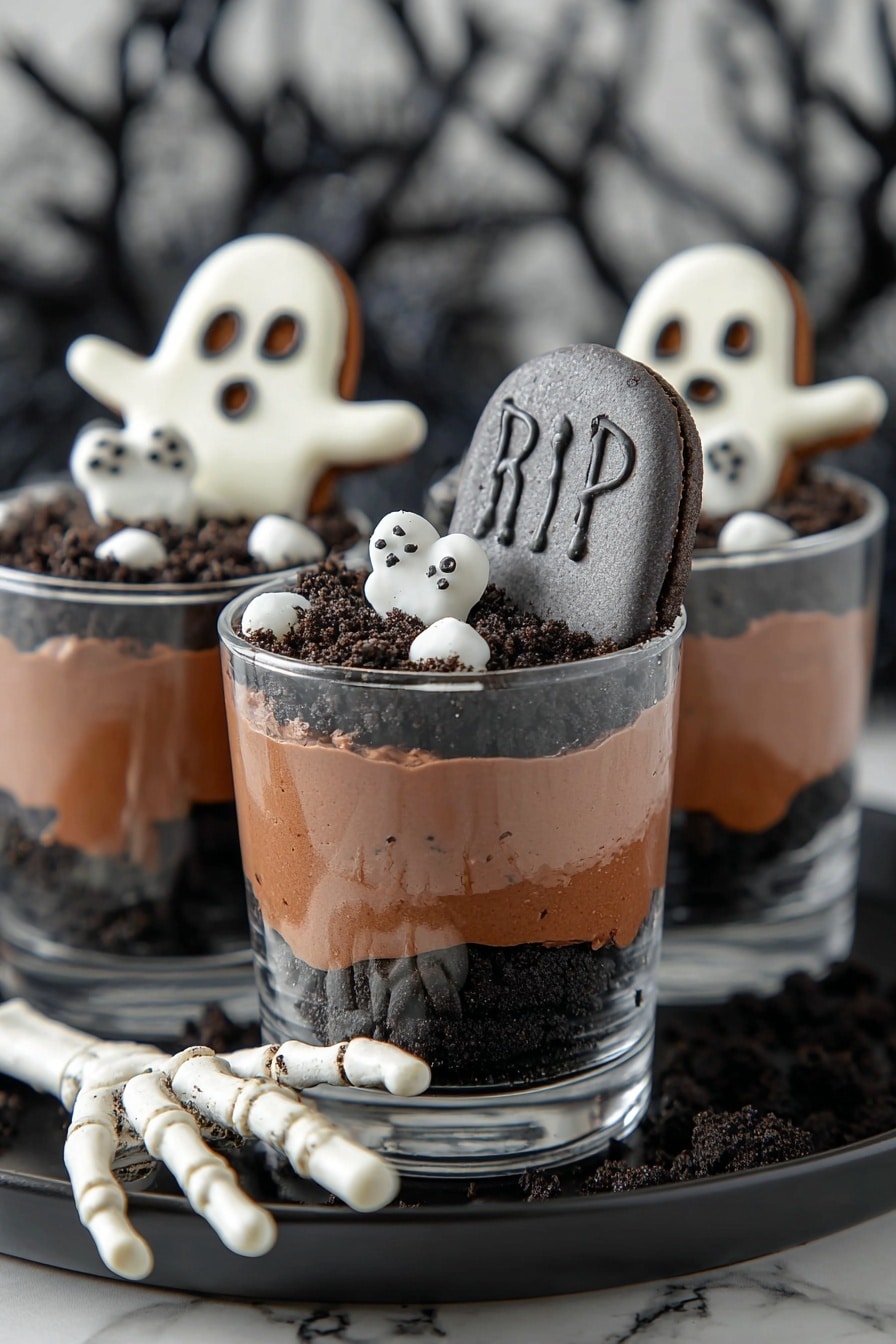
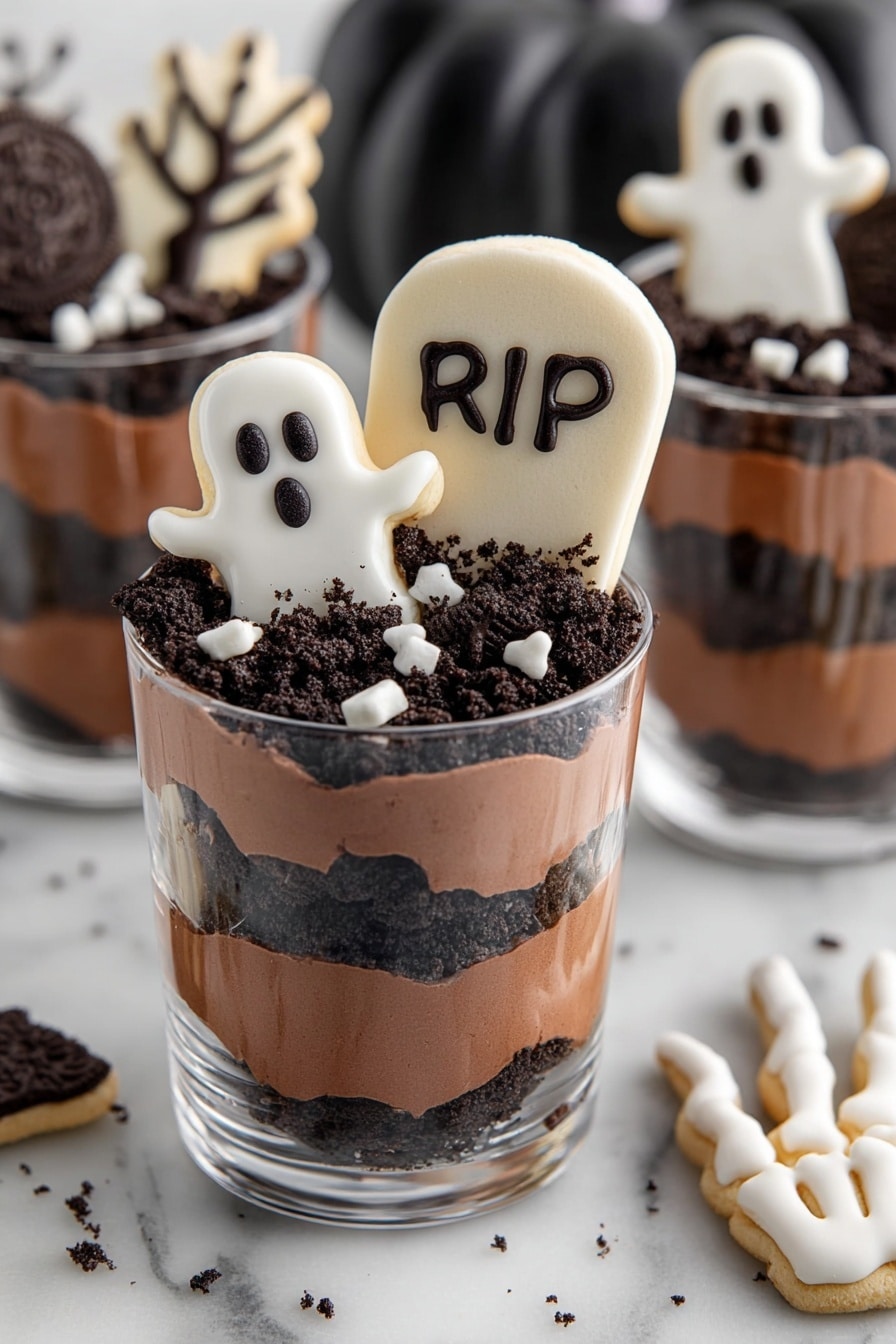
If you’re looking to wow your friends or family with an easy yet seriously adorable dessert this spooky season, you’re going to love this Halloween Graveyard Pudding Cups Recipe. It’s got all the fun Halloween vibes—ghosts, tombstones, creepy trees—all nestled in rich chocolate pudding and Oreo “dirt.” Plus, it’s surprisingly simple to whip up, making it perfect for last-minute treats or a party showstopper. Stick around, because I’m sharing all my tips to make your graveyard look just the way you want it, with zero stress!
Why This Recipe Works
- No-fuss decorations: White and black melted chocolate transform simple ingredients into spooky ghosts and trees without fancy tools.
- Textures that pop: Creamy pudding contrasts with crunchy Oreos and crisp cookies for an irresistible bite.
- Flexible layering: You customize how much pudding or Oreo “dirt” you want in each cup, so everyone can enjoy it their way.
Ingredients & Why They Work
This Halloween Graveyard Pudding Cups Recipe is all about combining simple, easily found ingredients that play off each other’s textures and flavors. From the creamy instant pudding to the crisp Milano cookies and rich Oreos, these ingredients make building your mini graveyard a breeze — no stress, all fun.

- White chocolate: Melts smoothly for crafting spooky ghost shapes with a sweet, creamy finish.
- Black candy melts: Perfect for adding details like eyes, mouths, trees, and tombstone writing thanks to their smooth melting and re-hardening properties.
- Milano cookies: These act as sturdy yet tasty tombstones, and their rectangular shape makes them easy to decorate.
- Instant chocolate pudding mix: Quick to prepare and rich in flavor, forming the creamy base of each cup.
- Cold milk: Helps the instant pudding set perfectly without clumping.
- Crushed Oreos: Add that perfect “dirt” texture while bringing classic chocolate crunch.
- Halloween sprinkles (optional): Bring extra festive color and texture to the graveyard scene.
Make It Your Way
One of the best things about this Halloween Graveyard Pudding Cups Recipe is just how flexible it is. I’ve played with different decorations and layering, and honestly? That’s part of the fun. Don’t hesitate to tweak it to fit your style or dietary needs—you’ll impress everyone no matter what!
- Variation: I sometimes swap the Oreo crumbs with crushed graham crackers for a lighter “sand” look that kids love.
- Dairy-free option: Use plant-based milk and dairy-free pudding mix to keep it creamy without the dairy.
- Extra spooky: Add gummy worms peeking out from the “dirt” layer for a fun surprise.
- Personal touches: Try writing funny or creepy messages on the tombstones with edible markers if you want to get playful.
Step-by-Step: How I Make Halloween Graveyard Pudding Cups Recipe
Step 1: Crafting Your Ghosts
Start by melting your white chocolate slowly in 20-second bursts, stirring between each to avoid burning. When it’s perfectly smooth, spoon heaping blobs onto parchment paper. Use the back of your spoon to drag each blob down gently, shaping them into little ghosts. For a cute touch, I use a toothpick to pull out the sides and create “arms” that look like spooky spirits waving hello. Pop those in the fridge to set—cooling them completely helps the next decorating step go smoothly.
Step 2: Adding Faces and Trees with Black Candy Melts
While your ghosts chill, melt the black candy melts according to the package instructions. Pour some into a piping bag fitted with a tiny tip to draw eyes and creepy mouths onto each ghost—this part feels like decorating Halloween cookies and always makes me smile. Use the remaining melted black candy to pipe spooky tree silhouettes on parchment paper, making sure to form wider bases so they stand upright later. Don’t rush—let all the black candy details harden fully before moving on.
Step 3: Turning Milano Cookies into Tombstones
Here’s where those Milano cookies become key players. Using the leftover black candy melt, pipe creepy inscriptions or even simple “RIP”s directly onto the cookies to create your tombstones. This detail adds so much character with minimal effort, and I like how these make the graveyard feel really alive. Once decorated, set them aside to let the chocolate harden at room temp or in the fridge.
Step 4: Whisking Up the Chocolate Pudding
Prepare your instant chocolate pudding by whisking the mix with cold milk until silky smooth. Trust me, whisking well is key to avoid lumps so your pudding is perfectly creamy. Let it rest a few minutes so it thickens while you prep your cups. This pudding will be the tasty “earth” your graveyard sits on!
Step 5: Layering the Graveyard Cups
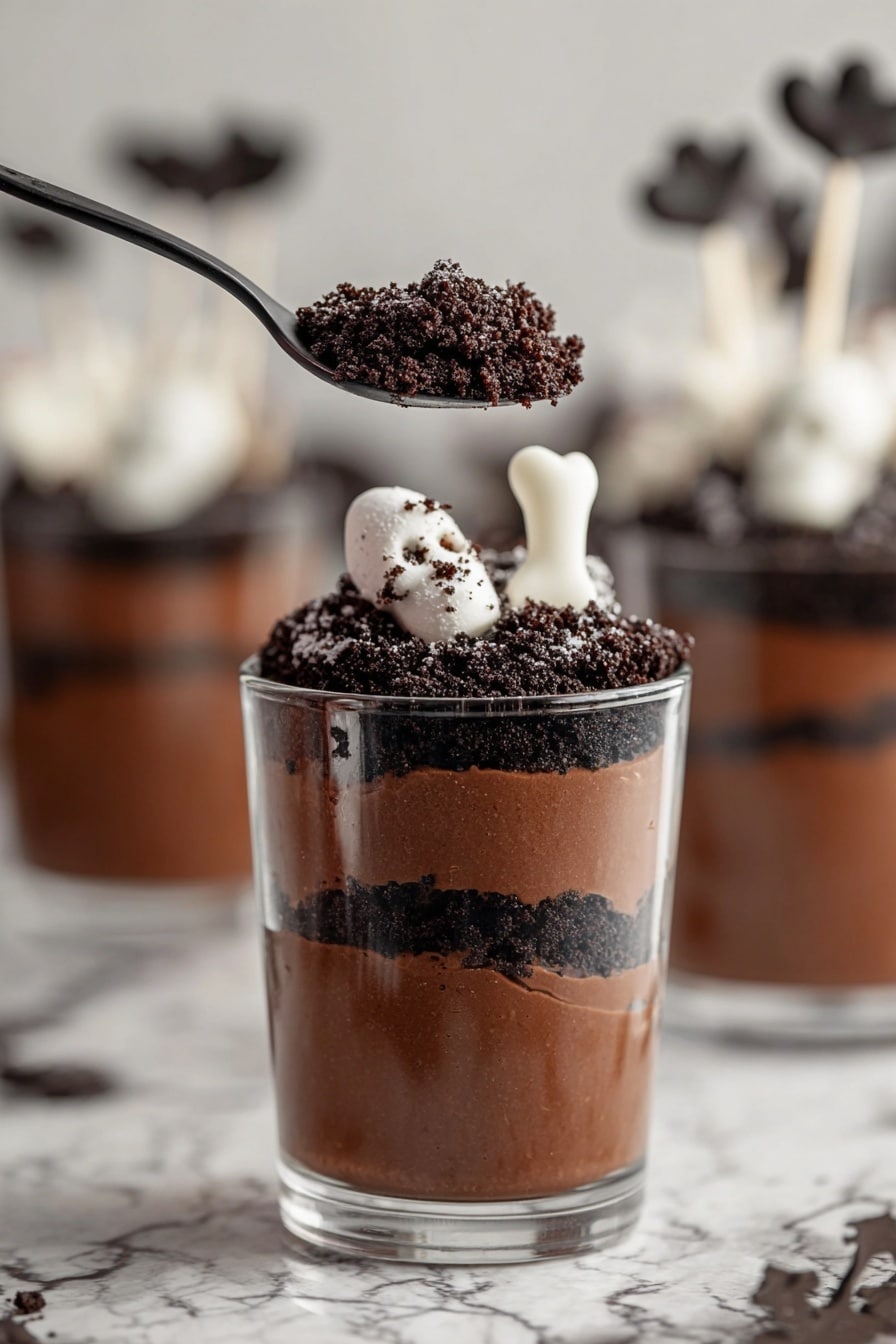
Grab your serving cups and start layering: a scoop of pudding at the bottom, then a layer of crushed Oreos for dirt texture, then pudding again, and finish with more crushed Oreos on top. It’s kind of like building your little edible Halloween landscape. I like to cover the cups and chill them for about an hour so everything sets beautifully and flavors meld.
Step 6: Bringing the Graveyard to Life
When it’s time to serve, gently stick one decorated Milano cookie into each cup as the tombstone, nestle a white chocolate ghost next to it, and place a black candy melt tree standing tall at the back. Don’t forget to sprinkle some festive Halloween sprinkles for that extra magical touch—because who doesn’t want a party on their pudding?
Tips from My Kitchen
- Melting Magic: Always melt chocolate slowly and stir often to keep it smooth and glossy.
- Piping Precision: Use a small piping tip for detailed faces and tombstone lettering; practice on parchment paper first if you’re unsure.
- Cooling Counts: Let each chocolate decoration harden completely before layering to avoid smudges.
- Serving Setup: Assemble decorations right before serving to keep ghosts and trees from softening or drooping.
How to Serve Halloween Graveyard Pudding Cups Recipe
Garnishes
I always add a smattering of Halloween-themed sprinkles on top for that final festive pop—you can never go wrong with little pumpkins or bats! Sometimes I toss in a gummy worm or two creeping out of the “dirt” if I want to surprise guests. They’re such a fun textural and visual bonus.
Side Dishes
These pudding cups shine on their own as a dessert but if you’re planning a whole Halloween spread, I recommend pairing them with light snacks like caramel popcorn or spiced pumpkin muffins. They balance the creamy richness nicely.
Creative Ways to Present
For Halloween parties, I like to serve these gravyard pudding cups in clear plastic cups or even mini cauldrons for that extra eerie effect. Setting them on a platter with dry ice underneath gives a spooky mist that wows every time!
Make Ahead and Storage
Storing Leftovers
After your spooky feast, store any leftover pudding cups covered tightly with plastic wrap or in airtight containers in the fridge. I keep the chocolate decorations separate if possible, so ghosts and tombstones don’t soften or get soggy.
Freezing
Freezing pudding cups isn’t ideal for maintaining that creamy texture and crisp decorations—I’ve tried, and the texture changes once thawed. I recommend enjoying fresh or chilled in the fridge instead.
Reheating
This treat is best served chilled, so reheating isn’t necessary. If leftovers are too cold straight from the fridge for your liking, just let the cup sit at room temperature for 10-15 minutes to soften slightly before enjoying.
FAQs
-
Can I make Halloween Graveyard Pudding Cups Recipe without black candy melts?
Absolutely! If you don’t have black candy melts, you can substitute with melted dark chocolate or use edible black icing pens for decorating. While candy melts are easier to handle and harden well, chocolate or icing will still give cute results with a little extra care.
-
How far in advance can I prepare these pudding cups?
You can prepare the pudding cups and the chocolate decorations up to a day ahead. Just store the decorations separately and add them to the cups right before serving to keep everything fresh and crisp.
-
Can kids get involved in making this recipe?
Definitely! Kids love shaping the white chocolate ghosts and decorating the tombstones. Just supervise the melting and piping steps or pre-make those for them to assemble the cups.
-
What can I use if I want a gluten-free version?
Swap out the Milano and Oreo cookies for gluten-free versions or other gluten-free crunchy cookies you enjoy. Make sure your pudding mix is also gluten-free, and you’re good to go!
Final Thoughts
I have to say, this Halloween Graveyard Pudding Cups Recipe is one of my go-to festive treats that never fail to bring smiles (and a little spooky fun) to the table. It feels fancy with all the decorations but comes together quicker than you’d think. Whether you’re making it with kids, serving it at a party, or just sneaking a cup to yourself after dark, you’ll appreciate how easy and charming it is. I absolutely recommend giving it a go—you might just find it becomes a Halloween tradition in your kitchen too!
Print
Halloween Graveyard Pudding Cups Recipe
- Prep Time: 20 minutes
- Cook Time: 0 minutes
- Total Time: 1 hour 20 minutes
- Yield: 6 cups
- Category: Dessert
- Method: No-Cook
- Cuisine: American
- Diet: Vegetarian
Description
Halloween Graveyard Pudding Cups are a spooky and fun dessert featuring layers of creamy chocolate pudding, crushed Oreos, and decorated with white chocolate ghosts, black candy melt trees, and Milano cookie tombstones. Perfect for Halloween parties, this dessert combines easy-to-make pudding with festive edible decorations for an eye-catching treat.
Ingredients
Decorations
- ⅔ cup white chocolate, melted
- ½ cup black candy melts, melted
- 6 Milano cookies
- Halloween sprinkles, optional
Pudding Cups
- 1 (3.9 ounce) box instant chocolate pudding mix
- 1 ¾ cups cold milk
- ½ – 1 cup crushed Oreos
Instructions
- Melt white chocolate: Melt the white chocolate in a microwave-safe bowl, heating in 20-second intervals and stirring until smooth. Drop heaped spoonfuls onto a parchment-lined tray and drag the bottom of the dollops down to shape ghosts. Use a toothpick to pull the chocolate out to create arms if desired. Refrigerate to set.
- Decorate ghosts: Melt the black candy melts according to package directions. Transfer to a piping bag with a small tip and pipe eyes and mouths onto the white chocolate ghosts. Set aside to fully harden.
- Create trees and tombstones: Pipe spooky tree shapes with the remaining black candy melts onto parchment paper, making a thicker base for stability. Allow trees to set completely. Pipe inscriptions onto Milano cookies with melted black candy to create tombstones.
- Prepare pudding: In a large bowl, whisk instant chocolate pudding mix with cold milk until smooth. Let the pudding sit for a few minutes to thicken.
- Assemble pudding cups: Layer pudding at the bottom of each serving cup, add crushed Oreos, then another pudding layer, finishing with Oreos. Refrigerate for 1 hour to set.
- Serve: Press a Milano cookie tombstone into each cup, place a white chocolate ghost beside it, and add a tree at the back. Sprinkle with Halloween sprinkles if desired. Serve and enjoy!
Notes
- Store pudding cups covered with plastic wrap or airtight container in refrigerator up to 3 days.
- Keep decorations separate from pudding cups until ready to serve to maintain texture.
- Use a piping bag with a fine tip for precise decorating with black candy melts.
- White chocolate ghosts can be made a day ahead and refrigerated to save prep time on party day.
- Adjust crushed Oreo quantity based on desired cookie layer thickness.
Nutrition
- Serving Size: 1 cup
- Calories: 320 kcal
- Sugar: 30 g
- Sodium: 150 mg
- Fat: 18 g
- Saturated Fat: 10 g
- Unsaturated Fat: 6 g
- Trans Fat: 0 g
- Carbohydrates: 36 g
- Fiber: 2 g
- Protein: 4 g
- Cholesterol: 15 mg

