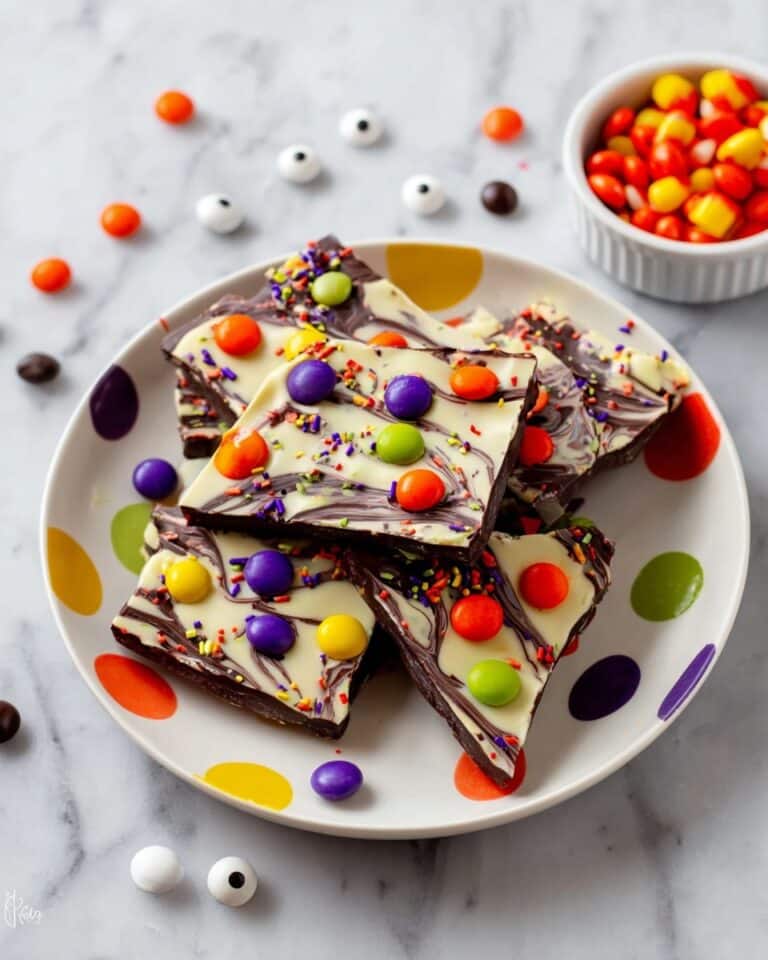
Spooky Halloween Oreo Bark Recipe
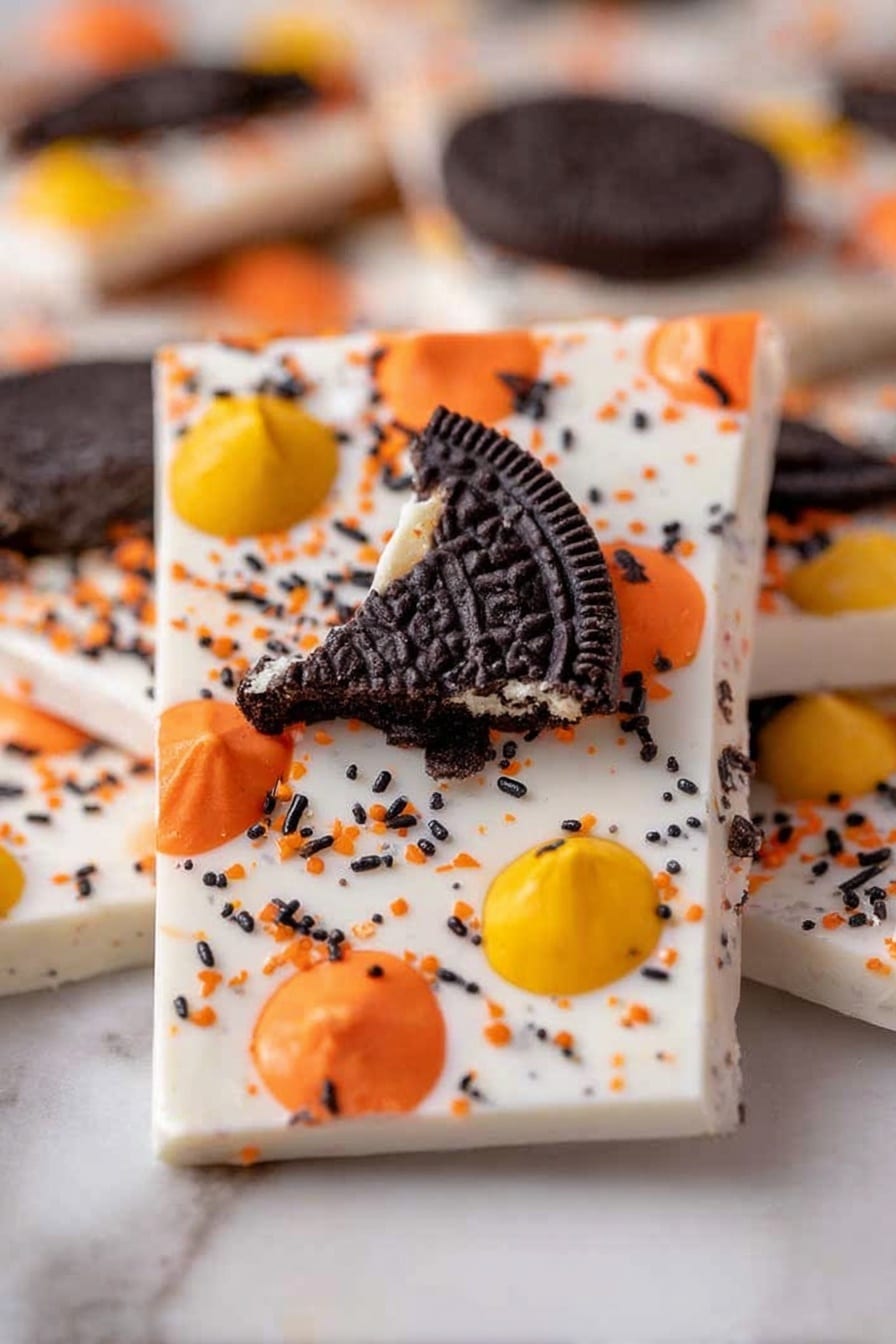
If you’re looking for a quick, fun, and irresistibly festive treat this fall, my Spooky Halloween Oreo Bark Recipe is a total win. It’s that perfect blend of sweet, crunchy, and colorful that not only looks amazing on your Halloween table but is so simple you can whip it up with your kids or for a last-minute party. Seriously, this recipe is fan-freaking-tastic and also completely customizable. Stick with me here—I’ll share my go-to tips to get it just right!
Why This Recipe Works
- Simple Ingredients: No fancy shopping required—just white chocolate, Oreos, and some fun Halloween candy.
- Quick Prep: Takes less than 10 minutes active time, perfect when you’re in a rush.
- Crowd-Pleaser: The combination of creamy white chocolate and crunchy Oreos is a party favorite every time.
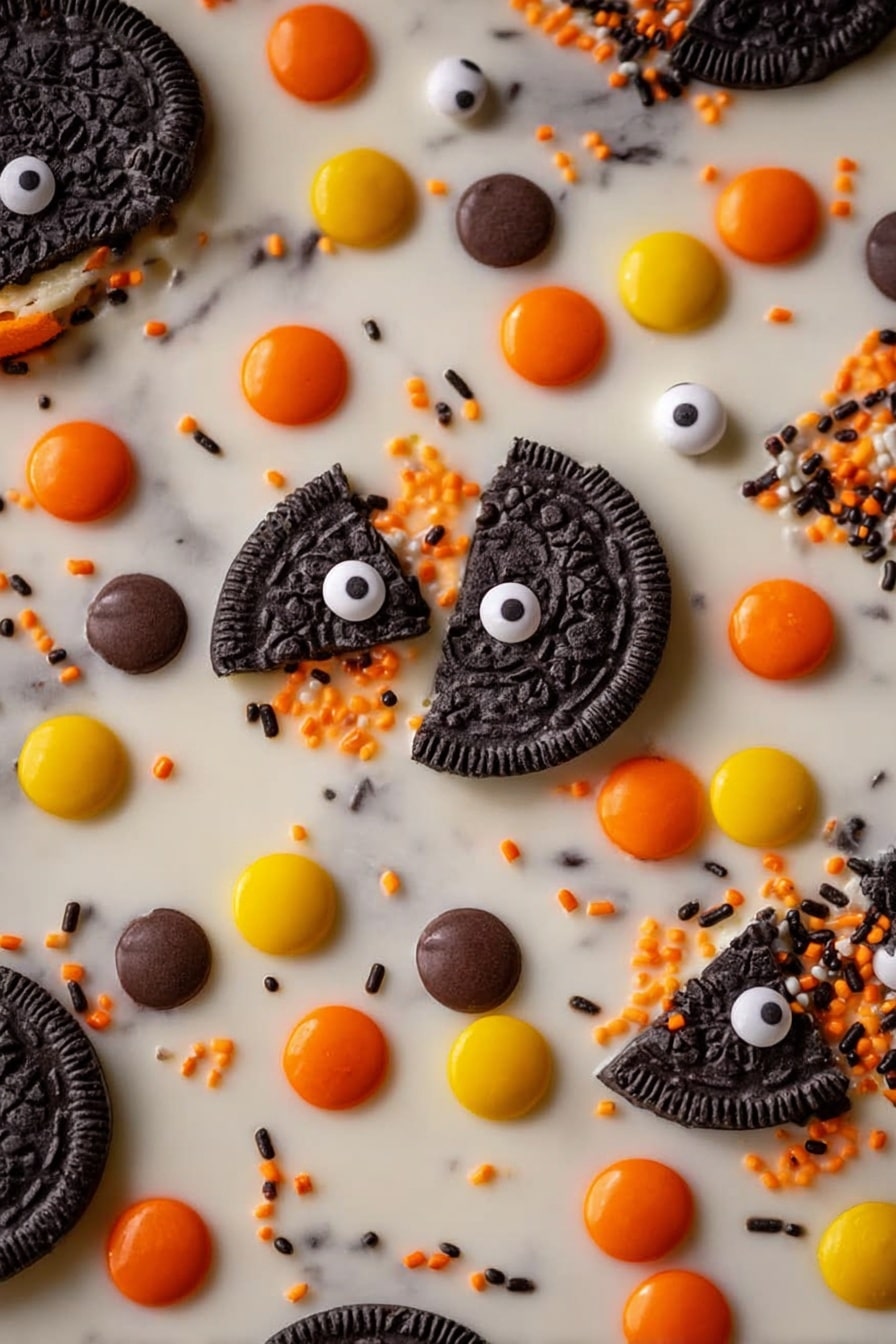
- Eye-Catching Presentation: Festive eyeball candies and colorful sprinkles make this bark a visual standout.
Ingredients & Why They Work
It’s amazing how a few simple ingredients can come together to create such a fun and tasty treat. Each ingredient brings something special—white chocolate for that creamy base, Oreos adding crunch and chocolate goodness, and the festive candies kicking the Halloween vibe into high gear. When you’re shopping, I recommend grabbing Halloween-themed Oreos for that extra spooky touch and fresh candy pieces that haven’t been sitting around.

- White chocolate: Use a good quality melting white chocolate for smooth texture and rich creaminess.
- Halloween Oreos: Regular Oreos totally work, but seasonal ones bring festive fun and that all-important chocolate crunch.
- Reese’s Pieces: Adds a pop of color and peanut butter flavor to contrast the sweetness.
- Halloween sprinkles: For that whimsical, festive look that instantly makes your bark “Halloween-approved.”
- Halloween eyeball candies: The star of the show—these little candies are simple but deliver the perfect creepy vibe.
Make It Your Way
I love how flexible the Spooky Halloween Oreo Bark Recipe is because you can really make it your own. Whether you want to dial up the spooky factor with more eyeballs, or swap in peanut butter cups instead of Reese’s pieces, this recipe welcomes tweaks. I often try different candy combos based on what I have on hand—and honestly, that’s half the fun!
- Variation: I once swapped Reese’s Pieces for mini candy corn—it gave the bark a totally different texture and a burst of Halloween colors that my kids adored.
- Dietary Modification: Use dairy-free white chocolate if you’re catering to vegan or lactose-intolerant friends; it melts beautifully and still tastes divine.
- Seasonal Change: Try peppermint Oreos and crushed candy canes during Christmas for a holiday spin on the same bark concept.
- Difficulty Level: Perfect for beginners—no baking required, just melting and assembling, which is why I make it with my little ones every year.
Step-by-Step: How I Make Spooky Halloween Oreo Bark Recipe
Step 1: Melting the White Chocolate Perfectly
Start by breaking up your white chocolate into chunks and placing them in a microwave-safe bowl. Microwave in 30-second bursts, stirring well after each session—that’s key to avoiding burning or clumping. Trust me, I’ve ruined batches by rushing this step, so take your time and stir until it’s luxuriously smooth and glossy.
Step 2: Spreading the Chocolate Base
Line a baking sheet with parchment paper—it makes cleanup a breeze and keeps your bark from sticking. Pour and spread the melted white chocolate evenly, about 1/4 inch thick. I usually use a spatula to smooth it out so it sets uniformly. Using half a baking sheet works perfectly with this amount of chocolate.
Step 3: Adding the Spooky Toppings
Coarsely chop your Halloween Oreos and scatter them across the smooth white chocolate. Follow up with Reese’s Pieces, festive Halloween sprinkles, and those adorable eyeball candies. Press them lightly so they stick to the chocolate but don’t press too hard or they’ll sink in. This is the moment your bark starts looking like a Halloween masterpiece!
Step 4: Chilling to Perfection
Pop the baking sheet into the fridge for at least an hour—or until the chocolate is firm to the touch. This chilling step is crucial for clean, easy breaks. Once firm, break it into fun irregular pieces and get ready to impress your friends and family!
Tips from My Kitchen
- Room Temperature Chocolate: Bring white chocolate to room temperature before melting to help it melt evenly without burning.
- Layering Toppings: Add toppings as soon as you spread the chocolate so they stick well—not after it starts to harden.
- Avoid Freezing: Don’t freeze the bark—it can cause condensation and make the chocolate dull or sticky.
- Breaking Technique: Use your hands to gently snap the bark into rustic pieces—avoid using a knife which can shatter it unevenly.
How to Serve Spooky Halloween Oreo Bark Recipe
Garnishes
I like to finish the bark with a few extra sprinkles and a handful of eyeball candies on top after it’s set, just to make it look extra spooky and festive. It adds such a cute, playful touch that your guests will love, especially kids who get a kick out of the eyeballs popping out.
Side Dishes
Pair your Spooky Halloween Oreo Bark with some warm apple cider or a cup of creamy hot chocolate for the ultimate Halloween treat spread. I’ve also enjoyed it alongside soft pumpkin cookies or roasted pumpkin seeds for a nice salty-sweet balance.
Creative Ways to Present
One of my favorite ways to present this bark is arranging the pieces on a black platter, scattered with a few faux cobwebs and tiny plastic spiders for that extra spooky ambiance. You could also wrap small bundles in clear cellophane tied with orange ribbon for cute Halloween party favors. Presentation really elevates this simple treat!
Make Ahead and Storage
Storing Leftovers
I store leftover bark in an airtight container between layers of parchment paper in the fridge. It keeps the bark crisp and prevents it from absorbing any fridge odors. It usually lasts about a week this way—if it even lasts that long!
Freezing
I don’t recommend freezing this bark because white chocolate doesn’t always thaw well and can develop a whitish bloom (fat bloom), which affects texture and appearance. It’s best enjoyed fresh or refrigerated.
Reheating
No reheating needed here! Just let the bark come to room temperature briefly if it’s been chilled too long, and it’s ready to enjoy. If it’s in the fridge, 10-15 minutes on the counter is usually perfect.
FAQs
-
Can I use regular Oreos instead of Halloween-themed ones?
Absolutely! Regular Oreos work just as well taste-wise. Halloween Oreos are mainly for the festive look and seasonal fun, so feel free to use whatever you have on hand.
-
What if my white chocolate seizes or clumps when melting?
This usually happens if any water gets into the chocolate or it overheats. Be sure to dry your tools and microwave in short bursts, stirring frequently to avoid overheating. Adding a tiny bit of vegetable oil can sometimes help smooth it out if this happens.
-
Can I add nuts or dried fruit to the Oreo bark?
Definitely! Chopped nuts, like pecans or almonds, or dried cranberries add great texture and flavor. Just sprinkle them on with your other toppings before chilling.
-
How should I break the bark into pieces?
Once chilled and firm, gently use your hands to snap the bark into rustic chunks. Avoid using a sharp knife as it can cause the bark to shatter unpredictably.
-
Can I make this recipe ahead of time for a Halloween party?
Yes, you can prepare the bark a day or two in advance! Just store it in an airtight container in the fridge until ready to serve. This recipe is perfect for easy, stress-free Halloween entertaining.
Final Thoughts
This Spooky Halloween Oreo Bark Recipe is one of those simple pleasures that bring a smile every time I make it. It’s quick, fun, and brings out everyone’s inner kid, no matter their age. I love how it adds a little magic to Halloween gatherings, and honestly, it’s so addictive you might want to double the batch. I can’t wait for you to try it and put your own spin on it—trust me, your Halloween guests will thank you!
Print
Spooky Halloween Oreo Bark Recipe
- Prep Time: 5 minutes
- Cook Time: 0 minutes
- Total Time: 1 hour 5 minutes
- Yield: 10 servings
- Category: Dessert
- Method: No-Cook
- Cuisine: American
Description
Create a fun and festive Spooky Halloween Oreo Bark featuring creamy white chocolate loaded with chopped Halloween Oreos, Reese’s Pieces, colorful sprinkles, and spooky eyeball candies. This no-bake treat is perfect for Halloween parties and is easy to make with just a few ingredients.
Ingredients
Main Ingredients
- 12 oz white chocolate
- 7 Halloween Oreos, chopped
- 1/4 cup Reese’s Pieces
- Halloween sprinkles, as desired
- Halloween eyeball candies, as desired
Instructions
- Melt the chocolate: Place the 12 oz white chocolate in a microwave-safe bowl. Heat in 30 second increments, stirring thoroughly between each increment until fully melted and smooth.
- Spread chocolate: Pour and spread the melted white chocolate evenly over a parchment-lined baking sheet, covering about half of the sheet for this amount of chocolate.
- Add toppings: Sprinkle the chopped Halloween Oreos, Reese’s Pieces, Halloween sprinkles, and eyeball candies evenly over the melted white chocolate while it is still warm.
- Chill the bark: Place the baking sheet in the refrigerator and chill for 1 hour to allow the chocolate to set completely.
- Break and serve: Once firm, remove from the fridge and break the bark into pieces. Serve and enjoy your festive Halloween treat!
Notes
- Use parchment paper to prevent sticking and for easy cleanup.
- Be careful not to overheat the white chocolate as it can seize.
- Customize toppings with your favorite Halloween candies or nuts.
- Store the bark in an airtight container in the refrigerator for up to one week.
Nutrition
- Serving Size: 1 piece
- Calories: 220 kcal
- Sugar: 20 g
- Sodium: 65 mg
- Fat: 14 g
- Saturated Fat: 8 g
- Unsaturated Fat: 5 g
- Trans Fat: 0 g
- Carbohydrates: 22 g
- Fiber: 1 g
- Protein: 2 g
- Cholesterol: 10 mg

