Creepy Halloween Spider Cupcakes Recipe
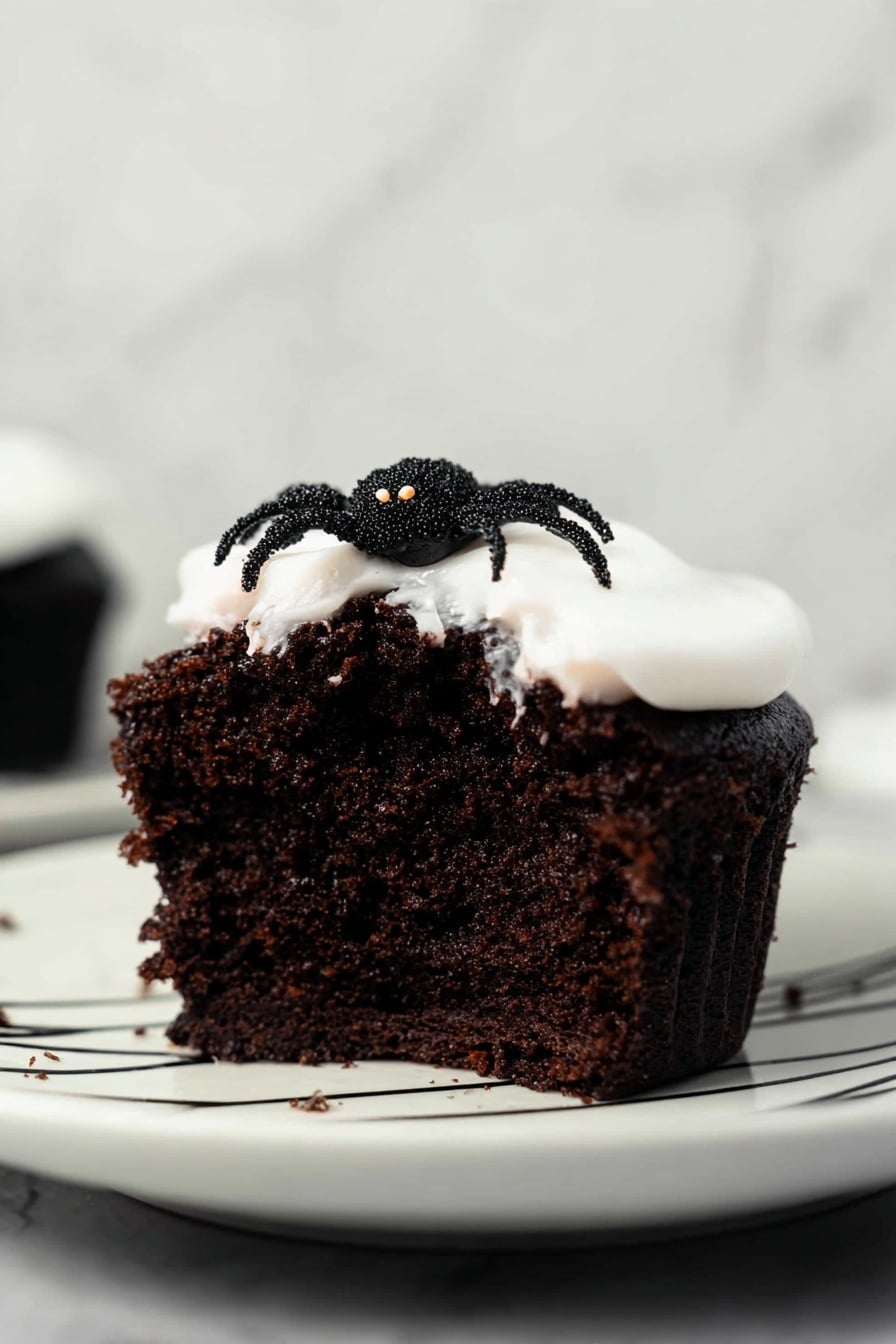
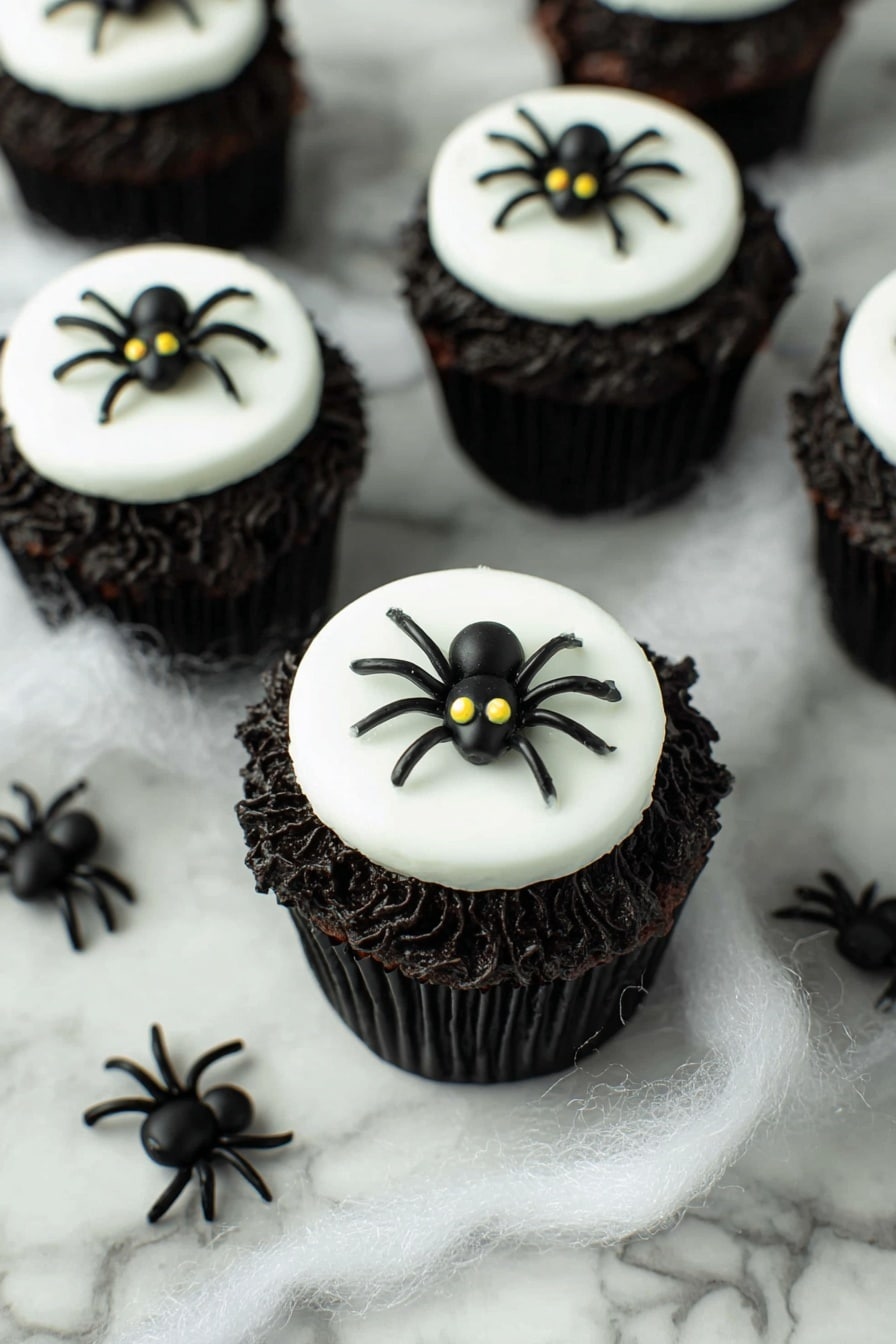
If you’re looking for a spooky, fun, and downright delicious treat this fall, let me share my all-time favorite Creepy Halloween Spider Cupcakes Recipe with you. These cupcakes aren’t just adorable—they’re packed with rich pumpkin and chocolate flavors, topped with the creamiest, darkest buttercream, and finished off with the cutest little spider decorations that your guests will love to stare at before they dive in. Trust me, once you make these, Halloween will never look or taste the same!
Why This Recipe Works
- Perfect Flavor Blend: The combination of pumpkin puree and cocoa powder creates a moist, rich cupcake that’s not overly sweet.
- Easy Yet Impressive Decoration: Using simple buttercream and fondant lets you create the creepy spider look without getting overwhelmed.
- Moist and Tender Texture: The careful folding technique keeps the cupcakes fluffy and prevents toughness.
- Crowd-Pleasing Fun Factor: Kids and adults alike will adore the spooky spider faces, making them a Halloween party hit.
Ingredients & Why They Work
The beauty of this Creepy Halloween Spider Cupcakes Recipe lies in the blend of pantry staples and seasonal flavors. Each ingredient is chosen to ensure the cupcakes come out perfectly moist, flavorful, and with just the right balance of sweetness. Plus, I’ve got some tips to help you shop smart and pick the best options.
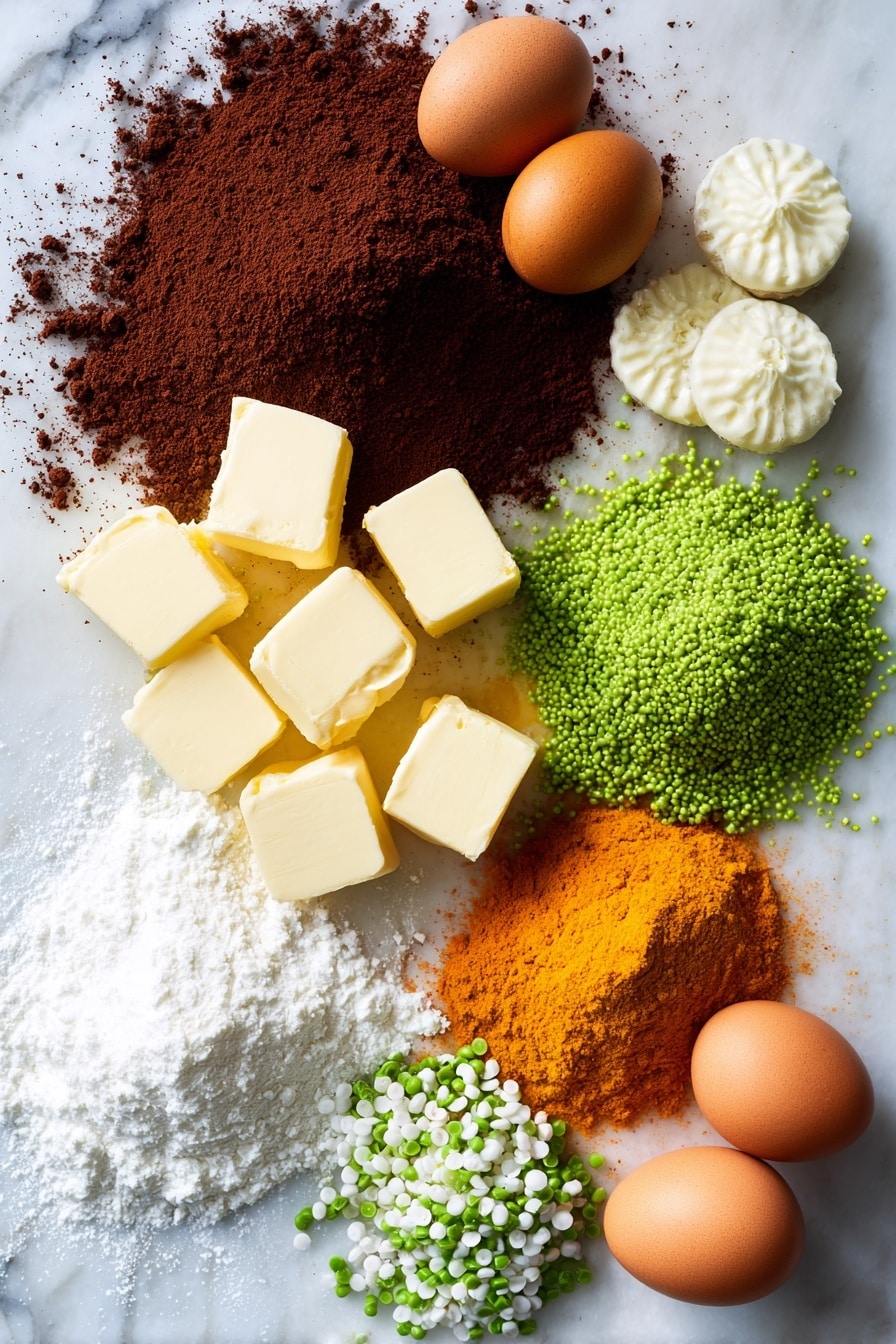
- Self-raising flour: Saves you from measuring baking powder separately, giving the cupcakes their rise with ease.
- Cocoa powder: Use unsweetened, natural cocoa for that genuine chocolate flavor and to deepen the color.
- Butter (salted): Salted butter enhances flavor, but if you only have unsalted, just add a pinch of salt.
- Granulated sugar: Sweetens perfectly without making the cupcakes too heavy or gritty.
- Eggs: Bind everything together and add richness—room temperature is ideal for better mixing.
- Pumpkin puree: Adds moisture, subtle sweetness, and that seasonal flair everyone loves.
- Milk: Keeps the batter creamy and helps create a tender crumb.
- Baking powder & salt: Work together to ensure cupcakes rise well and the flavors balance.
- Pumpkin pie spice: The secret kick of spice that elevates these cupcakes into fall perfection.
- Vanilla extract: Rounds out the flavor, adding warmth and depth.
- Powdered sugar (for buttercream): Key for silky smooth frosting with the right sweetness.
- Black cocoa powder: Gives the buttercream that intense dark color and rich chocolate taste.
- Black food coloring: Optional but perfect for that creepy, inky black frosting look.
- White fondant: Essential to craft our spider’s bodies and make them pop visually.
- Tiny green sprinkles: For the spider eyes — they add a little eerie sparkle that’s just perfect for Halloween.
Make It Your Way
One of my favorite things about this Creepy Halloween Spider Cupcakes Recipe is how easy it is to tweak and make it your own. Whether you want to dial up the spice, swap out ingredients for diet needs, or get extra creative with decorations, there’s plenty of room to experiment!
- Variation: I once swapped out the pumpkin pie spice for cinnamon and nutmeg only, and the cupcakes still tasted fantastic — a little less spicy but still absolutely autumnal.
- Diet tweak: For gluten-free, you can use a 1:1 gluten-free baking flour and it works surprisingly well, just watch your baking time carefully.
- Extra spooky: Adding a drop of red gel coloring to the buttercream before you color it black creates a deep blood-like hue that looks killer on party tables.
- Mini spiders: You can make smaller cupcakes too, just adjust the baking time and be sure to scale your fondant decorations accordingly.
Step-by-Step: How I Make Creepy Halloween Spider Cupcakes Recipe
Step 1: Mix Your Dry Ingredients Carefully
Start by whisking together your self-raising flour, cocoa powder, pumpkin pie spice, baking powder, and salt—then sift it all to make sure there are no lumps lurking. I find sifting really helps get that light crumb in the cupcakes, so don’t skip this! Set this aside while you work on your wet ingredients.
Step 2: Cream Butter and Sugar Until Fluffy
In a separate bowl, beat the butter and sugar together until light and fluffy—this usually takes about 2 minutes on medium speed. Don’t forget to scrape the sides of the bowl halfway through so everything blends evenly. It makes a huge difference in the texture of your cupcakes!
Step 3: Add Eggs and Pumpkin Puree
Beat the eggs in one at a time—this keeps the batter nice and smooth. Scrape down the bowl again to avoid any clumps. Next, add the pumpkin puree. It might look a little curdled at first, but don’t worry—that’s totally normal and it won’t affect your cupcakes.
Step 4: Fold in Dry Ingredients and Milk
Gently fold in half of your sifted dry ingredients, taking care not to overmix. Then add the milk and fold once more before adding the rest of the flour mixture. Scrape the bowl’s sides and bottom to fully combine everything, followed by your vanilla extract for an extra flavor boost.
Step 5: Bake Perfectly Sized Cupcakes
Scoop the batter into cupcake liners about three-quarters full (using a cookie scoop really helps with even sizes). Bake at 175°C (about 350°F) for 15 to 18 minutes. You’ll know they’re ready when a toothpick poked in comes out clean. Let them sit for a couple of minutes in the pan before transferring to a wire rack, and cover with a kitchen towel while cooling to retain moisture.
Step 6: Make the Dark, Velvety Buttercream
Beat softened butter until creamy, then sift in powdered sugar and black cocoa powder. Mix lightly at first so the sugar doesn’t fly everywhere—I always do this by hand before using the mixer. Beat until smooth and fluffy, scraping down frequently to make sure everything is incorporated. After adding vanilla, let the frosting rest for 10 to 20 minutes so the black cocoa really darkens the buttercream.
Step 7: Intensify the Black Frosting Color
If your buttercream still isn’t as dark as you want, add a few drops of gel-based black food coloring—or, alternatively, mix a little red, green, and brown food coloring for a deep black shade. Then let it rest again for 10 to 15 minutes for the color to deepen!
Step 8: Pipe the Buttercream
Fill your piping bag with the black buttercream. Use the star tip to pipe a ring of reverse stars around the cupcake, creating a little nest for the spider. If you need more buttercream, I suggest prepping it in two smaller bags for ease.
Step 9: Create the Spider Bodies
Roll out white fondant thinly, about ⅛ inch thick, and cut out small circles to fit on top of your cupcakes. Place these gently in the center of each frosted cupcake. For the spiders, switch to a round tip to pipe small and slightly bigger circles of black buttercream to form the spider’s head and body right on the fondant.
Step 10: Add Spider Legs and Eyes
Pipe four legs on each side of the spider with your round tip. Finally, use tweezers to carefully place tiny green sprinkles for the spider’s eyes. This small detail really brings the creepy-cute spider to life!
Tips from My Kitchen
- Using a Cookie Scoop: It helps keep cupcake sizes uniform, so they bake evenly.
- Cover While Cooling: Wrapping the cupcakes with a kitchen towel prevents drying out—trust me, this saved many batches!
- Fondant Handling: Knead it till smooth and use a dusting of powdered sugar or cornstarch to keep it from sticking while rolling.
- Avoid Soggy Fondant: Keep decorated cupcakes in an air-conditioned room but never in the fridge to avoid condensation buildup.
How to Serve Creepy Halloween Spider Cupcakes Recipe
Garnishes
I like to keep these cupcakes simple but striking by focusing on the spiders’ eyes with tiny green sprinkles. It adds just the right eerie pop without overwhelming the look. Sometimes, I’ll toss on some edible glitter for a little extra sparkle if it’s a big party!
Side Dishes
For a Halloween spread, I usually serve these cupcakes alongside some spiced cider or a rich hot chocolate with whipped cream. If you want savory sides, cheesy pumpkin dip and veggie sticks work brilliantly to balance all that sweet goodness.
Creative Ways to Present
One year, I displayed these cupcakes on a tiered cake stand decorated with faux spider webs and little plastic spiders scattered around. It made the creepy spider theme feel even more immersive. Another fun idea is placing cupcake “webs” made from piped white chocolate or icing around the cupcakes on your platter.
Make Ahead and Storage
Storing Leftovers
After decorating, store your cupcakes in an airtight container at room temperature for up to 2 days. I avoid refrigerating because the fondant can get sticky or weepy. Keeping them covered with a cloth helps retain moisture beautifully.
Freezing
Freezing decorated cupcakes isn’t ideal because the fondant can lose texture, but you can freeze the plain cupcakes for up to 3 months. Just wrap them tightly and freeze in a single layer. When you’re ready, thaw at room temperature before frosting and decorating.
Reheating
Reheat unfrosted cupcakes in a low oven (about 150°C/300°F) for 5-7 minutes to refresh them before frosting. For frosted cupcakes, I enjoy them at room temperature so the buttercream is nice and creamy without melting.
FAQs
-
Can I make the cupcakes ahead of time?
Definitely! You can bake the cupcakes a day or two in advance and store them in an airtight container. It’s best to frost them the same day you plan to serve for the freshest look and taste.
-
What if I don’t have black cocoa powder?
Regular cocoa powder works fine but your buttercream will be lighter in color. You can use black food coloring to darken it, although black cocoa powder gives a richer flavor and deeper color without extra coloring.
-
How do I keep the fondant from getting soggy?
Keep your cupcakes at room temperature in a dry, air-conditioned space. Avoid the fridge since condensation makes fondant sticky. Also, don’t cover cupcakes too tightly right after decorating.
-
Can I substitute the pumpkin puree?
Yes! You can try mashed sweet potatoes or butternut squash puree as alternatives, but the pumpkin pie spice and moisture level might need slight adjustments to get the perfect texture.
-
Is it okay to use liquid food coloring instead of gel?
Gel food coloring is preferred since it won’t thin out your buttercream. Liquid food coloring can change the consistency if used in large amounts, making piping tricky.
Final Thoughts
I hope you’ve enjoyed me sharing this Creepy Halloween Spider Cupcakes Recipe with you as much as I love making them! They’ve become a Halloween tradition in my home because they’re simple to make but sure to wow. Once you get the hang of the folding technique and the fun decorating, you’ll be whipping these up for every spooky celebration to come. So grab your piping bags, roll out that fondant, and let’s make Halloween deliciously creepy, together!
Print
Creepy Halloween Spider Cupcakes Recipe
- Prep Time: 20 minutes
- Cook Time: 18 minutes
- Total Time: 1 hour 35 minutes
- Yield: 14 cupcakes
- Category: Dessert
- Method: Baking
- Cuisine: American
Description
These Creepy Halloween Spider Cupcakes combine rich chocolate pumpkin cupcakes with a smooth black buttercream frosting decorated with adorable fondant spiders, perfect for spooky celebrations.
Ingredients
Chocolate Cupcakes
- 180 g self raising flour
- 20 g cocoa powder
- 100 g salted butter
- 200 g granulated sugar
- 2 eggs
- 200 g pumpkin puree
- 100 ml milk
- ½ teaspoon baking powder
- ¼ teaspoon salt
- ½ teaspoon pumpkin pie spice
- 1 teaspoon vanilla extract
Buttercream
- 450 g powdered sugar
- 225 g salted butter
- 2 tablespoons black cocoa powder
- 2 tablespoons milk
- 1 teaspoon vanilla extract
- Black food coloring
Decoration
- 175 g white fondant
- Tiny green sprinkles (for the spiders’ eyes)
Instructions
- Prepare the Oven and Liners: Preheat your oven to 175°C and line a cupcake pan with muffin liners or cupcake liners.
- Mix Dry Ingredients: In a mixing bowl, whisk together self-raising flour, cocoa powder, pumpkin pie spice, baking powder, and salt. Sift the mixture and set aside.
- Cream Butter and Sugar: In a separate bowl, combine the granulated sugar and salted butter. Beat on medium speed for about 2 minutes until light and fluffy, scraping the sides and bottom halfway through.
- Add Eggs: Beat in the eggs one at a time, incorporating each fully before adding the next. Scrape the bowl’s sides and bottom midway to ensure even mixing.
- Add Pumpkin and Fold Dry Ingredients: Mix in the pumpkin puree; it’s normal if the mixture curdles. Gradually fold in half of the dry ingredients without overmixing.
- Add Milk and Remaining Flour: Fold in the milk, then fold in the remaining dry ingredients. Scrape the bowl thoroughly to combine.
- Mix in Vanilla Extract: Add the vanilla extract and stir well.
- Scoop Batter and Bake: Fill each cupcake liner about three-quarters full with batter. Bake for 18 minutes or until a toothpick inserted in the center comes out clean.
- Cool Cupcakes: Let cupcakes rest in the pan for 1 to 2 minutes, then transfer to a cooling rack and cover with a kitchen towel to keep moist until completely cool.
- Make Buttercream: Beat the salted butter in a large bowl until smooth and creamy. Sift in powdered sugar and black cocoa powder. Mix lightly with a spatula and then beat on medium speed until smooth and well combined.
- Finish Buttercream: Scrape the bowl and beaters to incorporate all ingredients. Add vanilla extract and beat again. Let the frosting rest 10–20 minutes to deepen color.
- Color Buttercream: If the frosting is not black enough, add black food coloring or a mix of red, green, and brown gel food colors. Mix well and rest another 10–15 minutes.
- Prepare Piping Bags: Transfer buttercream to a piping bag. Fit two more piping bags with a star tip (#1M) and a small round tip (#3).
- Pipe Base Frosting: Insert the buttercream bag into the star tip bag and pipe reverse stars in a circle on each cupcake.
- Shape Fondant Circles: Knead the white fondant until soft and pliable. Roll it out to about ⅛ inch thickness. Cut 2-inch diameter circles—enough for all cupcakes.
- Apply Fondant: Place each fondant circle in the center on top of the piped frosting on every cupcake.
- Pipe Spiders: Switch the buttercream to the small round tip bag. Pipe a small circle for the spider’s body, then a smaller circle for the head in front. Pipe 4 legs on each side.
- Add Eyes: Using tweezers, place two tiny green sprinkles on each spider’s head to resemble eyes.
Notes
- Scrape the bowl during mixing to ensure all ingredients blend evenly with no lumps.
- A cookie scoop or ice cream scoop with a spring release helps keep consistent cupcake sizes.
- Adjust baking time if using liners larger or smaller than 5 cm diameter by 3.5 cm high.
- Cover cupcakes with a kitchen towel while cooling to maintain moisture and prevent drying.
- Lightly mixing powdered sugar and cocoa with a spatula before beating prevents sugar dust from flying.
- Gel-based food coloring is preferred to maintain frosting texture; a red-green-brown mix can substitute black coloring.
- If buttercream quantity is too large for one bag, divide into two bags and swap piping bags as needed.
- Knead fondant well and dust workspace with icing sugar or cornstarch to avoid sticking.
- Fondant sizes can vary depending on cupcake size; adjust cutter accordingly.
- Store cupcakes in an air-conditioned room to avoid fondant sogginess; avoid refrigeration to prevent condensation.
Nutrition
- Serving Size: 1 cupcake
- Calories: 350 kcal
- Sugar: 30 g
- Sodium: 150 mg
- Fat: 20 g
- Saturated Fat: 12 g
- Unsaturated Fat: 6 g
- Trans Fat: 0 g
- Carbohydrates: 40 g
- Fiber: 3 g
- Protein: 4 g
- Cholesterol: 65 mg

