Witch Hat Cupcakes Recipe
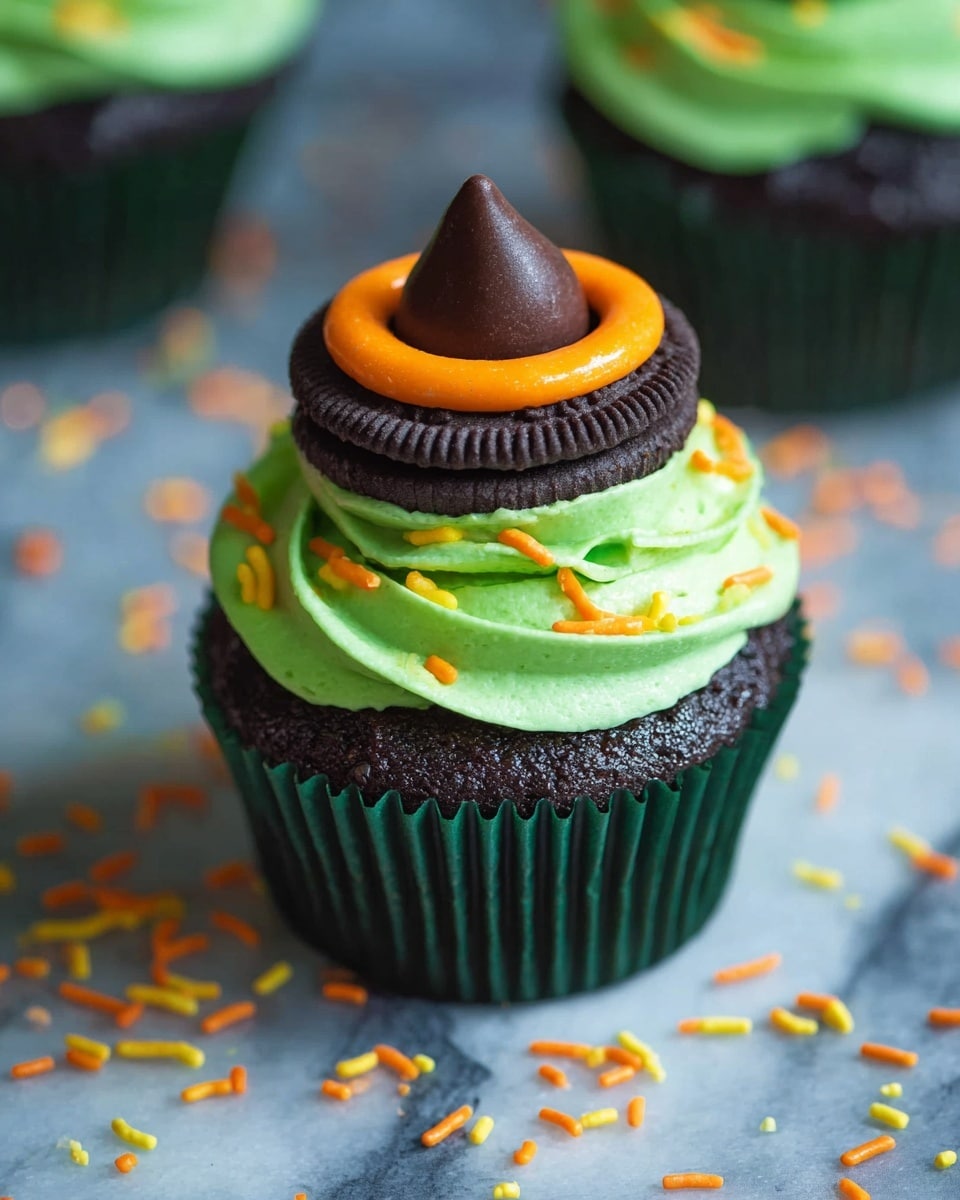
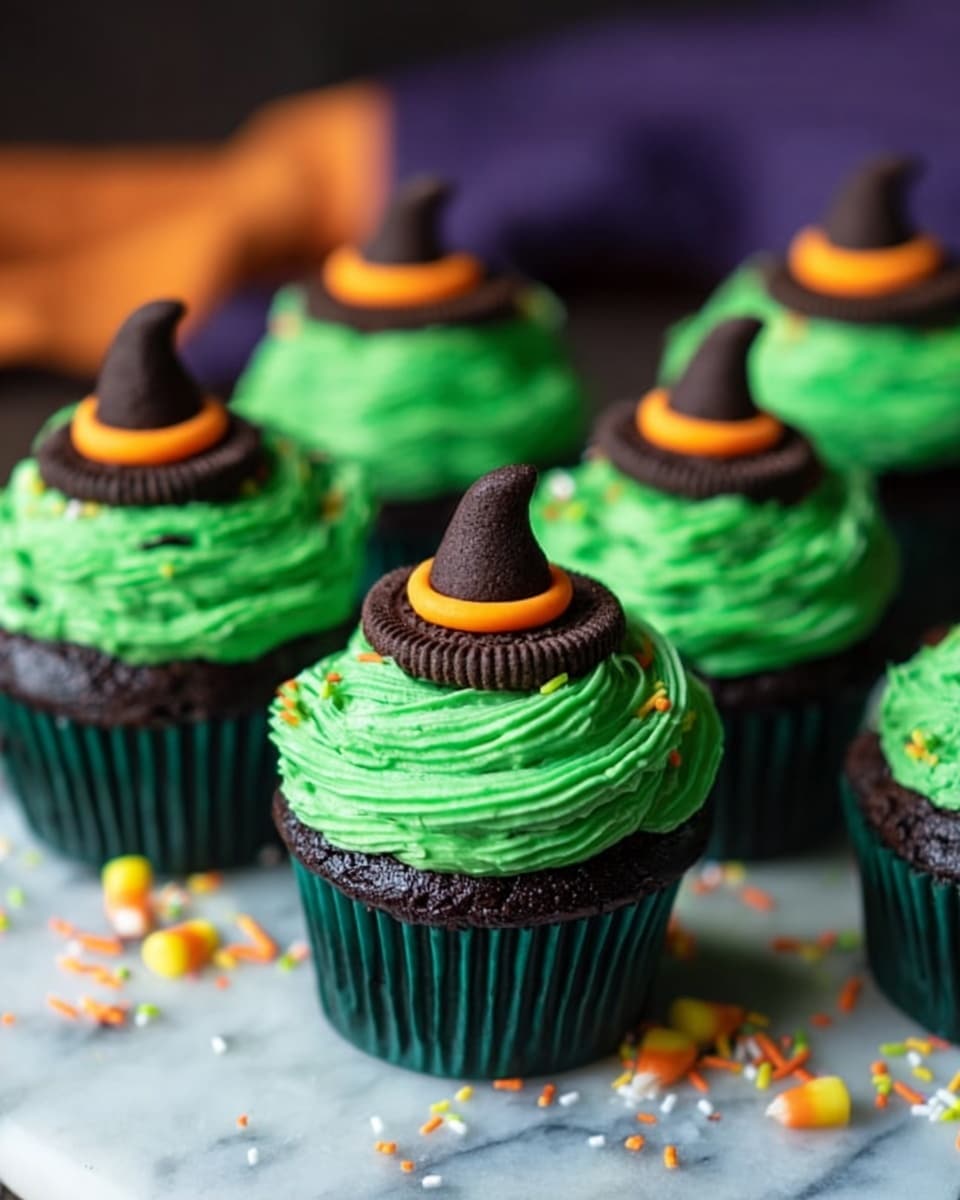
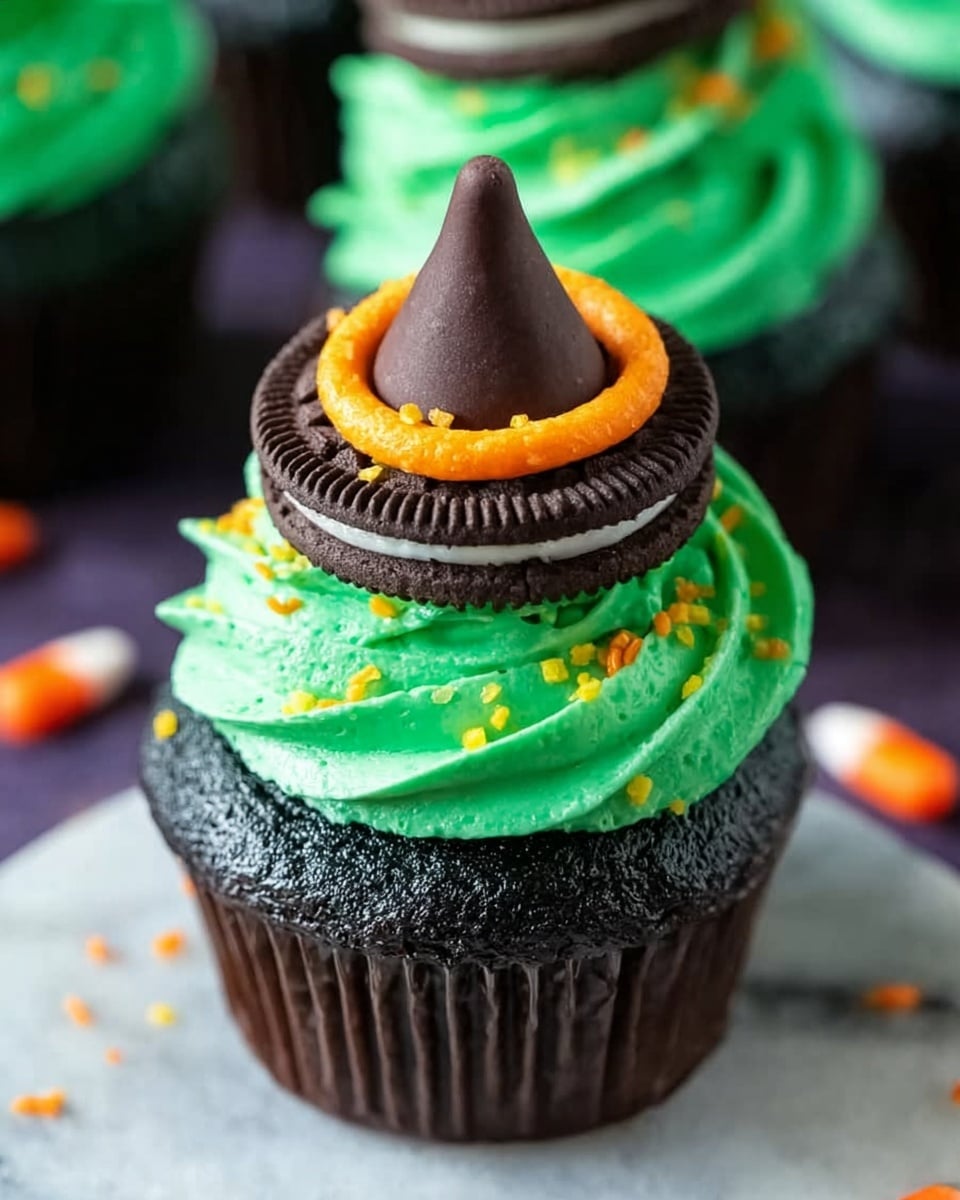
If you’re looking to delight friends and family with a spooky yet irresistibly delicious treat, this Witch Hat Cupcakes Recipe is exactly what you need. Imagine moist chocolate cupcakes topped with whimsical witch hats made from Oreos and Hershey’s kisses, all dressed up with bright, creamy frosting—it’s a fan-freaking-tastic recipe that’s perfect for Halloween or anytime you want to add a little magic to your baking. Trust me, once you try making these, you’ll want to whip them up again and again!
Why This Recipe Works
- Simple Yet Impressive: The look of the witch hats is surprisingly easy to achieve, making you look like a pro without stress.
- Flavor Harmony: The classic chocolate cupcake pairs perfectly with tangy cream cheese frosting and the crunch of Oreos for a balanced bite.
- Customizable Colors: You can easily swap food coloring to match any party theme or holiday beyond Halloween.
- Kid-Friendly Assembly: Great hands-on activity that kids can help with, from frosting to decorating, making it a fun family project.
Ingredients & Why They Work
Every ingredient in this Witch Hat Cupcakes Recipe has its role, creating a delicious balance of flavor and texture while keeping the process simple and approachable. Plus, shopping for them is a breeze since most are pantry staples or easy to find at any grocery store.
- Chocolate Cupcakes: The rich, fudgy base that holds the whole treat together and satisfies that chocolate craving.
- Oreo Cookies: Perfectly shaped to create the iconic witch hat base with a crunchy texture contrast.
- Hershey’s Chocolate Kisses: These form the pointed ‘tip’ of the witch hat, adding a creamy chocolate hit.
- Cream Cheese Frosting: Tangy and smooth frosting that provides a luscious canvas for colorful decorating and height on the cupcake.
- Food Coloring (Green & Orange): Brings the cupcakes to life with vibrant hues, making them festive and visually striking.
- White and Orange Sprinkles: Adds extra texture and playful pops of color on top of the witch hats for that magical finish.
Make It Your Way
I love how this Witch Hat Cupcakes Recipe lets you get creative with decorating. Whether you want to swap out green and orange for purple and black, or add a little edible glitter for sparkle, this recipe is a perfect starting point for personalization that fits your party vibe or mood.
- Variation: One year, I swapped the cream cheese frosting for a vanilla buttercream dyed a deep purple—super festive and just as delicious.
- Dietary Modifications: Use dairy-free cream cheese and vegan chocolate kisses to make these cupcakes friendly for vegan friends.
- Seasonal Twist: Swap orange frosting and sprinkles for red and green around Christmas for magical holiday witch hats.
- Difficulty Level: If you want to keep things ultra-simple, skip the food coloring and sprinkles—but honestly, I recommend the full experience for that wow factor.
Step-by-Step: How I Make Witch Hat Cupcakes Recipe
Step 1: Baking the Perfect Chocolate Cupcakes
Start with your favorite chocolate cupcake recipe or a trusted box mix—I’ve found both work beautifully here. Bake 12 cupcakes in a standard muffin tin and let them cool completely before decorating. Pro tip: cooling fully prevents frosting from melting and keeps your cupcakes looking sharp and neat.
Step 2: Coloring and Preparing the Frosting
Make a half-batch of cream cheese frosting (I like my frosting tangy, not too sweet). Separate about ½ cup of the frosting into another bowl. Add green food coloring to the larger portion, mixing until you get a bright, inviting shade. Add orange to the smaller bit—feel free to adjust color intensity to your liking. This dual-color frosting sets the tone for the fun design on your witch hats.
Step 3: Crafting the Witch Hat Toppers
Carefully twist the Oreo cookies in half to separate the top from the bottom. This step works best if your Oreos are at room temperature—too cold, and they might crumble. Next, place a tiny spoonful of orange frosting in the center of the Oreo top half, right where the cream was. Gently press a Hershey’s chocolate kiss on top to form the pointed tip of the witch hat. Sprinkle some white and orange sprinkles around the base of the kiss for a magical finishing touch. Set these aside while you prepare the cupcakes.
Step 4: Decorating the Cupcakes
Using a piping bag fitted with a round or star tip, pipe the green frosting onto the center of each cooled cupcake, spiraling gently upwards to create the ‘hat’ shape. Don’t pipe all the way to the edges; you want a neat tower of frosting. Once piped, carefully place your Oreo witch hat topper on the frosting. Voilà—instant enchanting Halloween magic!
Step 5: Chill and Serve
Cover the cupcakes loosely with plastic wrap and refrigerate them until you’re ready to serve. The chill helps the frosting set perfectly and keeps the hats perched just right. When it’s party time, bring them out and watch the smiles spread around the room.
Tips from My Kitchen
- Twisting Oreos: Warm Oreos slightly in your hands before twisting to prevent them from crumbling.
- Frosting Consistency: If your cream cheese frosting feels too thick for piping, add a teaspoon of milk to loosen it without sacrificing flavor.
- Color Mixing: When mixing the food coloring, go slow—you can always add more color but can’t take it away once too intense.
- Storage Solution: Store cupcakes in a single layer to protect your delicate witch hats from getting squished.
How to Serve Witch Hat Cupcakes Recipe
Garnishes
I always go for a mix of white and orange sprinkles on the witch hats because they add just the right amount of festive sparkle and texture. Sometimes I toss in edible glitter or tiny candy stars to make them even more enchanting. It’s these little details that turn cute cupcakes into a Halloween party showstopper.
Side Dishes
These Witch Hat Cupcakes pair beautifully with a warm apple cider or a spooky punch for that ultimate fall vibe. If you want to offer something savory alongside, simple finger foods like mini sandwiches or stuffed mushrooms work great, balancing out the sweet decadence.
Creative Ways to Present
When I’ve hosted Halloween parties, I like to arrange the cupcakes on a black cake stand adorned with fake spider webs and little plastic spiders scattered around. You can also place them on plates lined with themed napkins or even serve them in decorative mini cauldrons for a quirky touch. Guests love the immersive experience almost as much as the cupcakes!
Make Ahead and Storage
Storing Leftovers
I store leftover Witch Hat Cupcakes in an airtight container in the fridge—they stay fresh for up to three days. To keep the hats intact, I place them in a single layer to avoid smushing the frosting or toppers. When bringing to a party or event, I recommend a sturdy container with individual cupcake slots.
Freezing
If you want to freeze these cupcakes, I suggest freezing them without the Oreo witch hats first—frost the cupcakes and freeze them on a tray until solid. Then wrap each cupcake tightly. Before serving, thaw them overnight in the fridge and add the hats fresh for best results. That way, the crunch stays crisp and the frosting looks perfect.
Reheating
I usually don’t reheat cupcakes because they’re best served at room temperature. If chilled, just take them out of the fridge about 15-20 minutes before serving to bring the frosting to a creamy texture—it really improves flavor and mouthfeel.
FAQs
-
Can I use store-bought frosting for the Witch Hat Cupcakes Recipe?
Absolutely! Store-bought cream cheese frosting works well. Just make sure to mix it well before coloring, and if it’s too thick for piping, add a splash of milk to loosen it up slightly.
-
What if I don’t have Hershey’s kisses?
You can substitute any small chocolate candy with a similar shape, like mini chocolate cones or even a small candy-coated chocolate. The goal is to create the pointed crown of the witch hat.
-
Can I make these cupcakes gluten-free?
Yes! Use your favorite gluten-free chocolate cupcake recipe or mix, and double-check that all the toppings and frosting ingredients are gluten-free.
-
How long do these cupcakes last?
When stored properly in the fridge, these cupcakes stay fresh for about 3 days. Make sure to keep them covered to avoid drying out.
-
Can kids help decorate Witch Hat Cupcakes?
Definitely! Kids love assembling the hats and adding sprinkles, making it a fun baking activity to do together.
Final Thoughts
I can’t tell you how many times this Witch Hat Cupcakes Recipe has been the star at my Halloween parties. It’s one of those rare desserts that feels festive, tastes amazing, and is so approachable to make—you don’t need to be a baking expert, just someone ready to have fun! If you give these a try, I’m pretty sure they’ll become a yearly tradition for you, too. Happy baking and here’s to a spooktacular celebration!
Print
Witch Hat Cupcakes Recipe
- Prep Time: 30 minutes
- Cook Time: 25 minutes
- Total Time: 55 minutes
- Yield: 12 cupcakes
- Category: Dessert
- Method: Baking
- Cuisine: American
- Diet: Vegetarian
Description
Witch Hat Cupcakes are festive chocolate cupcakes decorated with cream cheese frosting, Oreo cookie witches hats topped with Hershey’s Kisses, and colorful sprinkles, perfect for Halloween celebrations.
Ingredients
Base Cupcakes
- 12 chocolate cupcakes
Decorations
- 6 Oreo cookies
- 12 Hershey’s chocolate kisses
- 1/2 batch cream cheese frosting
- green food coloring
- orange food coloring
- white sprinkles
- orange sprinkles
Instructions
- Prepare frosting: After making the cream cheese frosting, separate ½ cup of the frosting into a separate bowl for coloring.
- Color the frosting: Color the larger amount of frosting green and the smaller amount orange using food coloring.
- Prepare Oreo bases: Gently split the Oreo cookies in half.
- Assemble witches hats: Place a very small spoonful of orange frosting in the center of the top half of each Oreo cookie. Then, place a Hershey’s kiss on top and press down gently. Add white and orange sprinkles on the frosting around the kiss. Set the assembled hats aside.
- Frost cupcakes: Pipe the green frosting into the center of each cupcake, avoiding the edges, and gently wind the frosting upwards creating a few layers, resembling a cone shape.
- Finish decoration: Place the Oreo witches hat on top of the green frosting on each cupcake.
- Chill and serve: Refrigerate the decorated cupcakes in a covered container until ready to serve to keep them fresh.
Notes
- For a smoother frosting, ensure cream cheese is softened before mixing.
- Use a piping bag with a round tip for neater frosting application.
- Gently twist Oreos apart to avoid breaking the cookies.
- You can substitute Hershey’s Kisses with any other cone-shaped chocolate for variation.
- Store cupcakes in the refrigerator and serve at room temperature for best flavor.
Nutrition
- Serving Size: 1 cupcake
- Calories: 350 kcal
- Sugar: 28 g
- Sodium: 180 mg
- Fat: 18 g
- Saturated Fat: 8 g
- Unsaturated Fat: 7 g
- Trans Fat: 0 g
- Carbohydrates: 42 g
- Fiber: 2 g
- Protein: 4 g
- Cholesterol: 30 mg

