Halloween Pizzas Recipe
Hey there! If you’re looking to wow your family or friends this spooky season, I have just the thing for you—a Halloween Pizzas Recipe that’s as fun to make as it is delicious to eat. Trust me, these pizzas bring Halloween vibes to life with creative toppings and that homemade crust everyone raves about. Stick around, and I’ll walk you through everything you need to know so your Halloween dinner becomes an instant favorite!
Why This Recipe Works
- No-fuss crust: The no-rise dough means you get homemade pizza crust fast without the wait.
- Kid-friendly fun: Decorating pizzas with Halloween-themed toppings gets everyone involved and excited.
- Customizable toppings: Whether you love classic pepperoni or want veggie ghosts, you can tailor each pizza perfectly.
- Perfect bake time: Quick baking ensures crust is crispy but toppings stay melty and fresh.
Ingredients & Why They Work
This Halloween Pizzas Recipe strikes the perfect balance by combining simple pantry staples for crust with vibrant, fresh toppings that lend flavor and festive flair. Here’s a bit about each key ingredient and why it’s a winner in this recipe.
- All-purpose flour: Gives the crust structure without being overly dense; easy to find and versatile.
- Pizza yeast: Adds just enough lift so your crust is tender and chewy, even without rising time.
- Sugar: Feeds the yeast for that slight sweetness and brown crust.
- Salt: Enhances all the other flavors and balances sweetness.
- Very warm water: Helps activate the yeast quickly for faster dough preparation.
- Vegetable or canola oil: Keeps the crust moist and tender with a nice golden color.
- Pizza sauce: The base of flavor that’s tangy and rich, making every bite pop.
- Fresh mozzarella cheese: Melts beautifully, creating that classic pizza gooeyness you can’t resist.
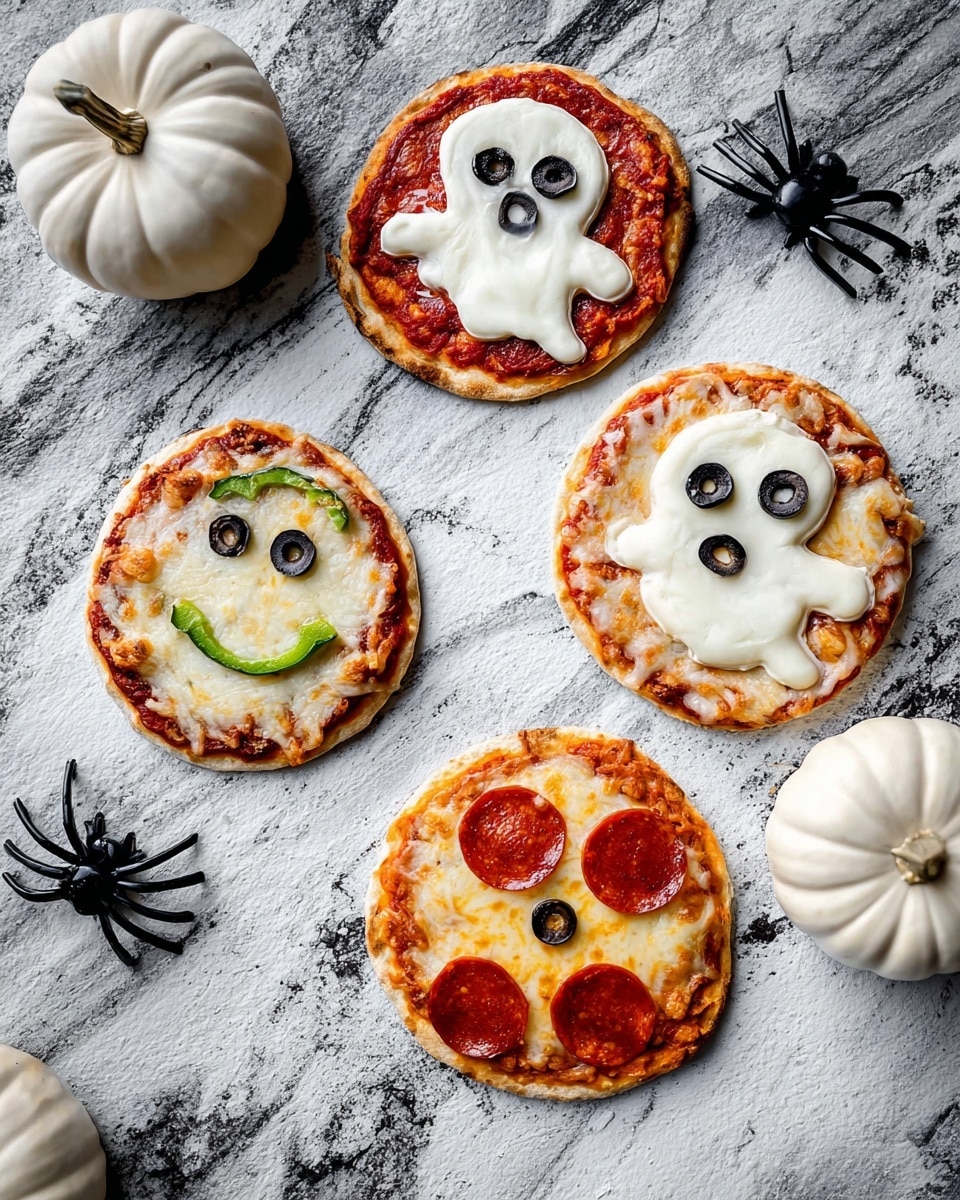
- Assorted toppings (pepperoni, bell peppers, olives, etc.): These let you craft fun Halloween shapes and add bursts of flavor and texture—get creative here!
Make It Your Way
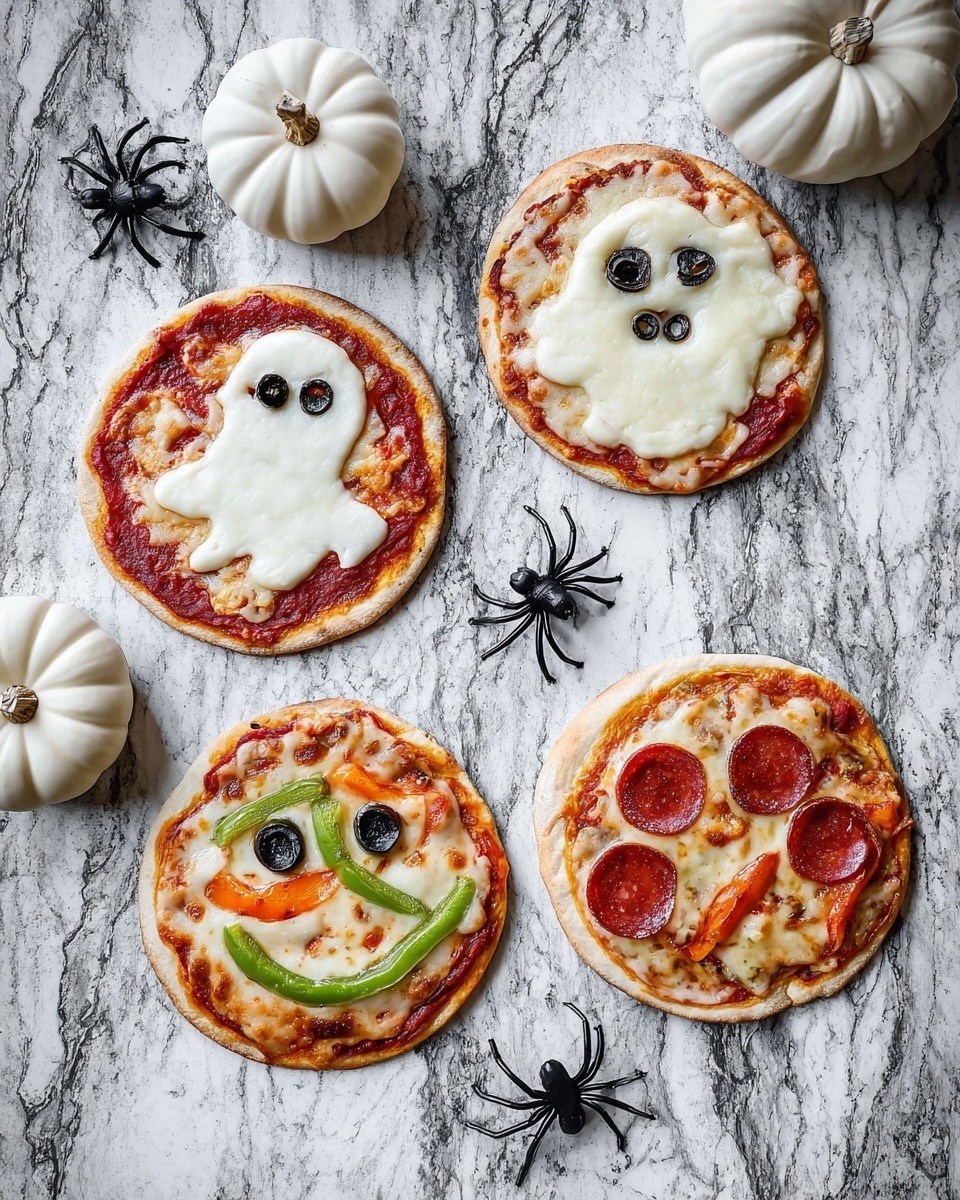
What I love about this Halloween Pizzas Recipe is how easy it is to swap toppings based on what you have and your taste preferences. You can make classic pepperoni faces or go wild with bell peppers and olives to create spooky spiders or pumpkins. The best part? Everyone can personalize their own pizza, making dinner super interactive.
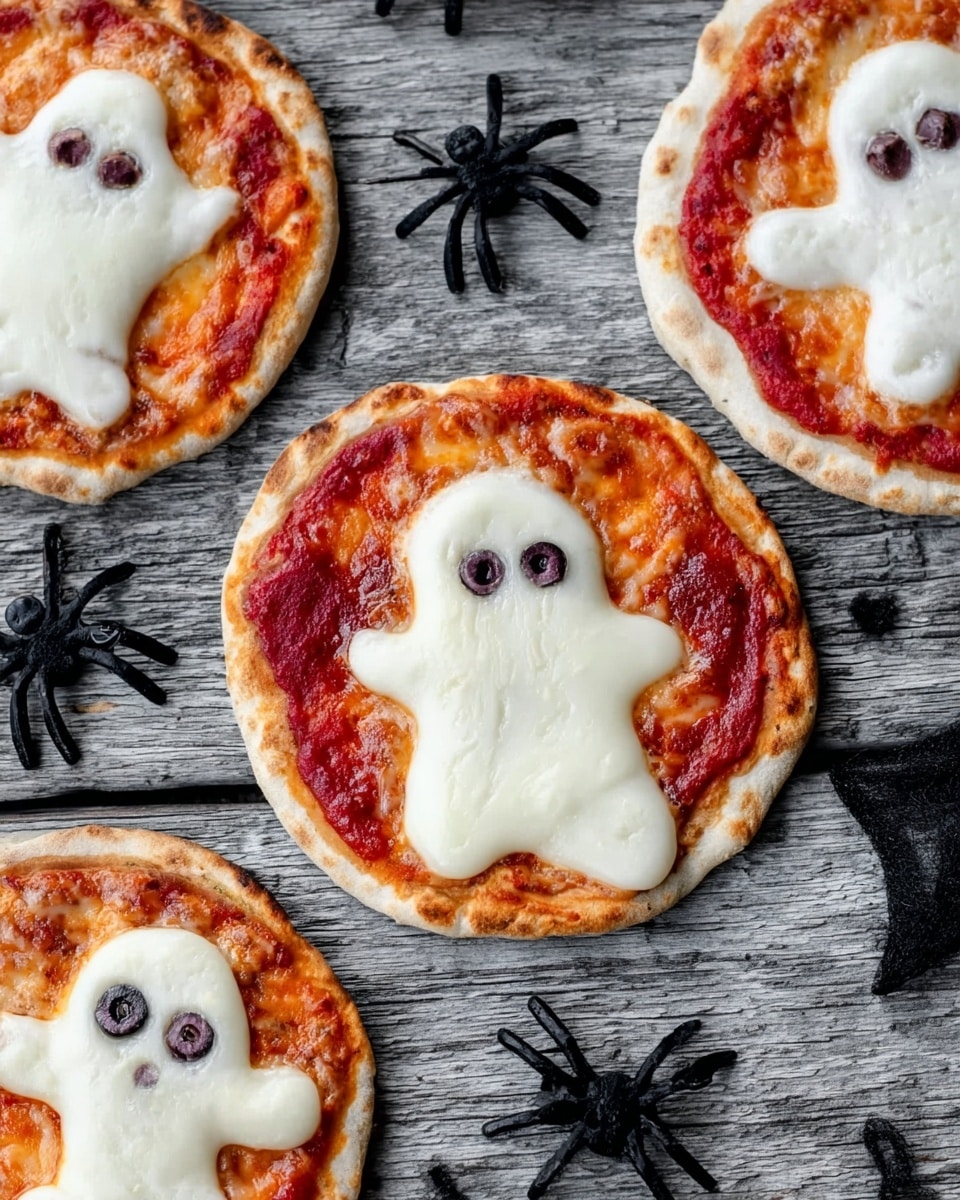
- Vegetarian variation: I’ve made these with just bell peppers, olives, and onions shaped like ghosts—super cute and delicious.
- Gluten-free crust: You can swap the flour for a gluten-free blend, but be sure to check the dough texture—it might need a little extra water or oil.
- Spicy kick: Add sliced jalapeños or a drizzle of hot honey for those who like it fiery.
- Kid-friendly shapes: Use cookie cutters on the dough before pre-baking for fun Halloween shapes like bats and cats.
Step-by-Step: How I Make Halloween Pizzas Recipe
Step 1: Mix and Knead the Dough
Start by combining 1 cup of flour with the undissolved yeast, sugar, and salt in a large bowl. Pour in the very warm water and oil, then mix quickly until everything is blended—about a minute. Then, gradually stir in the remaining flour until the dough starts to form a soft, slightly sticky ball. I usually dump it onto a floured surface and knead for around 4 minutes until it’s silky smooth and elastic. Don’t be tempted to add too much flour; you want the dough to stay soft.
Step 2: Shape and Pre-bake Your Pizza Crusts
Divide your dough into 4 portions, then roll or pat each into an 8-inch circle. I find a rolling pin works best for even thickness, but patting by hand gives a rustic touch. Place your rounds on a greased baking sheet, then bake at 450°F (232°C) for 5-6 minutes. The crust should be just set, with a barely golden bottom. This pre-bake step keeps your crust crisp once you add toppings.
Step 3: Decorate with Halloween Magic
Spread each crust generously with pizza sauce, then layer on your mozzarella and toppings. This is the fun part! Maybe a spider made from black olives, or a pumpkin face with bell peppers and pepperoni. I like to get the kids involved here—it’s a great way to spark their creativity. Once decorated, bake for another 5-8 minutes, until the cheese is bubbly and golden.
Tips from My Kitchen
- Keep dough slightly sticky: It makes kneading easier and results in a wonderfully tender crust.
- Pre-bake crusts thoroughly: Helps avoid sogginess from toppings, especially with watery veggies like bell peppers.
- Use fresh mozzarella: It melts more evenly and gives that authentic, melty pizza feel.
- Don’t overload toppings: Otherwise, the crust won’t crisp up properly, and the pizza can get soggy.
How to Serve Halloween Pizzas Recipe
Garnishes
I usually finish off the pizzas with a sprinkle of fresh parsley or basil leaves. Not only do they add a pop of color against the spooky toppings, but they also impart a fresh brightness that balances the cheese and sauce. If you want to get extra creative, a drizzle of balsamic glaze can mimic spiderweb patterns—looks amazing and tastes fantastic!
Side Dishes
To make it a complete party spread, I love pairing these Halloween pizzas with a crisp green salad tossed with a tangy vinaigrette and some crunchy veggie sticks with dip. For something more festive, some homemade pumpkin soup or roasted garlic mashed potatoes work beautifully as well.
Creative Ways to Present
For our last Halloween bash, I placed each pizza on a black or orange plate lined with parchment paper printed with bones and bats—instantly spooky! You can also serve mini pizzas on a wooden board surrounded by autumn leaves or candlelight. If you’re hosting kids, build a “make your own pizza” station with all the toppings laid out buffet-style. It’s a hit every time!
Make Ahead and Storage
Storing Leftovers
I usually wrap leftover slices tightly in plastic wrap and keep them in an airtight container in the fridge. They stay good for about 2-3 days and reheat surprisingly well. Just make sure to cool them before storing to avoid sogginess.
Freezing
These Halloween pizzas freeze wonderfully. I pre-bake the crusts, assemble the pizzas, then wrap each one tightly in foil and pop them into freezer bags. They last for up to 2 months. When you’re ready to bake, just bake from frozen, adding a few extra minutes to the cooking time.
Reheating
To keep that fresh-from-the-oven vibe, I reheat slices in a hot skillet on the stove with a lid for a few minutes. This crisps the crust and melts the cheese without drying out the pizza like a microwave can.
FAQs
-
Can I prepare the dough in advance for this Halloween Pizzas Recipe?
Absolutely! The dough can be made a few hours ahead and stored in the refrigerator in an airtight container. When you’re ready to use it, let it come back to room temperature for easier handling before shaping into pizzas.
-
What toppings work best for creating Halloween shapes?
Bell peppers in orange and green, black olives, pepperoni slices, and onion rings are great for crafting fun shapes like pumpkins, spiders, and ghosts. You can get as creative as you want — the key is using contrasting colors and different textures.
-
Can I use store-bought pizza sauce instead of homemade?
Of course! Although making your own sauce adds an extra layer of flavor, a good-quality store-bought pizza sauce works perfectly for this Halloween Pizzas Recipe and saves time when you’re busy prepping.
-
How can I make this recipe gluten-free?
Swap the all-purpose flour with your favorite gluten-free flour blend. Keep an eye on the dough’s texture; gluten-free dough may need a little more water or oil to stay soft and workable. Pre-baking crust is still recommended to keep it crisp.
Final Thoughts
This Halloween Pizzas Recipe has become one of my family’s go-to celebrations—I love how it sparks creativity and brings everyone together, from the youngest trick-or-treater to the biggest pizza lovers. Plus, the quick no-rise dough means no one’s stuck waiting around hungry. Give it a try this year, and I’m sure you’ll be hearing requests to make these spooky pies a new tradition in your home, too!
Print
Halloween Pizzas Recipe
- Prep Time: 15 minutes
- Cook Time: 12 minutes
- Total Time: 27 minutes
- Yield: 4 servings
- Category: Main Course
- Method: Baking
- Cuisine: American
Description
This Halloween Pizzas recipe features a no-rise pizza crust topped with classic pizza sauce, fresh mozzarella, and a variety of festive toppings such as pepperoni, bell peppers, olives, onions, pineapple, parsley, salami, and Canadian bacon. Designed for a quick preparation with a crispy, slightly chewy crust, these pizzas are perfect for fun and creative Halloween-themed meals.
Ingredients
No-Rise Pizza Crust
- 1 ¾ to 2 cups all-purpose flour
- 1 envelope Fleischmann’s Pizza Yeast
- 1 1/2 teaspoons granulated sugar
- 3/4 teaspoon salt
- 2/3 cup very warm water
- 3 tablespoons vegetable oil or canola oil
Toppings
- 1 cup pizza sauce
- 1/2 pound fresh mozzarella cheese
- Desired pizza toppings: pepperoni, bell peppers, olives, onion, pineapple, parsley, salami, Canadian bacon
Instructions
- Preheat Oven: Preheat your oven to 450°F to ensure it’s hot enough for baking the pizzas.
- Mix Dry Ingredients: In a large bowl, combine 1 cup of flour, the undissolved yeast packet, sugar, and salt.
- Add Wet Ingredients and Mix: Add the very warm water and vegetable oil to the dry ingredients and mix until well blended, about 1 minute.
- Form Dough: Gradually add the remaining flour until a soft, slightly sticky dough ball forms. Pour the dough onto a floured surface and knead for about 4 minutes until smooth and elastic, adding more flour if needed.
- Divide Dough: Divide the dough into 4 equal portions.
- Shape Crusts: Roll or pat each portion into an 8-inch circle and place on greased baking sheets.
- Partially Bake Crusts: Bake the crusts in the preheated oven for 5 to 6 minutes until just set and lightly browned on the bottom.
- Add Sauce and Toppings: Spread each crust with pizza sauce, then add fresh mozzarella and your choice of toppings, arranging them into Halloween-themed designs if desired.
- Final Bake: Bake the assembled pizzas for an additional 8 minutes, or until the cheese is melted and bubbly.
Notes
- The pizza sauce can be prepared ahead of time and stored in the refrigerator for up to one week.
- Chop and store toppings separately in airtight containers in the fridge to save prep time on the day of baking.
- The dough can be made a few hours in advance and kept covered in the refrigerator.
- To freeze, assemble pizza on the partially baked crust, cover tightly, and freeze for up to 2 months. Bake from frozen, adding a few extra minutes to the cooking time.
- Use vegetable or canola oil for a neutral flavor and tender crust.
Nutrition
- Serving Size: 1 pizza
- Calories: 350 kcal
- Sugar: 3 g
- Sodium: 600 mg
- Fat: 14 g
- Saturated Fat: 7 g
- Unsaturated Fat: 6 g
- Trans Fat: 0 g
- Carbohydrates: 38 g
- Fiber: 2 g
- Protein: 15 g
- Cholesterol: 40 mg

