Halloween Inspired Peanut Butter Blossom Spider Cookies Recipe
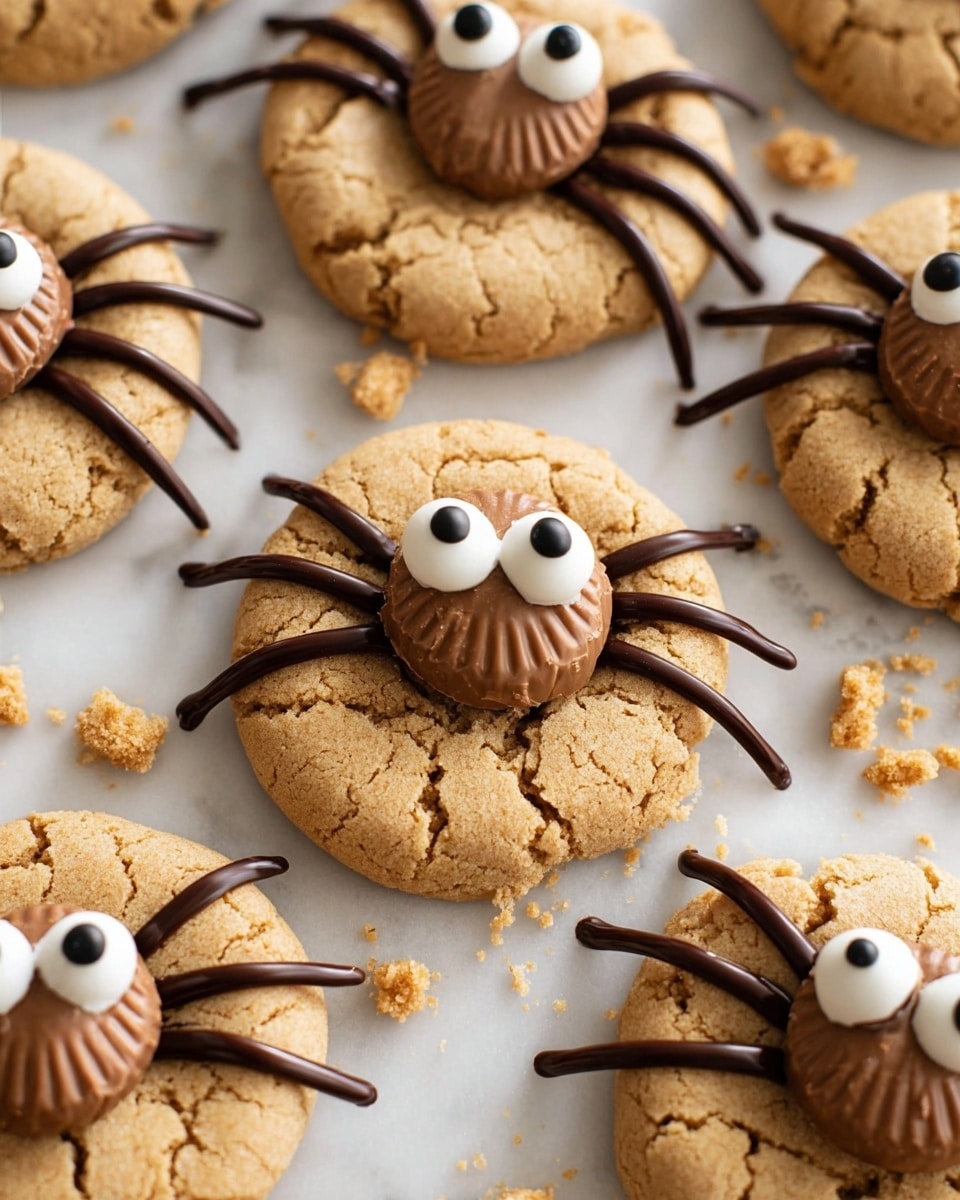
If you’re looking for a festive treat that brings a little spooky fun to your Halloween celebrations, you’ve got to try this Halloween Inspired Peanut Butter Blossom Spider Cookies Recipe. These cookies combine that classic peanut butter goodness with a cheeky spider twist, making them perfect for parties, school events, or just a cozy night with candy corn and scary movies. I promise, once you make these, they’ll be your new seasonal obsession!
Why This Recipe Works
- Classic Flavor Combo: Peanut butter and chocolate are forever a dream team, and these cookies bring them together beautifully.
- Fun Halloween Twist: The addition of candy eyes and spider legs adds a playful, festive vibe that kids and adults love.
- Easy to Make in Batches: The dough chills quickly and bakes fast, so you can whip up a big batch without stress.
- Great Texture Balance: The cookies stay soft and chewy with a slightly crispy edge, making every bite a winner.
Ingredients & Why They Work
This Halloween Inspired Peanut Butter Blossom Spider Cookies Recipe uses simple pantry staples that come together effortlessly. Each ingredient plays a specific role—from adding moisture and richness to balancing sweetness and texture.
- Unsalted butter: Softened for easy creaming, it adds moistness and richness without overpowering flavors.
- Creamy peanut butter: The star of the show, giving that classic peanut butter cookie flavor and softness.
- Granulated sugar: Adds sweetness and helps create that slightly crisp exterior when rolled on top.
- Eggs: Bind the dough together and add a bit of moisture and chewiness.
- Vanilla extract: Enhances the flavors and balances the peanut butter’s nuttiness.
- All-purpose flour: The structure-maker that holds everything together perfectly.
- Baking soda: Gives a subtle lift and keeps the cookies tender.
- Salt: Essential to highlight the peanut butter’s natural flavors and balance the sweetness.
- Miniature Reese’s Peanut Butter Cups: The “innards” of your spider, bringing that gooey chocolate-peanut butter combo right in the center.
- Candy eyes: For those instantly spooky, fun spider characters that pop out from every cookie.
- Semi-sweet chocolate chips (melted): Used for piping spider legs, adding a little extra charm.
Make It Your Way
I love that this Halloween Inspired Peanut Butter Blossom Spider Cookies Recipe is so customizable. Whether you want to amp up the spooky factor or lighten it up a bit, the base recipe supports your creativity.
- Variation: Once, I swapped the Reese’s cups for mini chocolate chips clusters when I had picky eaters – it was still delicious and less messy!
- Dietary modification: You can easily use a sugar substitute or a dairy-free butter to cater to dietary needs, and it still turns out great.
- Decoration twist: Instead of chocolate legs, try black icing gel or thin licorice strands for a slightly different look.
Step-by-Step: How I Make Halloween Inspired Peanut Butter Blossom Spider Cookies Recipe
Step 1: Cream That Butter and Sugar
Start by fitting your mixer with the paddle attachment and beating the softened butter and sugar together for about 4-5 minutes until they’re light, fluffy, and thoroughly combined. This step is crucial because it traps air, helping the cookies to be soft and chewy instead of dense.
Step 2: Add Peanut Butter and Eggs
Mix in the creamy peanut butter for another minute or two until smooth. Then add the eggs one at a time with vanilla extract, making sure everything is well blended. Using room temperature eggs helps everything incorporate evenly—don’t skip it!
Step 3: Incorporate Dry Ingredients
Next, add your flour, baking soda, and salt. Mix just until combined – overmixing can make cookies tough. When your dough is ready, cover it and let it chill in the fridge for about 25-30 minutes. This step slows down spreading and makes the dough easier to handle.
Step 4: Shape and Sugar Coating
Using a 1 oz. scoop or tablespoon, portion out balls of dough, then roll them smooth with your palms. Roll each ball in the extra sugar to create that subtly crackly and sparkly top after baking. This little sugar coating adds a delightful texture contrast.
Step 5: Bake and Cool
Bake the cookies on parchment-lined trays at 350°F for 9-11 minutes until they’re just golden at the edges but still soft in the center. Let the cookies rest on the sheet for about 5 minutes after baking so they set a bit—that’s key for the decorating step.
Step 6: Add Your Spider Features
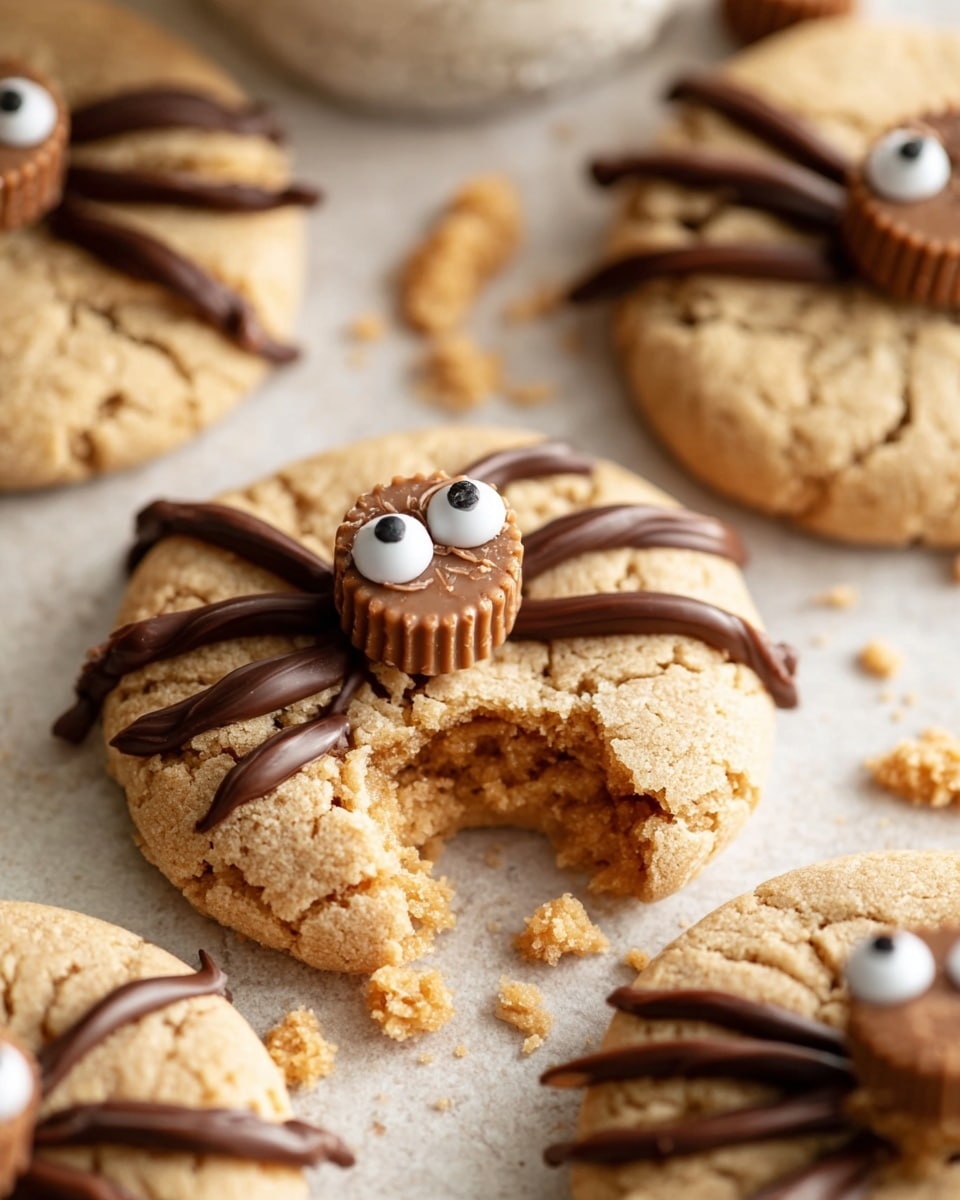
Carefully press a miniature Reese’s Peanut Butter Cup into the center of each cookie while it’s still warm, but not hot. The warmth helps the Peanut Butter Cup soften a touch for better sticking. Then, gently place two candy eyes on top, using the natural stickiness of the cup, or a dab of melted chocolate if needed.
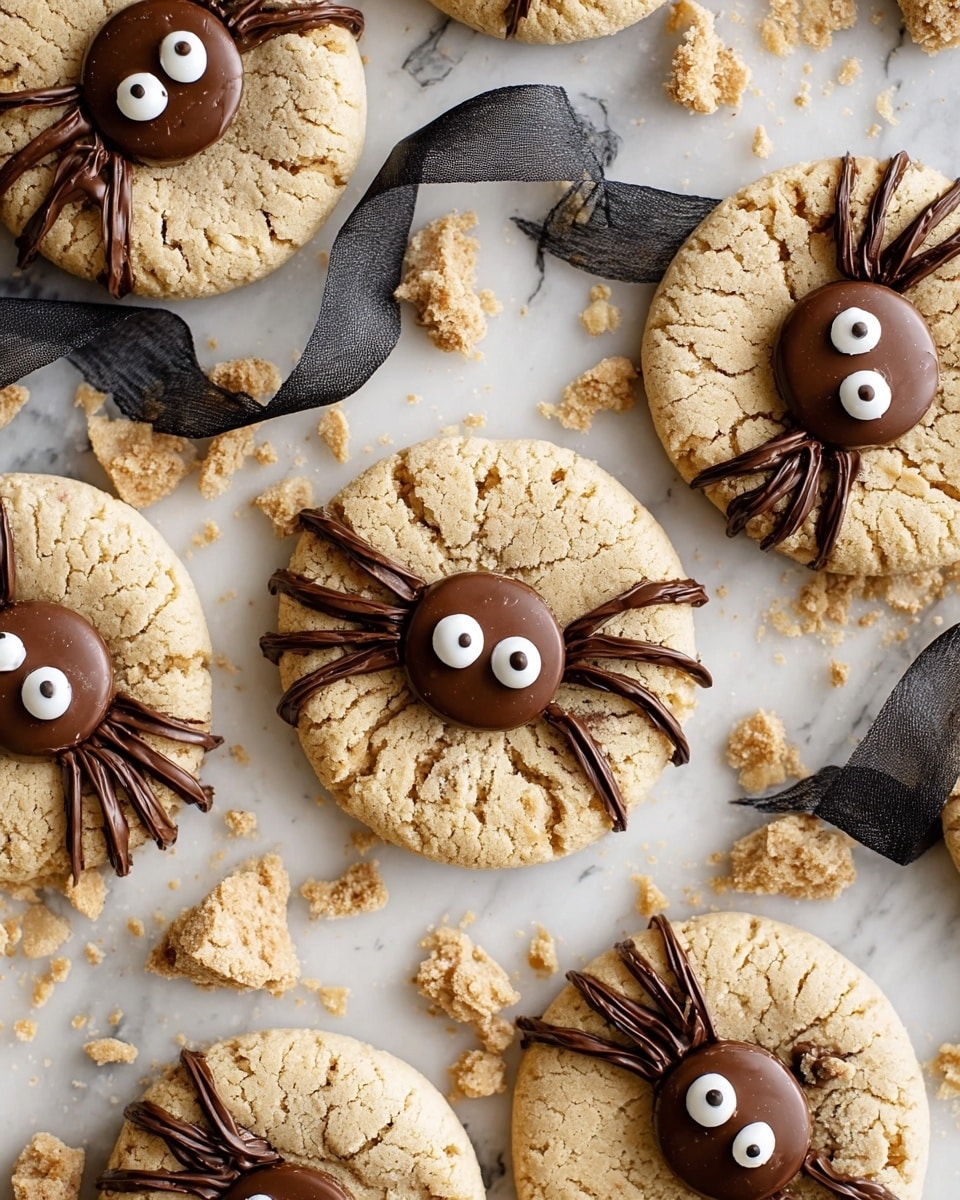
Finally, load melted chocolate into a piping bag with a tiny opening and draw spider legs extending from the Peanut Butter Cup. If piping seems tricky, try using a toothpick dipped in chocolate or even black licorice strings to create legs. Let everything cool completely before enjoying (or storing!).
Tips from My Kitchen
- Avoid Melty Mess: Let cookies cool about 5 minutes before adding the Peanut Butter Cups so they don’t completely melt and lose shape.
- Freeze the Cups: Pop your Reese’s cups in the freezer before decorating to help them hold up better on warm cookies.
- Eye Adhesion: If candy eyes don’t stick perfectly, a tiny dab of melted chocolate works wonders as glue.
- Legs Piping: Use a fine tip or even a toothpick for painting spider legs to keep details crisp and cute instead of messy.
How to Serve Halloween Inspired Peanut Butter Blossom Spider Cookies Recipe
Garnishes
I like to keep it simple here with just the candy eyes and chocolate legs, but sometimes I add a little orange-colored sugar sprinkles around the edges before baking for a festive pop of color. If you want to go extra, a light dusting of powdered sugar after decorating can look like eerie spider webs!
Side Dishes
These cookies are perfect alongside a cold glass of milk or a warm cup of spiced apple cider. If you’re hosting a party, try pairing them with some Halloween-themed cupcakes or a batch of pumpkin spice popcorn for a delightful spread.
Creative Ways to Present
One of my favorite presentations was arranging these cookies on a black platter shaped like a spider web—complete with edible white icing webs piped around! You could also tie up little cookie bags with orange and black ribbon to hand out as Halloween favors. Kids love the festive vibe!
Make Ahead and Storage
Storing Leftovers
Once decorated and completely cooled, store your Halloween Inspired Peanut Butter Blossom Spider Cookies in an airtight container at room temperature. I find they stay fresh and soft for 3-4 days, which is ideal if you’re preparing them for a party or a week of treat snacking.
Freezing
You can freeze the unbaked dough balls—just scoop and roll them, then freeze on a tray before transferring to a freezer bag. When you’re ready, bake straight from frozen, adding an extra minute or two. I don’t recommend freezing decorated cookies though, as the eyes and chocolate get finicky.
Reheating
If you want to warm up a cookie (fresh out of storage), a quick 10-second zap in the microwave softens it just right without melting the chocolate decorations. This little trick revives that fresh-from-the-oven vibe perfectly.
FAQs
-
Can I use crunchy peanut butter for this Halloween Inspired Peanut Butter Blossom Spider Cookies Recipe?
Absolutely! Using crunchy peanut butter will add a nice little texture contrast inside the cookie. Just be aware it might alter the dough’s consistency slightly, so keep an eye on dough texture—add a tiny splash of milk if it feels too dry.
-
What can I use if I can’t find candy eyes for decorating?
If candy eyes are hard to find, you can make your own using small dots of white icing with a black edible marker or use mini chocolate chips stuck onto the peanut butter cups with melted chocolate as glue.
-
How do I prevent the peanut butter cups from melting too much?
Letting the cookies cool 5 minutes before adding peanut butter cups and chilling the cups in the freezer before decorating really helps reduce melting. Also, adding decorations gently avoids squeezing the warm cookie too much.
-
Can I make these cookies gluten-free?
Yes! Substitute the all-purpose flour with a gluten-free baking flour blend that includes xanthan gum. You might need to adjust the baking time slightly and monitor the dough’s consistency but it’s a tasty alternative.
Final Thoughts
This Halloween Inspired Peanut Butter Blossom Spider Cookies Recipe is such a fun and tasty way to get into the holiday spirit. I love how it’s both nostalgic and creative, and the way the peanut butter and chocolate come together is just irresistible. Whether you’re baking with kids or just want a festive treat for yourself, these cookies never disappoint. Trust me, once you make them, you’ll want to keep this recipe in your seasonal rotation forever!
Print
Halloween Inspired Peanut Butter Blossom Spider Cookies Recipe
- Prep Time: 20 minutes
- Cook Time: 11 minutes
- Total Time: 1 hour
- Yield: 24 cookies
- Category: Dessert
- Method: Baking
- Cuisine: American
- Diet: Vegetarian
Description
Halloween Inspired Peanut Butter Blossom Spider Cookies are a fun and festive treat featuring soft peanut butter cookies topped with miniature Reese’s peanut butter cups, candy eyes, and chocolate spider legs. Perfect for Halloween parties, these cookies combine classic flavors with spooky decoration for a delightful seasonal snack.
Ingredients
Cookie Dough
- 1/2 cup unsalted butter, softened
- 1 cup creamy peanut butter
- 1 1/2 cups granulated sugar plus 2 tbsp for rolling
- 2 eggs, room temperature
- 1 tbsp vanilla extract
- 2 1/2 cups all-purpose flour
- 1 tsp baking soda
- 1 tsp salt
Decorations
- 24 miniature Reese’s peanut butter cups
- Candy eyes
- 1 oz semi-sweet chocolate chips, melted
Instructions
- Cream the butter and sugar: In a large mixing bowl fitted with a paddle attachment, cream the softened butter and 1 1/2 cups granulated sugar for 4-5 minutes until the mixture is light and fluffy.
- Add peanut butter and mix: Add the creamy peanut butter to the butter and sugar mixture and mix for another 1-2 minutes until fully combined.
- Incorporate eggs and vanilla: Add the eggs one at a time along with the vanilla extract, mixing well to combine all ingredients.
- Add dry ingredients: Gradually add the all-purpose flour, baking soda, and salt to the wet ingredients, mixing until the dough is fully incorporated.
- Chill the dough: Cover the dough with plastic wrap and chill it in the refrigerator for 30 minutes to firm up.
- Scoop and roll dough balls: Using a 1 oz portion scoop or measuring spoon, scoop out dough portions. Roll each into a smooth ball with your palms, then roll each ball in the 2 tbsp of granulated sugar reserved for rolling.
- Preheat oven and prepare baking sheet: Preheat the oven to 350 degrees Fahrenheit. Line a baking sheet with parchment paper and arrange the sugar-coated cookie balls 2-3 inches apart.
- Bake the cookies: Bake the cookies in the preheated oven for 11 minutes until they are golden brown and still soft in the center.
- Cool cookies slightly: Let the cookies sit on the baking sheet for about 5 minutes after baking to firm up before transferring them to a wire rack to cool completely.
- Add Reese’s cups and candy eyes: Press one miniature Reese’s peanut butter cup into the center of each cookie gently. Press two candy eyes onto each peanut butter cup while it is still slightly warm to help them adhere. If they don’t stick, use a small dot of melted chocolate as glue.
- Pipe spider legs: Fill a piping bag or plastic sandwich bag with melted semi-sweet chocolate chips and snip off a tiny corner. Pipe spider legs onto each cookie around the peanut butter cup to create a spider effect.
- Set and serve: Let the chocolate legs cool and harden completely before serving. Store leftover cookies in an airtight container at room temperature for 3-4 days.
Notes
- Let the cookies cool for about 5 minutes before adding the Reese’s peanut butter cups to prevent the cups from melting too much.
- To prevent the Reese’s cups from melting, you can chill them in the freezer for a few minutes before pressing them onto the cookies.
- If candy eyes do not stick to the peanut butter cups on their own, use a small amount of melted chocolate to adhere them securely.
- Spider legs can also be drawn using a toothpick dipped in melted chocolate, black Twizzlers, or gel icing as alternatives to piping.
- Use parchment paper to prevent cookie sticking and for easy clean-up.
Nutrition
- Serving Size: 1 cookie
- Calories: 180 kcal
- Sugar: 15 g
- Sodium: 120 mg
- Fat: 10 g
- Saturated Fat: 3 g
- Unsaturated Fat: 6 g
- Trans Fat: 0 g
- Carbohydrates: 18 g
- Fiber: 1 g
- Protein: 4 g
- Cholesterol: 25 mg

