No Bake Spiderweb Cheesecake (Creepy Halloween Recipe) Recipe
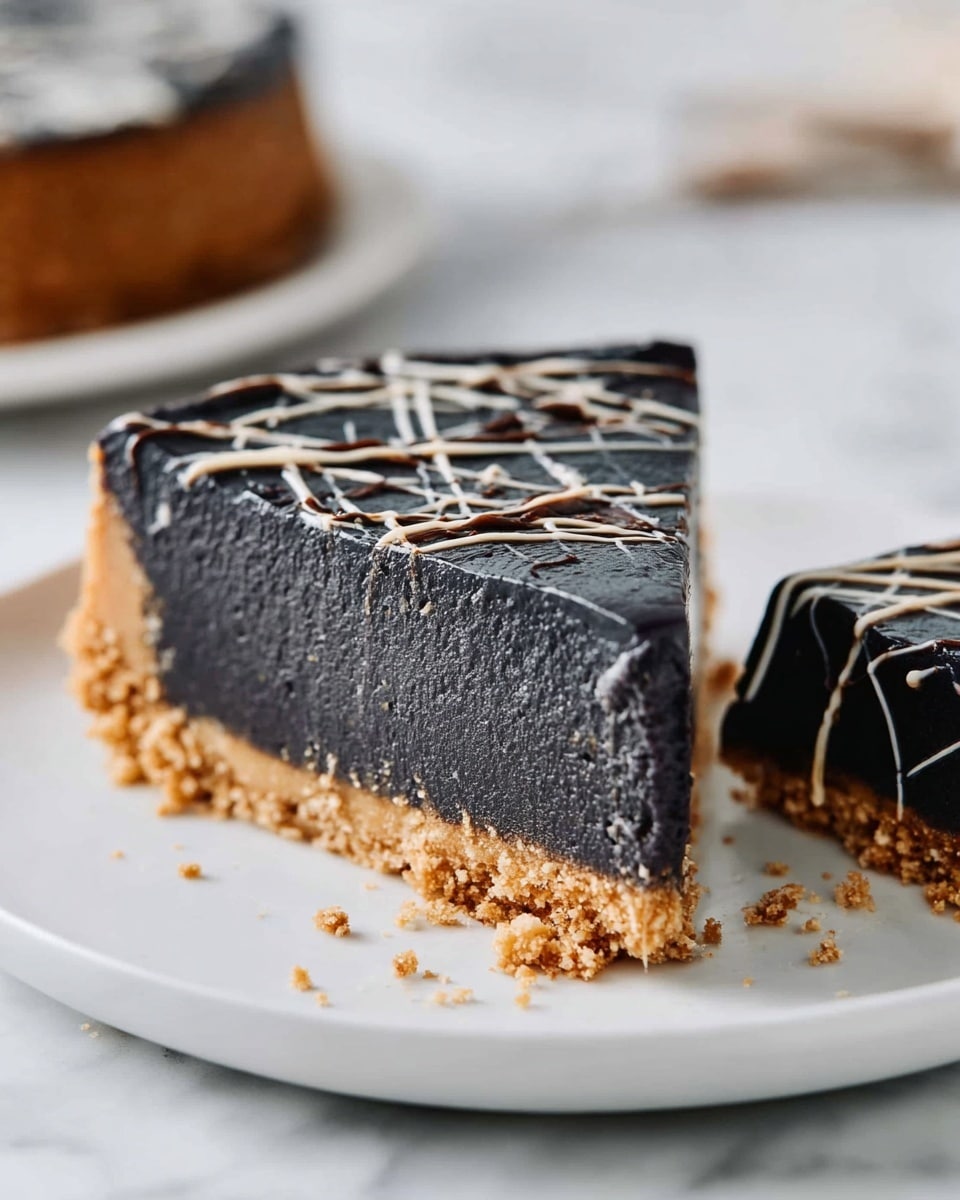
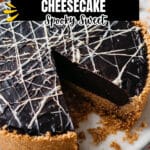
If you’re looking for a Halloween treat that’s as fun to make as it is to eat, you’re going to love this No Bake Spiderweb Cheesecake (Creepy Halloween Recipe) Recipe. It’s creamy, festive, and perfectly spooky with a striking spiderweb design that will wow everyone at your party. Plus, it requires no oven and just a bit of chilling time, making it super doable even if you’re short on prep time. I can’t wait to share all my tips so you nail this creepy cheesecake on your first try!
Why This Recipe Works
- No baking needed: Perfect for beating the heat or when you don’t want to heat up your kitchen during Halloween prep.
- Easy spiderweb effect: Uses colorful gel food coloring and stringy marshmallow “web” that’s impressively spooky but simple to create.
- Classic cheesecake texture: Smooth, creamy, and tangy from lemon juice, balancing sweetness perfectly.
- Kid-friendly and fun: Little hands love helping pull the marshmallow webs — perfect for family Halloween fun.
Ingredients & Why They Work
All the ingredients here come together beautifully to create that perfect no bake cheesecake texture with a spooky twist. Nothing too fancy, but each one has a purpose. I always recommend grabbing fresh cream cheese and heavy cream for the best results — they really make the filling rich and luscious.
- Graham Crackers: The crust base, offering buttery crunch; I like to pulse them finely in the food processor for even pressing.
- Melted Butter: Binds the graham cracker crumbs together for a solid crust that holds its shape.
- Sugar: Adds subtle sweetness and balances the tang of cream cheese.
- Cream Cheese: The star of the show—creamy and tangy, it’s essential for that classic cheesecake flavor.
- Lemon Juice: Brings brightness and balances richness.
- Vanilla: Adds depth and warmth to the filling.
- Powdered Sugar: For smooth sweetness without graininess.
- Heavy Cream: Whipped into the filling for lightness and that melt-in-your-mouth feel.
- Black, Purple, and Blue Gel Food Coloring: These give the filling its haunting hues and are more vibrant than liquid colors.
- Marshmallows: The magic behind that sticky, stringy spiderweb topping—fun to pull and perfect for creepy vibes.
- Springform Pan: Makes unmolding your cheesecake effortless and neat.
- Mixing Bowls, Rubber Spatula & Electric Mixer: Your best friends for this recipe ensuring smooth, lump-free batter.
- Food Processor: Not absolutely required, but I’m telling you, it makes the graham cracker crust prep a breeze!
Make It Your Way
I love this recipe because it’s so easy to experiment with. You can adjust the colors, use different flavored extracts, or swap out the crust. It’s flexible enough to match your Halloween vibe or taste preferences.
- Variation: I once swapped the graham cracker crust for chocolate cookie crumbs, which took the creepy factor up a notch and added a rich, chocolatey base.
- Dietary Modifications: Cream cheese alternatives can make this keto- or gluten-free friendly; just be sure to pick crust and filling substitutes that firm up nicely.
- Seasonal Changes: Instead of Halloween colors, try red and white gel colors for a Valentine’s Day twist, or orange and black if you want a more traditional Halloween theme.
Step-by-Step: How I Make No Bake Spiderweb Cheesecake (Creepy Halloween Recipe) Recipe
Step 1: Crush the Graham Crackers and Form the Crust
Start by pulsing about two sleeves of graham crackers in your food processor until they’re nice and fine, almost like sand. This crust is key to holding your cheesecake together without being crumbly. Then, mix in sugar and melted butter until it looks like damp sand. Press this mixture firmly into the base of a well-greased springform pan—don’t be shy about packing it tight. This step creates a sturdy base that makes slicing a breeze. Pro tip: Chill the crust for 10 minutes before adding your filling to help it set.
Step 2: Prepare the Cheesecake Filling
Using an electric mixer, beat cream cheese until it’s completely smooth — no lumps, no bumps. Mix in lemon juice, vanilla, powdered sugar, and heavy cream, all at once if you like, then continue beating until you get a glossy, luscious filling. Now for the fun part: add your black gel food coloring. It takes a bit of mixing, but keep going until the color is deep and even. Then, swirl in purple and blue gel colors, beating until everything looks beautifully marbled but blended. This multi-hued effect is what gives the cheesecake that eerie, other-worldly look.
Step 3: Assemble and Chill Overnight
Pour your gorgeous colored filling right over the crust in the springform pan, smoothing the top gently with your spatula. Refrigerate for at least 8 hours or overnight—this chilling time is crucial for firming the cheesecake so it slices neatly. Patience here totally pays off!
Step 4: Craft the Spooky Spiderweb Top
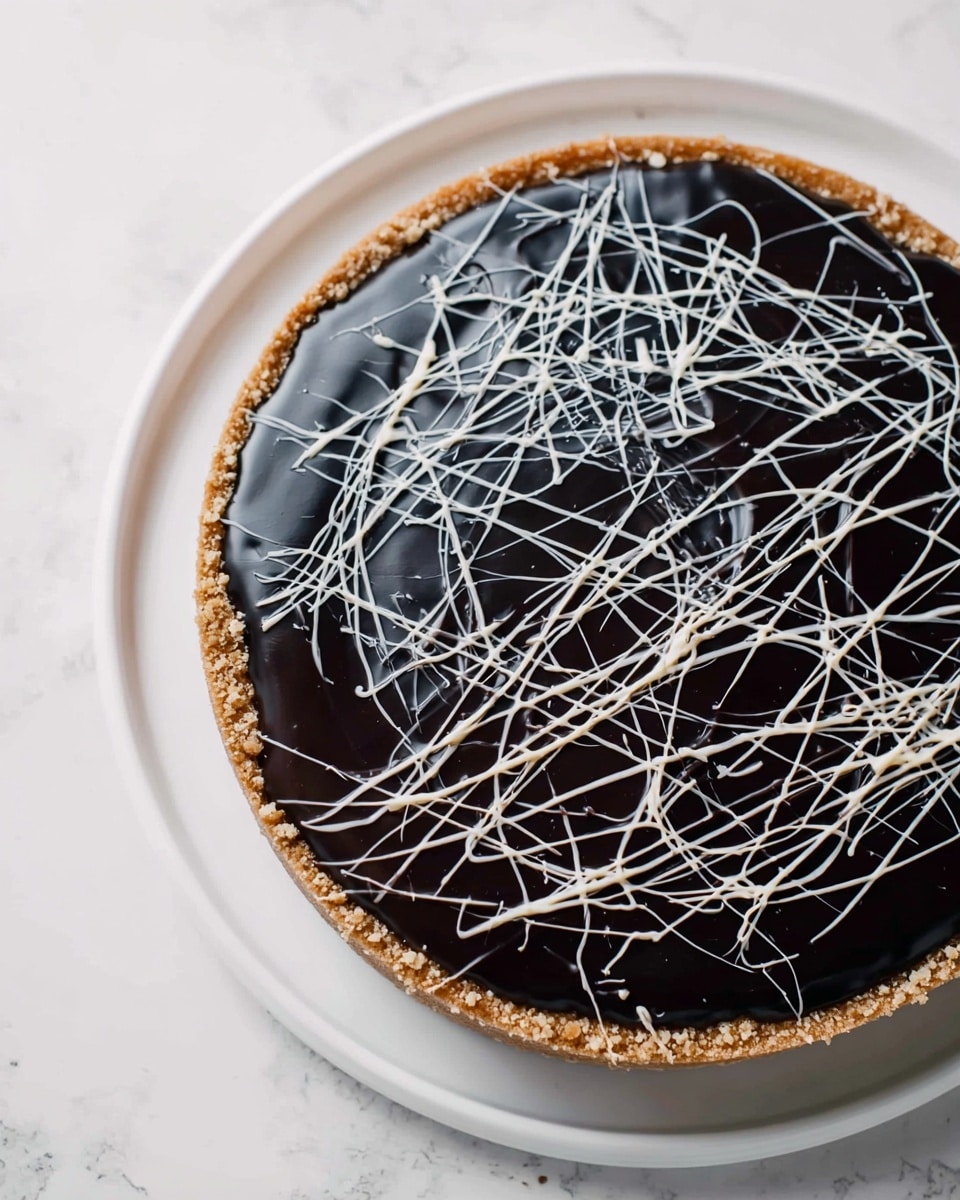
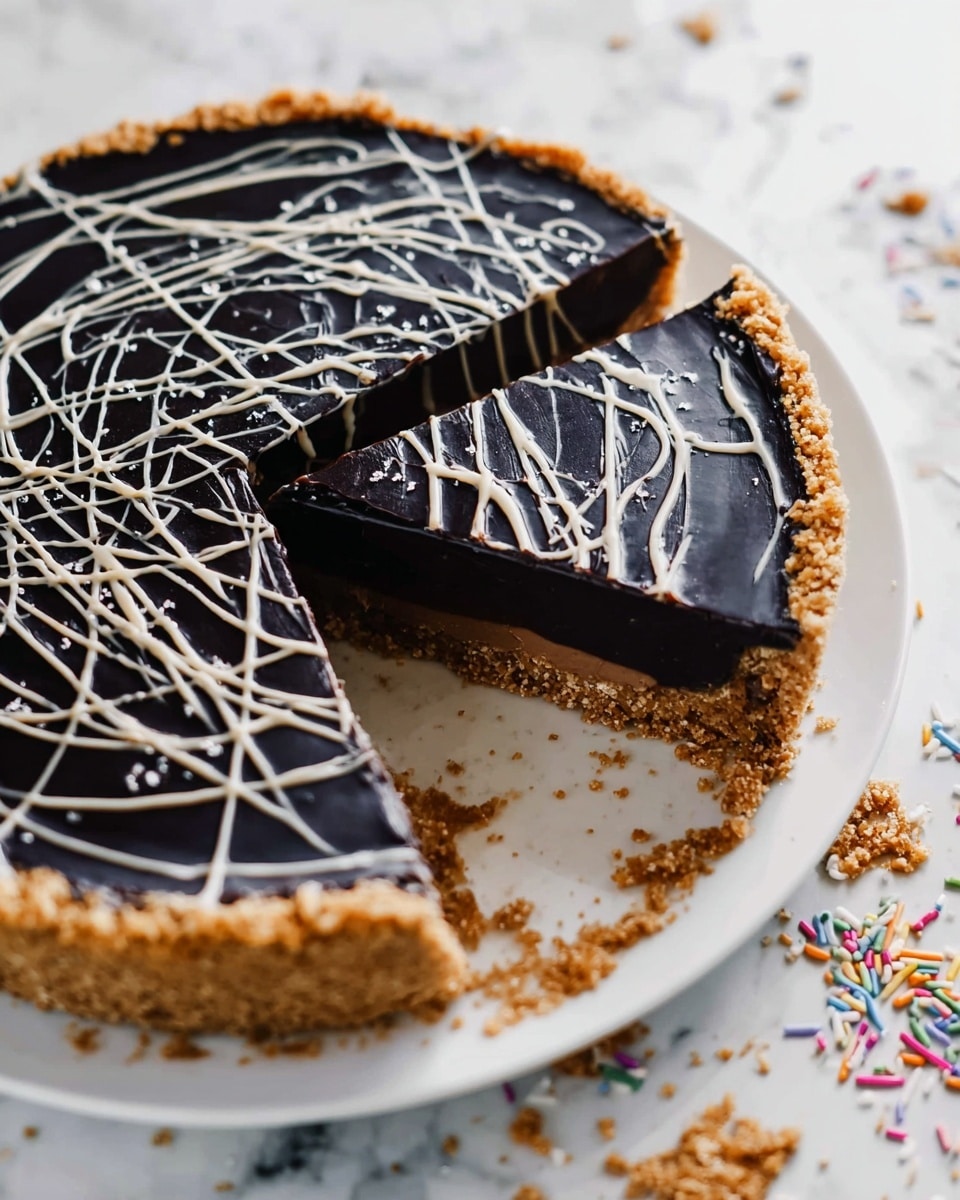
Right before serving, nuke two marshmallows for just 10 seconds in the microwave — no more, or they get too gooey. Let them cool a bit so you can handle them comfortably, then use your fingers to pull and knead until the marshmallow becomes sticky and stringy. This is your “spiderweb material.” Gently drape and string these marshmallow threads over the cheesecake to create a spooky web effect that will impress your guests. Trust me, it’s way easier than it looks and adds the perfect creepy touch!
Tips from My Kitchen
- Don’t Rush the Chilling: Giving the cheesecake ample time to set overnight makes your slicing super clean and mess-free.
- Use Gel, Not Liquid Colors: Gel food coloring delivers vibrant hues without thinning your batter.
- Press the Crust Firmly: This avoids a crumbly crust that falls apart when serving.
- Marshmallow Web Timing: Wait for marshmallows to cool slightly before pulling so you don’t burn your fingers and get perfect sticky webs.
How to Serve No Bake Spiderweb Cheesecake (Creepy Halloween Recipe) Recipe
Garnishes
I love keeping it simple with the marshmallow spiderweb, but if you want to go extra, add plastic spiders for a fun effect (just be sure to remove before eating!). A light dusting of edible glitter or colored sugar sprinkles also amps up the spooky vibe without overpowering the cheesecake’s flavors.
Side Dishes
This cheesecake stands out enough on its own, but if you’re serving it at a party, a side of fresh berries or a small scoop of vanilla ice cream nicely complements the rich, creamy texture.
Creative Ways to Present
For an eerie Halloween table, place the No Bake Spiderweb Cheesecake on a black cake stand surrounded by dry ice for spooky fog effect. Or, serve it in mini springform pans or clear cups with the marshmallow web on top for individual “spooky jars” that kids love.
Make Ahead and Storage
Storing Leftovers
This cheesecake keeps beautifully in the fridge for up to 3 days. I usually cover mine tightly with plastic wrap or store it in an airtight container to preserve moisture and prevent it from absorbing other flavors.
Freezing
I’ve frozen this cheesecake successfully by wrapping it securely in plastic wrap and foil before placing it in the freezer. When you’re ready, thaw overnight in the refrigerator. The texture remains creamy, though the marshmallow “web” is best added fresh to keep its stringy magic.
Reheating
No reheating needed here — this cheesecake is meant to be served chilled. Just pull it out of the fridge about 10 minutes before serving, so it softens slightly and your guests can savor its creamy texture.
FAQs
-
Can I make the No Bake Spiderweb Cheesecake (Creepy Halloween Recipe) Recipe without a food processor?
Absolutely! If you don’t have a food processor, you can crush the graham crackers inside a sealed plastic bag using a rolling pin or heavy pan until fine. It just takes a bit more elbow grease but works just as well for the crust.
-
How do I get the marshmallow to form the spiderweb without it sticking too much?
After microwaving, wait for the marshmallows to cool enough to handle comfortably—about 30 seconds—then gently pull apart and stretch slowly. The residual stickiness helps form the web but letting them cool slightly prevents them from sticking to your fingers excessively.
-
Can I prepare this cheesecake earlier than Halloween day?
Yes! In fact, making it a day ahead is perfect for chilling. Just keep the marshmallow spiderweb separate and assemble right before serving, so your web looks fresh and springy.
-
Can I use different colors for the spiderweb cheesecake?
Of course! Feel free to mix your favorite gel food coloring shades. I sometimes add green or orange to match the Halloween palette or create eerie effects.
-
Is this cheesecake suitable for kids to help make?
Yes, definitely! Kids especially enjoy pulling the marshmallow webs and seeing the colors swirl in the filling. Just supervise them with the microwave step and make sure marshmallows have cooled before handling.
Final Thoughts
This No Bake Spiderweb Cheesecake (Creepy Halloween Recipe) Recipe has become a family favorite — it’s such a blast to make, and it always impresses guests with minimal fuss. The creamy filling combined with the spooky visual always brings smiles and a few “ooohs!” from everyone around the table. If you want a Halloween dessert that’s delicious, visually exciting, and easy to prepare, I highly recommend giving this one a whirl. Trust me, you’re going to love how simple it is to create something magically creepy right in your own kitchen!
Print
No Bake Spiderweb Cheesecake (Creepy Halloween Recipe) Recipe
- Prep Time: 30 minutes
- Cook Time: 0 minutes
- Total Time: 8 hours 15 minutes
- Yield: 10 servings
- Category: Dessert
- Method: No-Cook
- Cuisine: American
Description
This No Bake Spiderweb Cheesecake is a spooky and delicious Halloween dessert featuring a creamy, colorful cream cheese filling on a graham cracker crust, topped with marshmallow spiderweb decoration. Perfect for festive celebrations, this easy-to-make cheesecake requires no baking and is chilled overnight for a smooth, set texture.
Ingredients
Crust
- 2 sleeves of Graham Crackers
- 1 stick of Melted Butter
- 6 tablespoons of Sugar
Cheesecake Filling
- 2 (8 oz.) blocks of Cream Cheese
- 3 teaspoons of Lemon Juice
- 2 teaspoons of Vanilla Extract
- 1 cup of Powdered Sugar
- 1 and 1/2 cups of Heavy Cream
- 1 tube of Black Gel Food Coloring
- 1 tube of Purple Gel Food Coloring
- 1 tube of Blue Gel Food Coloring
Decoration
- 2 Marshmallows
Instructions
- Prepare the crust: Process the graham crackers in a food processor until fine crumbs form. Mix in the sugar and melted butter thoroughly. Press this mixture firmly into the bottom of a well-greased springform pan and set aside.
- Make the cheesecake filling: Beat the cream cheese until smooth using an electric mixer. Add lemon juice, vanilla extract, powdered sugar, and heavy cream. Continue mixing until the mixture is smooth and creamy.
- Color the filling: Add the black gel food coloring to the cream cheese mixture and beat until well combined. Then add the purple and blue gel food colorings and beat until the batter is smooth and evenly colored.
- Assemble the cheesecake: Pour the colored cream cheese filling into the prepared crust in the springform pan. Spread evenly and refrigerate the cheesecake overnight to allow it to set properly.
- Create the spiderweb decoration: Microwave two marshmallows for 10 seconds until puffed. Let them cool until they are safe to handle but still sticky. Knead the marshmallows between your fingers until they become sticky and stringy.
- Decorate the cheesecake: Pull apart the sticky, stringy marshmallow and carefully stretch it over the chilled cheesecake surface to create a spiderweb pattern, as shown. Serve your spooky Halloween dessert and enjoy!
Notes
- Use a springform pan for easy removal of the cheesecake without damage.
- Ensure the marshmallows are cool enough to handle when making the spiderweb to avoid burns.
- If gel food coloring is not available, liquid coloring can be substituted but may affect texture slightly.
- For a firmer crust, chill it for 15 minutes before adding the filling.
- This cheesecake benefits from refrigerating at least 8 hours or overnight for best texture.
Nutrition
- Serving Size: 1 slice
- Calories: 320 kcal
- Sugar: 20 g
- Sodium: 180 mg
- Fat: 24 g
- Saturated Fat: 14 g
- Unsaturated Fat: 8 g
- Trans Fat: 0 g
- Carbohydrates: 22 g
- Fiber: 1 g
- Protein: 5 g
- Cholesterol: 65 mg

