RIP Halloween Dessert Shooters Recipe
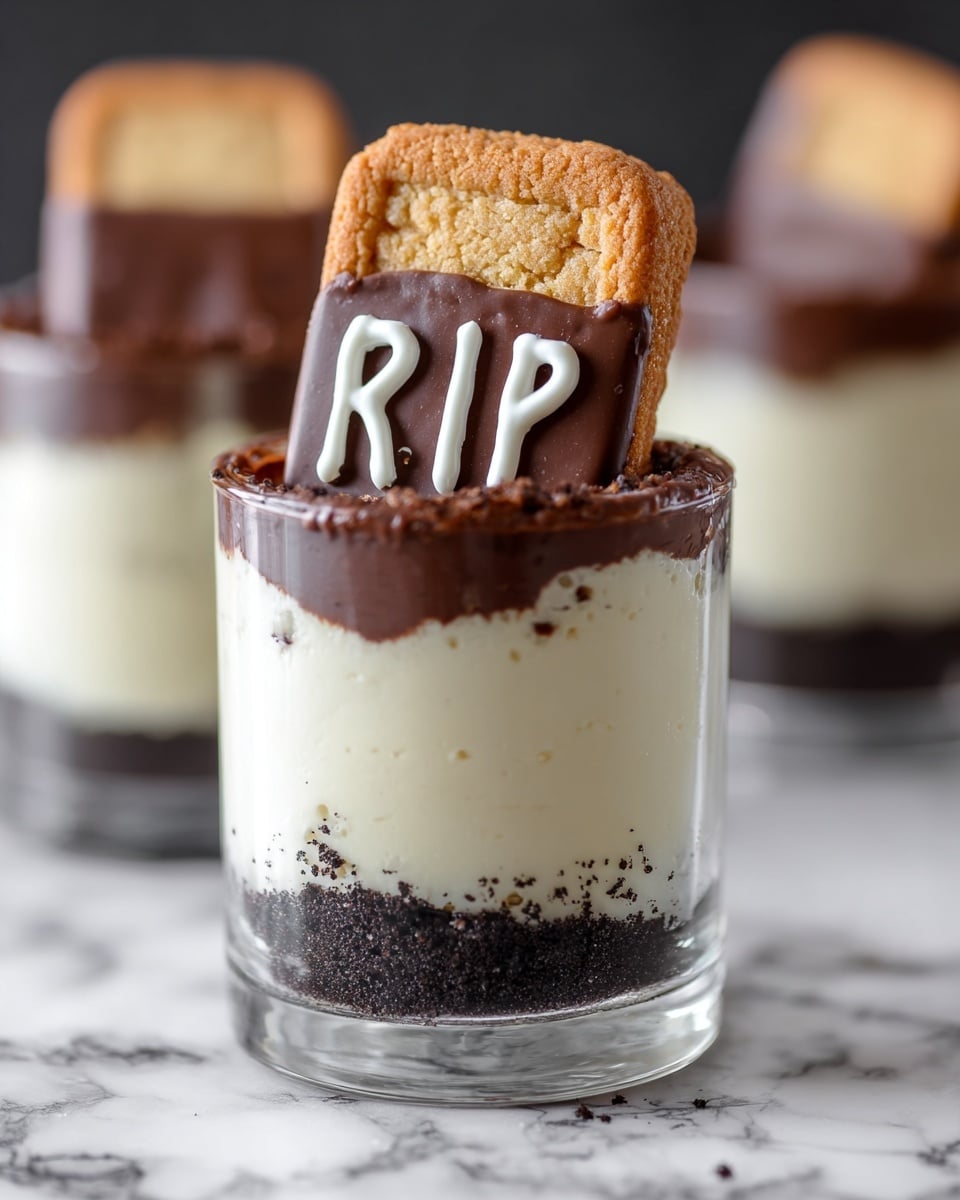
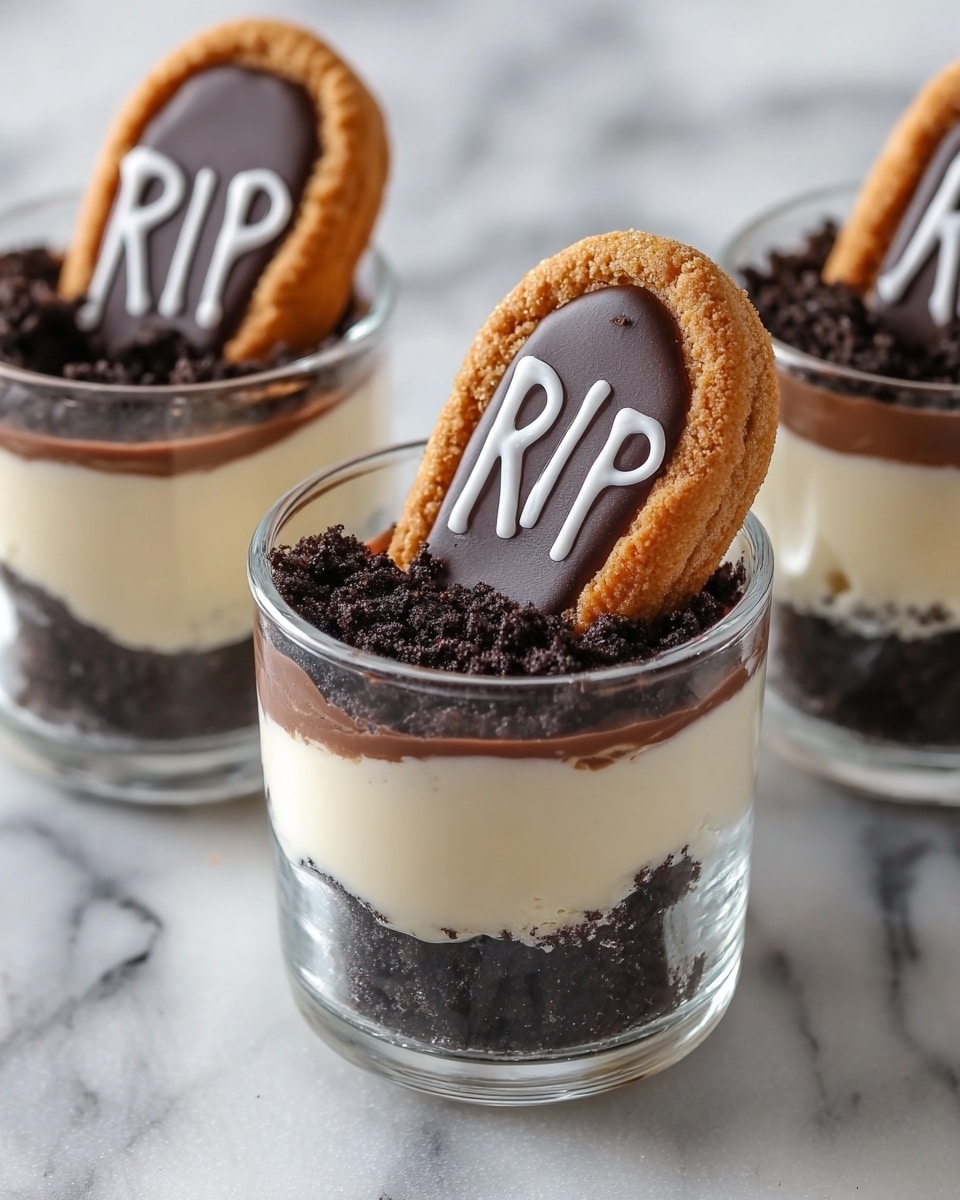
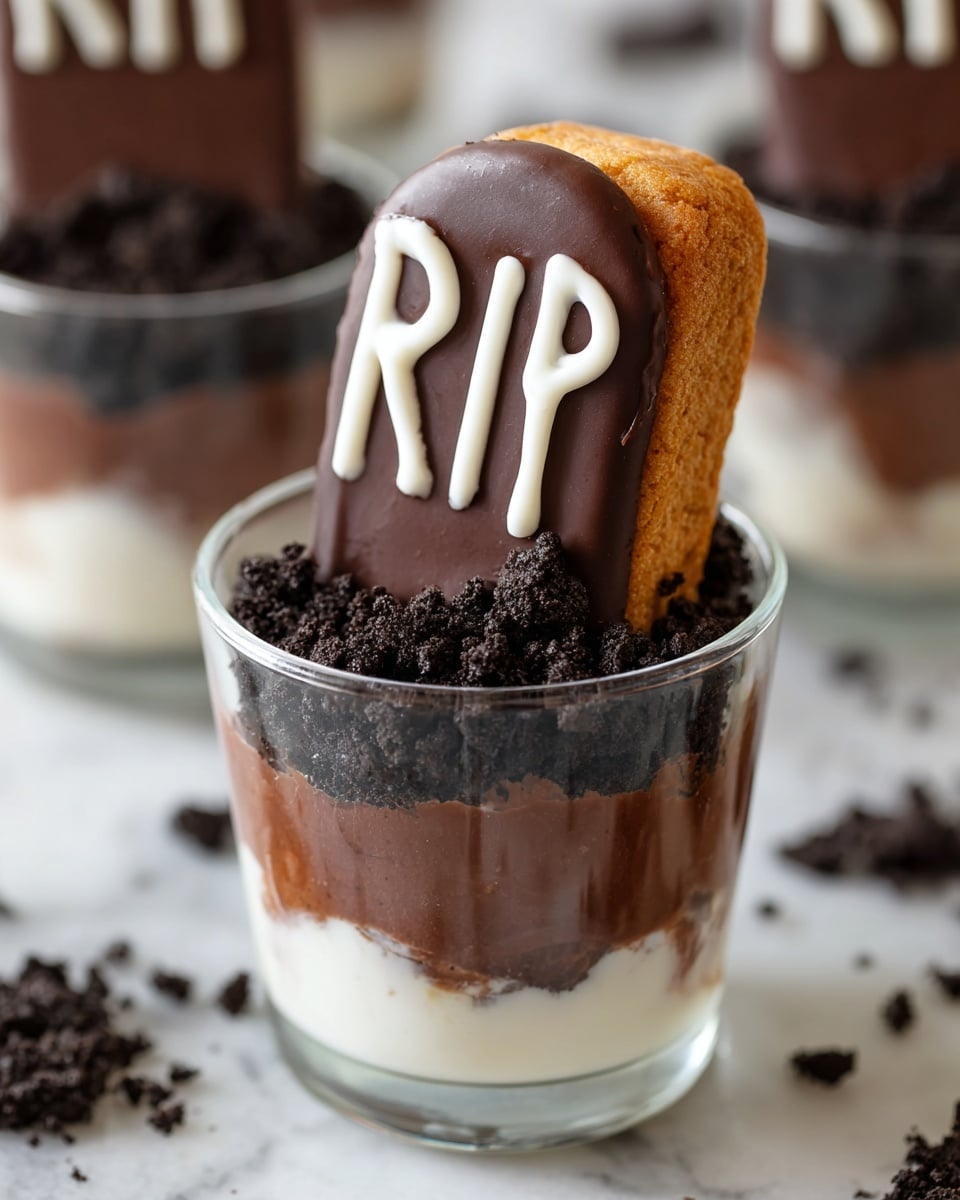
Hey there, Halloween lovers! If you’re looking for a fun, spooky treat that’s as charming as it is delicious, I’m so excited to share my RIP Halloween Dessert Shooters Recipe with you. These little shooters are packed with creamy pudding, crunchy Oreo “soil,” and a chocolatey ladyfinger gravestone that you can personalize yourself. Trust me, they’re perfect for parties or just because you deserve a bite of festive fun. Stick with me, and I’ll walk you through every step so your dessert shooters come out just right!
Why This Recipe Works
- Layered Textures: The combo of creamy pudding with crunchy Oreo crumbs and firm chocolate gravestones offers mouthwatering contrast.
- Simple Yet Impressive: Ingredients are everyday pantry staples, but the presentation steals the show.
- Customizable Details: You can easily swap flavors or decorations to make these shooters your own spooky signature.
- Party-Perfect Portions: Bite-sized and easy to serve, so guests can grab and go without any mess.
Ingredients & Why They Work
All the ingredients in this RIP Halloween Dessert Shooters Recipe come together to create a playful, spooky vibe that tastes amazing. Each part, from the Oreo soil to the pudding base and the chocolatey gravestones, has a role that makes the whole dessert so fun. When picking ingredients, fresh ladyfingers and quality chocolate will make a noticeable difference.
- Oreos: Using the classic cookie gives you that crumbly soil effect and a delicious chocolate flavor that almost everyone loves.
- Pudding powder: Choose your favorite flavor; I often go with chocolate or vanilla for a nice contrast with the Oreos.
- Semisweet or dark chocolate: Melts perfectly for coating ladyfingers and adds a rich depth to your gravestones.
- Unsalted butter: Helps create a smooth, glossy chocolate coating and controls sweetness.
- Ladyfingers: Perfectly shaped for gravestones, plus they soak up a little chocolate to stay moist but firm.
- Egg white: Used in the royal icing for writing “RIP,” and gets beautifully foamy when beaten.
- Powdered sugar: Sifted to avoid lumps, it balances the egg whites for smooth, pipeable icing.
Make It Your Way
One of my favorite things about this RIP Halloween Dessert Shooters Recipe is how easy it is to switch up flavors or decorations. Feel free to get creative — you can personalize the pudding flavor, the gravestone text, or add spooky sprinkles. It’s a great way to make these your own and surprise friends or family with a unique twist.
- Flavor swaps: I’ve experimented with pumpkin spice pudding for a seasonal twist that my guests absolutely loved.
- Dietary tweaks: You can use dairy-free pudding and vegan ladyfingers to make these shooters allergy-friendly.
- Decorative details: Instead of “RIP,” I like to pipe little spider webs or ghost faces on the ladyfingers for extra Halloween flair.
Step-by-Step: How I Make RIP Halloween Dessert Shooters Recipe
Step 1: Prep the Oreo Soil and Pudding Base
First, scrape the white filling from each Oreo and save it in a bowl — this little trick adds extra creaminess to the pudding. Next, throw the Oreo cookies (without filling) into a food processor for just a few seconds until you get crumbly “soil.” Follow the pudding packet instructions to prepare your pudding; while it’s still warm, mix in the Oreo filling for that luscious texture. Let the pudding cool slightly, then pour it into your glasses, filling each just halfway to leave room for the layers on top. Chill the glasses in your fridge while you prepare the gravestones.
Step 2: Make Your Chocolate Covered Gravestones
Place a pot of water to simmer and melt your chocolate with butter gently over the steam — this keeps it smooth and silky. Meanwhile, cut ladyfingers in half so they fit neatly in the glasses and will stand up like gravestones. Using a spatula, spread melted chocolate over each half and lay them on baking parchment to set. Once set, whip up your royal icing with egg white and sifted powdered sugar — beat the egg white first with a fork until foamy for best results. Transfer the icing to a plastic bag, snip a tiny hole, and pipe “RIP” onto each chocolate-coated ladyfinger. It’s surprisingly satisfying to do, and trust me, the kids will love it!
Step 3: Assemble Your Halloween Shooters
Once your pudding has partially set, top it with a generous layer of Oreo crumbs — this gives that crunchy “dirt” effect. Then gently press your decorated ladyfingers right into the crumbs so they stand tall like spooky gravestones. Pop the shooters back in the fridge to chill until you’re ready to serve. These shots look incredibly cute displayed all lined up at a Halloween party or chilling in the fridge for later.
Tips from My Kitchen
- Don’t Overprocess Oreos: Just pulse briefly to avoid turning the crumbs into powder.
- Foam Those Egg Whites First: Beating them until foamy before adding sugar makes piping a breeze.
- Use a Small Tip or Scissor Cut: For your piping bag or plastic baghole, make it small so your “RIP” writing turns out neat.
- Chill Between Layers: Refrigerate after pudding and after adding crumbs so layers stay distinct and pretty.
How to Serve RIP Halloween Dessert Shooters Recipe
Garnishes
I usually keep it simple with these shooters because the details are already so fun, but a few mini gummy worms peeking out of the Oreo soil always add a creepy-cute touch. Another favorite of mine is sprinkling edible glitter or orange and black sprinkles on top for that extra party sparkle.
Side Dishes
Serve these alongside savory snacks like bite-sized mini sandwiches or a cheese board to balance out the sweetness. For a Halloween bash, I love pairing the shooters with spooky deviled eggs or black bean dip with chips for a nice contrast.
Creative Ways to Present
One year, I arranged the shooters on a tray decorated with dry ice for fog effect — talk about spooky wow-factor! You can also line them up in a coffin-shaped serving dish or nestle them in a hollowed-out pumpkin for fun. I’ve even used mini test tubes for a science-lab look that friends loved at a Halloween potluck.
Make Ahead and Storage
Storing Leftovers
If you happen to have leftovers (they don’t usually stick around long!), just cover the shooters tightly with plastic wrap or place them in an airtight container and refrigerate. They’ll keep fresh and delicious for 2-3 days tops.
Freezing
I don’t recommend freezing these since the pudding texture changes and the Oreo crumbs might get soggy, but if you try it, make sure to freeze them uncovered to avoid sogginess and thaw gently in the fridge.
Reheating
Since this dessert is best served chilled, I suggest enjoying leftovers cold — reheating won’t do much good here. Just pull them out of the fridge about 10 minutes before serving so the pudding softens slightly for the best palate experience!
FAQs
-
Can I use homemade pudding instead of packet pudding powder?
Absolutely! Homemade pudding can add a lovely fresh taste. Just make sure it’s thick enough to hold up when layered and cooled, otherwise the Oreo crumbs might sink instead of resting on top.
-
What if I don’t have a piping bag for the “RIP” letters?
No piping bag? No problem! Use a small zip-top bag and snip a tiny corner to pipe your icing. I’ve found this method works perfectly for neat letters without fancy tools.
-
Can I make these dessert shooters vegan?
Yes! Swap pudding for a vegan version, use vegan Oreos (great news—they’re naturally vegan!), dairy-free butter alternatives, and vegan-friendly ladyfingers. You’ll still get all the spooky fun with a plant-based twist.
-
How long do these dessert shooters last once assembled?
For best texture and flavor, enjoy within 2-3 days. Longer storage can cause sogginess, especially with the Oreo crumbs and ladyfingers.
Final Thoughts
This RIP Halloween Dessert Shooters Recipe holds a special place in my heart — it’s the perfect blend of spooky and sweet without being complicated. I remember making these with my kids one fall afternoon, and how their eyes lit up piping “RIP” on each gravestone. It’s a little tradition that brings fun memories and delicious bites all in one. I hope you’ll give it a try and enjoy the smiles (and repeated requests) that come next!
Print
RIP Halloween Dessert Shooters Recipe
- Prep Time: 40 minutes
- Cook Time: 0 minutes
- Total Time: 40 minutes
- Yield: 24 servings
- Category: Dessert
- Method: No-Cook
- Cuisine: American
Description
RIP Halloween Dessert Shooters are a spooky and delicious treat perfect for Halloween parties. These mini dessert cups feature a creamy Oreo pudding base topped with Oreo cookie crumbs and decorated with chocolate-covered ladyfinger gravestones inscribed with RIP royal icing, creating a fun and eerie presentation.
Ingredients
For the Soil
- 12 Oreo cookies
- 1 packet pudding powder (1.4 ounces/43 grams) of your choice
For the Gravestones
- 2 ounces semisweet or dark chocolate (60 grams)
- 3 tablespoons unsalted butter
- 12 ladyfingers
- 1 tablespoon egg white
- 5 tablespoons powdered sugar, sifted
Instructions
- Prepare Oreo Soil: Scrape the white filling from each Oreo cookie and place it in a bowl. Set it aside. Place the Oreo cookies into a food processor and process for a few seconds until they reach a crumb-like texture.
- Make Pudding Mixture: Prepare the pudding according to the packet instructions. While the pudding is still hot, stir in the reserved Oreo filling until well combined. Allow the mixture to cool slightly before pouring.
- Assemble Pudding Shooters: Pour the pudding mixture into small 1.5 oz (45 ml) glasses, filling only half of each glass to make room for the Oreo crumbs and gravestones. Place the glasses in the refrigerator to chill.
- Melt Chocolate: Melt the chocolate and unsalted butter together over a pot of simmering water until smooth and combined.
- Prepare Ladyfinger Gravestones: Cut each ladyfinger in half. Using a spatula, spread the melted chocolate over each ladyfinger half. Place the coated ladyfingers on a sheet of baking paper and allow the chocolate to set completely.
- Make Royal Icing: Beat the egg white lightly with a fork until foamy, then gradually mix in sifted powdered sugar until smooth. Transfer the icing to a ziplock bag and cut a tiny hole at one corner for piping.
- Decorate Gravestones: Once the chocolate has set on the ladyfingers, pipe the letters “RIP” onto each using the royal icing.
- Final Assembly: Once the pudding has set slightly, top each glass with Oreo crumbs. Insert a decorated ladyfinger gravestone into each glass. Keep the assembled dessert shooters refrigerated until ready to serve.
Notes
- Use 1.5 oz (45 ml) capacity glasses for best presentation and portion size.
- If royal icing is too thick, add a few drops of water to reach piping consistency.
- Semisweet or dark chocolate can be substituted depending on your sweetness preference.
- For a richer flavor, try adding a teaspoon of vanilla extract to the pudding mixture before chilling.
- Ensure chocolate fully sets before piping to prevent smudging.
- These dessert shooters can be prepared a few hours in advance and stored refrigerated.
Nutrition
- Serving Size: 1 shooter (1.5 oz)
- Calories: 150 kcal
- Sugar: 20 g
- Sodium: 90 mg
- Fat: 6 g
- Saturated Fat: 3.5 g
- Unsaturated Fat: 2 g
- Trans Fat: 0 g
- Carbohydrates: 22 g
- Fiber: 1 g
- Protein: 2 g
- Cholesterol: 10 mg

