Berry Galette Recipe
I absolutely love sharing this Berry Galette Recipe with friends because it’s just so wonderfully simple and yet has that homemade charm that wows everyone. There’s something magical about the rustic, free-form shape and the juicy, slightly tart berries tucked inside a flaky golden crust. Whether you’re making it for a casual weekend dessert or a special gathering, this galette really hits the sweet spot between elegant and easy.
What makes this Berry Galette Recipe stand out for me is how effortlessly it comes together, especially when you use store-bought pie dough, but it still feels totally homemade. Plus, it’s flexible—you can use any mix of berries you have on hand, making it perfect when you’re inspired by seasonal fruit or just grabbing whatever’s fresh at the market. I promise, once you try it, you’ll want to make this again and again.
Why This Recipe Works
- Simple Ingredients: Uses common pantry items and fresh berries to create big flavor without fuss.
- Rustic Charm: The free-form crust makes it easy—no pie pan needed, and it looks beautiful every time.
- Versatile Fruit Filling: You can mix berries or swap in other fruits to suit the season or your cravings.
- Perfect Balance: The lemon zest and vanilla add brightness and depth, balancing the berries’ sweetness.
Ingredients & Why They Work
The ingredients in this Berry Galette Recipe come together to provide that perfect mix of flavors and textures—from the fresh juicy berries to the flaky crust. Each item plays a special role, so choosing ripe berries and good-quality pie dough really helps make your galette shine.
- Mixed Berries: Using a combination of berries creates a layered flavor, balancing sweetness and tartness beautifully.
- Granulated Sugar: Sweetens the berries just right and helps draw out their natural juices for that luscious filling.
- Cornstarch: This is the secret weapon for thickening the filling and preventing a runny galette.
- Lemon Zest & Juice: Adds brightness that cuts through the sweetness and enhances the berry flavors.
- Vanilla Extract: A subtle warming note that rounds out the filling’s profile.
- Pie Dough: Flaky and buttery crust is the perfect vessel for the berries, and store-bought dough works wonderfully to save time.
- Egg: For brushing the crust, it gives the galette that gorgeous golden color and slight shine.
- Coarse Sugar: Optional but recommended for that delightful crunchy texture atop the crust.
Make It Your Way
One of the best things about this Berry Galette Recipe is how easy it is to personalize. I love trying out different berry combinations or adding a sprinkle of cinnamon for a cozy twist—feel free to experiment with what you like!
- Variation: I once swapped half the berries for diced peaches during summer, and it was such a fresh twist—don’t hesitate to mix fruits based on what’s fresh or what you have leftover in your fridge.
- Dietary Modification: If you want a gluten-free version, I recommend using a gluten-free pie crust; it still bakes beautifully and holds the filling well.
- Difficulty Level: To make this even simpler, you can skip the lemon zest and vanilla—but I urge you to keep them in next time because they make a noticeable difference.
Step-by-Step: How I Make Berry Galette Recipe
Step 1: Preheat and Prep
First things first—preheat your oven to 400°F and line your baking sheet with parchment paper. This helps the galette bake evenly and makes cleanup a breeze. I always double-check my oven temperature to make sure it’s spot on, because a well-heated oven makes all the difference in getting that crust perfectly golden.
Step 2: Mix the Berry Filling
In a large bowl, gently toss together your mixed berries with sugar, cornstarch, lemon zest, lemon juice, and vanilla extract. The cornstarch might look like a small amount, but it’s essential for thickening the natural berry juices as they bake, so don’t skip it. Be careful not to overmix to avoid bruising the berries too much.
Step 3: Roll Out the Dough
Place your chilled pie dough on the parchment-lined baking sheet and roll it gently into a roughly 12-inch circle if it’s not already that size. Don’t stress too much about perfect edges—this is a galette, so rustic is the goal here. If the dough is sticky, just dust with a bit of flour.
Step 4: Assemble the Galette
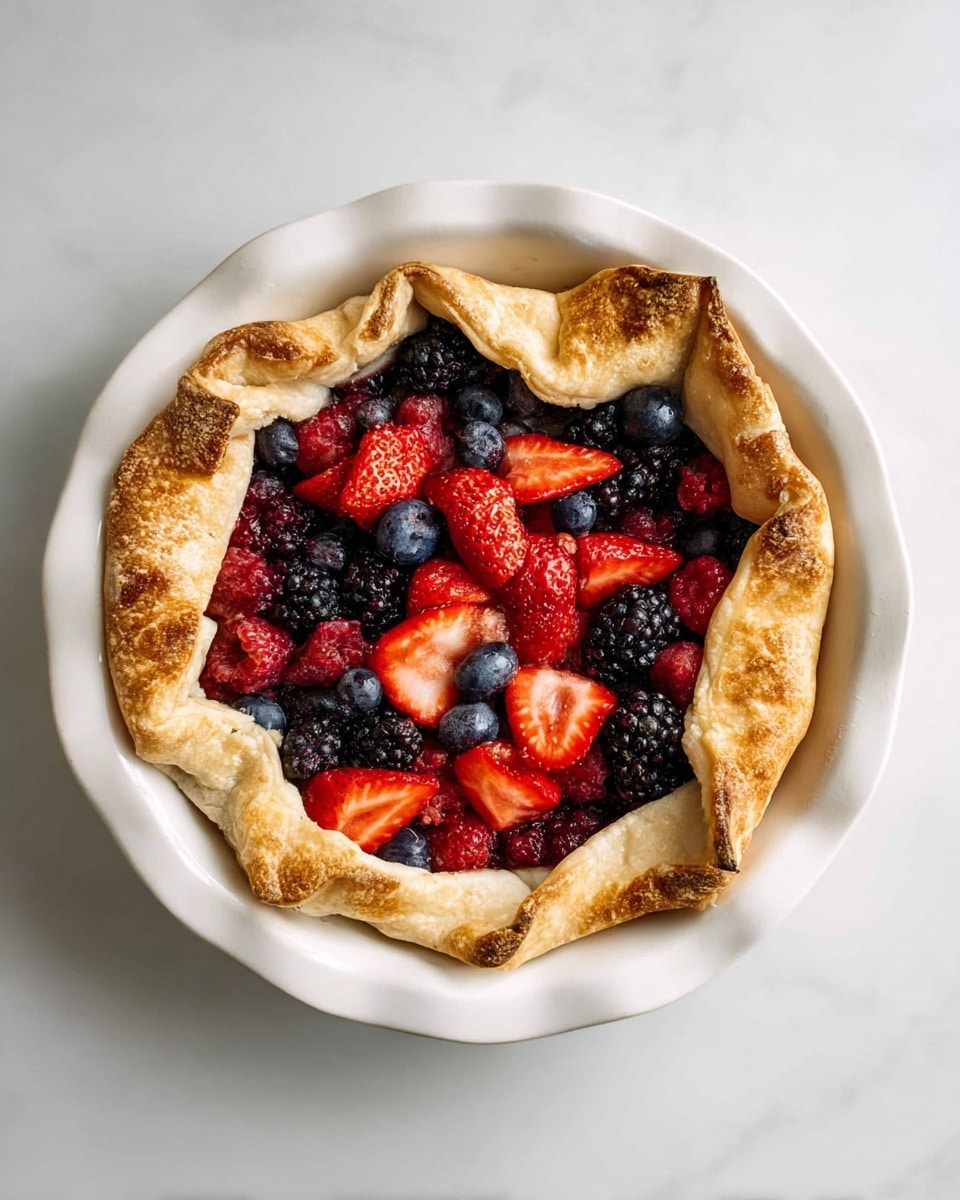
Spoon the berry filling right into the center of the dough, leaving about a 2-inch border all around. Then fold the edges of the dough up and over the fruit, pleating as you go to create a rustic edge and keep the filling contained—this is the best part, where your galette really starts to come to life! Finally, beat your egg and brush it generously over the dough to help it brown beautifully.
Step 5: Bake and Enjoy
Sprinkle coarse sugar over the crust if you like that extra crunch, then pop your galette into the oven for about 30–35 minutes. You’ll want to bake it until the crust is golden brown and the berries are bubbling away—it smells amazing at this point! After baking, let it cool at least 10 minutes before slicing so those lovely juices can thicken up.
Tips from My Kitchen
- Don’t Overmix Berries: Stir gently to keep berries whole for a prettier, more flavorful filling.
- Chill Your Dough: Cold dough makes for a flakier crust, so keep it refrigerated until the last minute.
- Use Parchment Paper: It makes rolling and transferring the galette so much easier and cleanup faster.
- Let It Cool Before Serving: The filling thickens as it cools, so your slices hold together nicely.
How to Serve Berry Galette Recipe
Garnishes
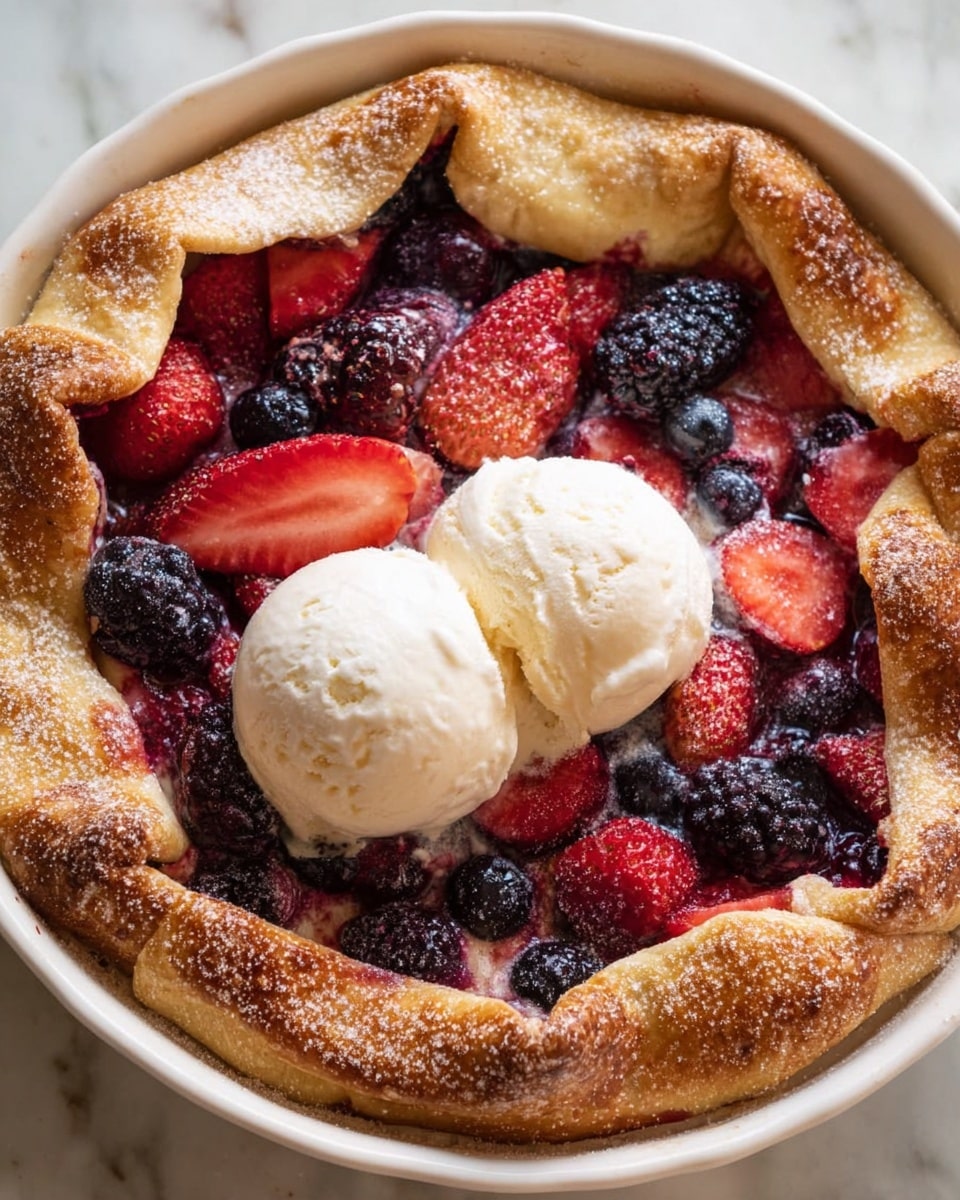
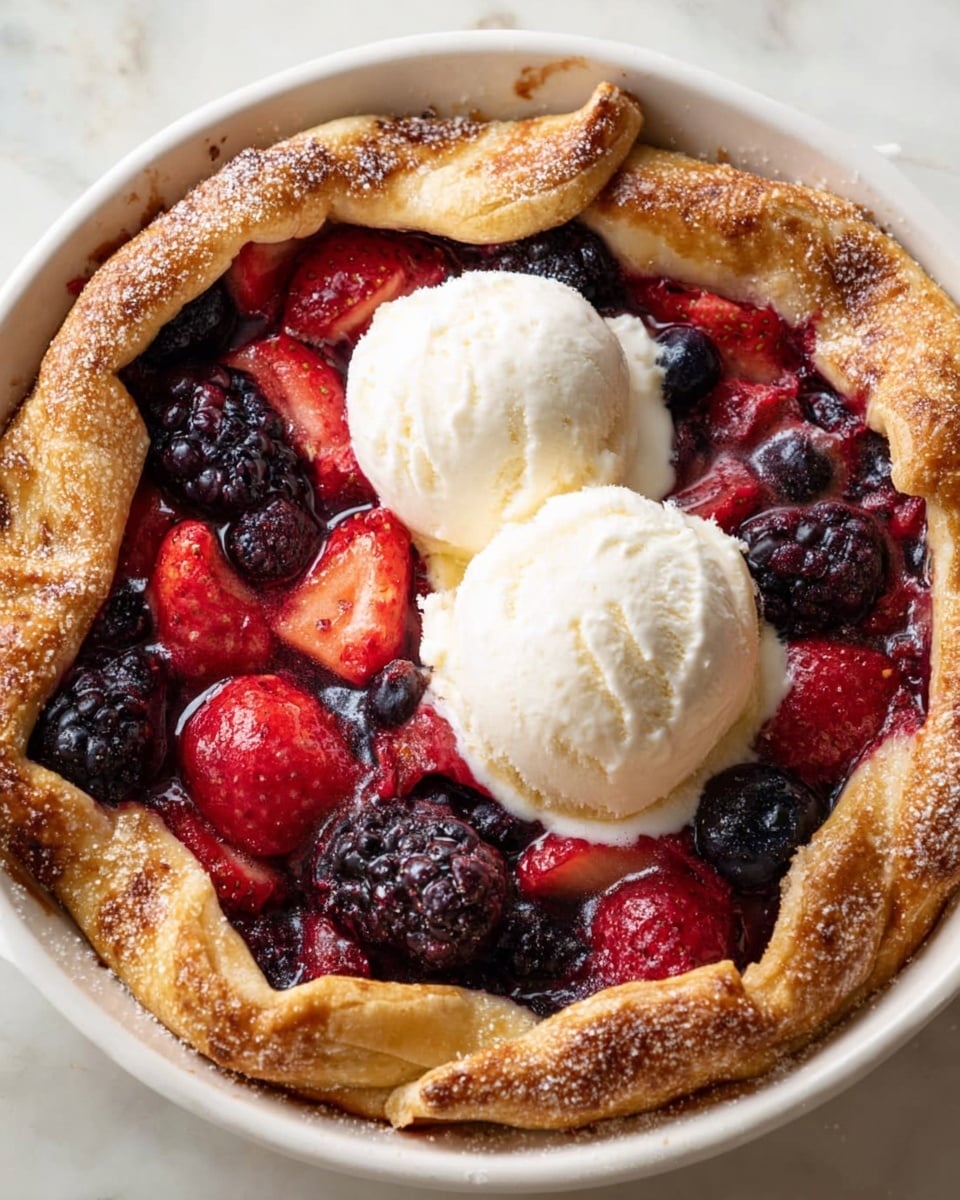
I love topping my Berry Galette with a scoop of vanilla ice cream or a dollop of freshly whipped cream—the cold creaminess contrasts beautifully with the warm berries and crisp crust. A sprinkle of powdered sugar or a few fresh mint leaves adds a lovely finishing touch when you’re serving guests.
Side Dishes
Since this galette is quite the star dessert, I usually keep sides simple—think a light green salad or a cheese plate if serving as part of a larger meal. It’s sweet and satisfying on its own, so no need to overwhelm with heavy sides.
Creative Ways to Present
For special occasions, I like to glaze the crust with a bit of warmed apricot jam before baking for an extra shine, or arrange extra berries on top inside the crust before folding in the edges. Another fun idea is serving mini galettes in ramekins for individual portions—such a crowd-pleaser!
Make Ahead and Storage
Storing Leftovers
Leftover Berry Galette keeps well covered at room temperature for a day or two, but I like to store it in the fridge if I want it to last longer. Just keep it wrapped tightly with plastic wrap to maintain its freshness and prevent the crust from getting soggy.
Freezing
If you want to freeze the galette, it’s best to do so before baking. Wrap it well in plastic wrap and foil, then freeze for up to two months. When ready, bake it straight from the freezer—just add a few extra minutes to the baking time.
Reheating
I reheat leftover galette slices in a 350°F oven for about 10 minutes to bring back that flaky crust texture. Avoid microwaving because the crust can get soggy quickly, and you lose that delightful flakiness.
FAQs
-
Can I use frozen berries for the Berry Galette Recipe?
Yes, you can use frozen berries, but be sure to thaw and drain them well before mixing into the filling to avoid excess moisture that makes the crust soggy. Toss the thawed berries gently with a bit more cornstarch if needed to help thicken the juices.
-
What kind of pie dough works best?
I usually use store-bought refrigerated pie dough for convenience, but homemade pie crust also works beautifully and adds a personal touch. Just make sure it’s cold and well-chilled before rolling out for the best flaky results.
-
Can I make this galette vegan?
Absolutely! Use a vegan pie crust and substitute the egg wash with a plant-based milk or maple syrup for brushing the crust—you’ll still get a lovely golden color and a delicious treat.
-
How do I prevent the crust from getting soggy?
Using cornstarch in the filling is key to thickening the berry juices. Also, baking on parchment paper and not piling the berries too high helps. Letting the galette cool before slicing also lets the juices set up.
-
Can I use this recipe with other fruits?
Yes! This galette is very forgiving. Try apples, peaches, plums, or cherries—just adjust sugar and lemon juice to your taste, and add a bit more cornstarch if the fruit is very juicy.
Final Thoughts
This Berry Galette Recipe holds a special place in my kitchen rotation because it’s both comforting and impressive without being overwhelming. I love how it brings out the best in fresh berries, wrapped in a golden flaky crust that anyone can make. Give it a try—you might just end up making it your go-to berry dessert!
Print
Berry Galette Recipe
- Prep Time: 10 minutes
- Cook Time: 35 minutes
- Total Time: 55 minutes
- Yield: 6 servings
- Category: Dessert
- Method: Baking
- Cuisine: American
- Diet: Vegetarian
Description
This delicious Berry Galette features a flaky homemade or store-bought pie dough filled with a vibrant mixture of mixed berries, lemon zest, and vanilla. Baked until golden and bubbly, it’s a perfect rustic dessert that pairs beautifully with vanilla ice cream or whipped cream.
Ingredients
Filling
- 2 cups mixed berries (blueberries, raspberries, blackberries, strawberries chopped)
- ¼ cup granulated sugar
- 1 tablespoon cornstarch
- 1 teaspoon lemon zest
- 1 tablespoon lemon juice
- 1 teaspoon vanilla extract
Crust & Topping
- 1 sheet store-bought pie dough or homemade, chilled
- 1 egg (for egg wash)
- Optional: coarse sugar for sprinkling
Instructions
- Preheat Oven: Preheat your oven to 400°F and line a baking sheet with parchment paper to prevent sticking and facilitate easy cleanup.
- Prepare the Filling: In a mixing bowl, combine the mixed berries, ¼ cup granulated sugar, cornstarch, lemon zest, lemon juice, and vanilla extract. Stir gently until the berries are evenly coated with the mixture.
- Roll Out Dough: Place your chilled pie dough sheet on the parchment paper. If necessary, roll it out slightly to form a 12-inch diameter circle for an even crust.
- Assemble: Spoon the berry mixture into the center of the dough, leaving about a 2-inch border around the edges. Carefully fold the edges of the dough over the berries, pleating as you go to create a rustic edge. The middle with the berries should remain exposed. Beat the egg and brush the egg wash over the dough crust to help it brown beautifully during baking.
- Finish & Bake: Sprinkle coarse sugar over the crust for added texture and sweetness if using. Bake the galette on the prepared baking sheet for 35 minutes, or until the crust turns golden brown and the berries are bubbling hot.
- Cool & Serve: Allow the galette to cool for at least 10 minutes on a wire rack to let the juices thicken. Serve warm, topped with vanilla ice cream or whipped cream for an extra indulgent treat.
Notes
- Use fresh or frozen berries; if frozen, do not thaw before mixing to reduce sogginess.
- For a crispier crust, chill the dough again after assembling before baking.
- Substitute lemon zest and juice with orange for a different citrus flavor.
- Store any leftovers covered in the refrigerator and reheat gently before serving.
- Customize by adding a sprinkle of cinnamon or nutmeg to the filling for warm spice notes.
Nutrition
- Serving Size: 1 slice
- Calories: 280 kcal
- Sugar: 18 g
- Sodium: 150 mg
- Fat: 15 g
- Saturated Fat: 6 g
- Unsaturated Fat: 7 g
- Trans Fat: 0 g
- Carbohydrates: 35 g
- Fiber: 4 g
- Protein: 3 g
- Cholesterol: 55 mg

