Pan Fried Chicken Strips Recipe
If you’re anything like me, there’s something utterly comforting about a crispy, well-seasoned chicken strip that you made right in your own kitchen—no deep-fryer required. This Pan Fried Chicken Strips Recipe delivers exactly that: perfectly golden, juicy strips with a crunchy exterior that’s full of flavor. It’s my go-to when I want something satisfying and easy, whether it’s a quick lunch or a fun dinner with friends.
What makes this Pan Fried Chicken Strips Recipe really stand out is the seasoned flour double-dip technique. It gives the chicken a crave-worthy crunch without being too heavy or greasy. Plus, frying in a cast iron skillet means you get even heat distribution and a beautiful crust every time—trust me, this method works wonders!
Why This Recipe Works
- Perfectly Crispy Coating: The double dredging in seasoned flour and egg creates a crunchy, flavorful crust that holds up beautifully.
- Juicy Inside: Frying at just the right temperature keeps the chicken tender and moist inside, no dryness here.
- Simple, Quality Ingredients: Using everyday pantry staples with a few flavorful spices makes this recipe accessible and tasty.
- Cast Iron Skillet Magic: The even heat of the skillet ensures an even, golden crust and consistent cooking.
Ingredients & Why They Work
Each ingredient in this Pan Fried Chicken Strips Recipe plays a role in building a flavorful, crispy exterior and juicy inside. Plus, you probably already have most of these in your kitchen, which is a big win in my book.
- All-purpose Flour: The base for the coating, flour helps create that irresistible crust when seasoned just right.
- Kosher Salt: Essential for bringing out the chicken’s natural flavor and seasoning the coating evenly.
- Garlic Powder: Adds a savory note without overpowering the chicken—my secret way to boost flavor.
- Onion Powder: A subtle sweetness that rounds out the spice blend in the flour.
- Freshly Ground Pepper: Gives a mild kick and depth to the seasoning.
- Paprika: Adds a gentle smokiness and beautiful color to the coating.
- Egg: Acts as the binding agent between the flour layers for a sturdy, crispy crust.
- Chicken Breasts: I prefer boneless, skinless breasts cut into strips for quick, even cooking.
- Cooking Oil (Non-GMO Canola recommended): Neutral flavor and good smoke point make it perfect for frying.
Make It Your Way
This Pan Fried Chicken Strips Recipe is wonderfully versatile, so I often switch it up depending on my mood or what’s in my pantry. I encourage you to experiment with the seasoning mix or dipping sauces to find your favorite spin.
- Variation: I’ve had great results swapping paprika for smoked paprika for a deeper smoky flavor that pairs amazingly with a chipotle mayo dipping sauce.
- Dietary Modification: For a gluten-free version, simply use a gluten-free flour blend instead of all-purpose flour—it crisps up just as well!
- Spice it Up: Adding a pinch of cayenne or chili powder to the flour mix gives the strips a spicy kick I love on cooler nights.
Step-by-Step: How I Make Pan Fried Chicken Strips Recipe
Step 1: Prep Your Chicken Strips and Seasoning
Start by slicing your chicken breasts into evenly sized strips to ensure they cook uniformly. Then whisk together your seasoned flour mixture combining flour, kosher salt, garlic powder, onion powder, freshly ground pepper, and paprika in a shallow dish. Crack your egg into a small bowl and beat it well — this helps the coating stick beautifully in the next steps.
Step 2: Get Your Pan Ready
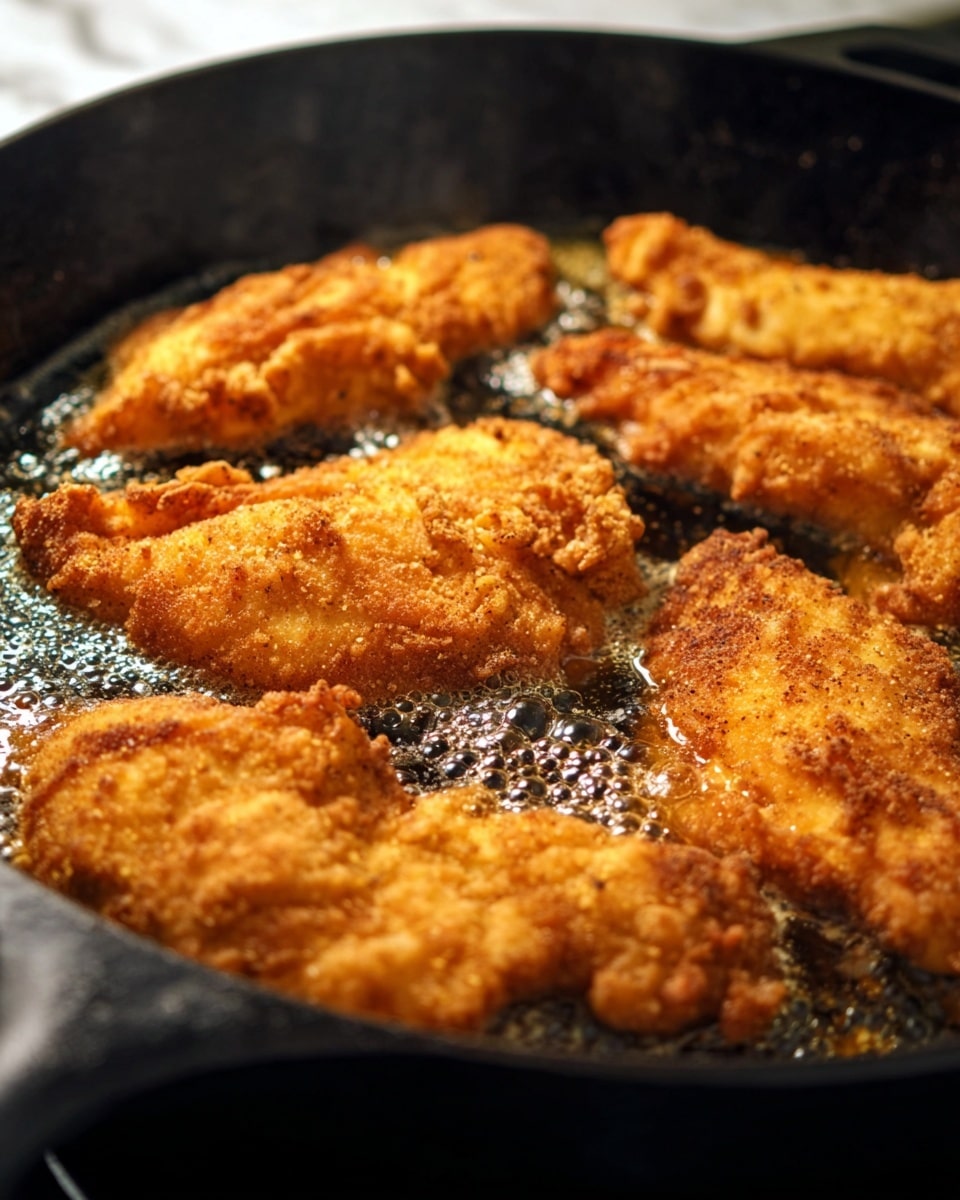
I heat my non-GMO canola oil in a 12-inch cast iron skillet over medium heat. The goal is about 350°F, perfect for a crispy crust without sogginess. If you don’t have a thermometer, test by dropping a bit of flour in—if it sizzles and brown immediately, you’re good to go.
Step 3: The Double Dredge Method
Coat each chicken strip lightly in the flour mixture first, but don’t drown it—just enough to stick. Then dip it in the beaten egg, and immediately return it to the flour mixture for a second coat. Before frying, I like to give each strip one final roll in the seasoned flour to maximize that crunchy coating. This might feel like extra work, but trust me, the texture is worth it.
Step 4: Fry to Perfection
Gently place your strips one by one into the hot oil—don’t crowd the pan or the temperature will drop. Fry for about 4 minutes on one side, then carefully flip and cook another 3–4 minutes. Use a meat thermometer if you have one; you want the internal temperature to reach 160°F for juicy, safe-to-eat chicken.
Step 5: Drain and Serve
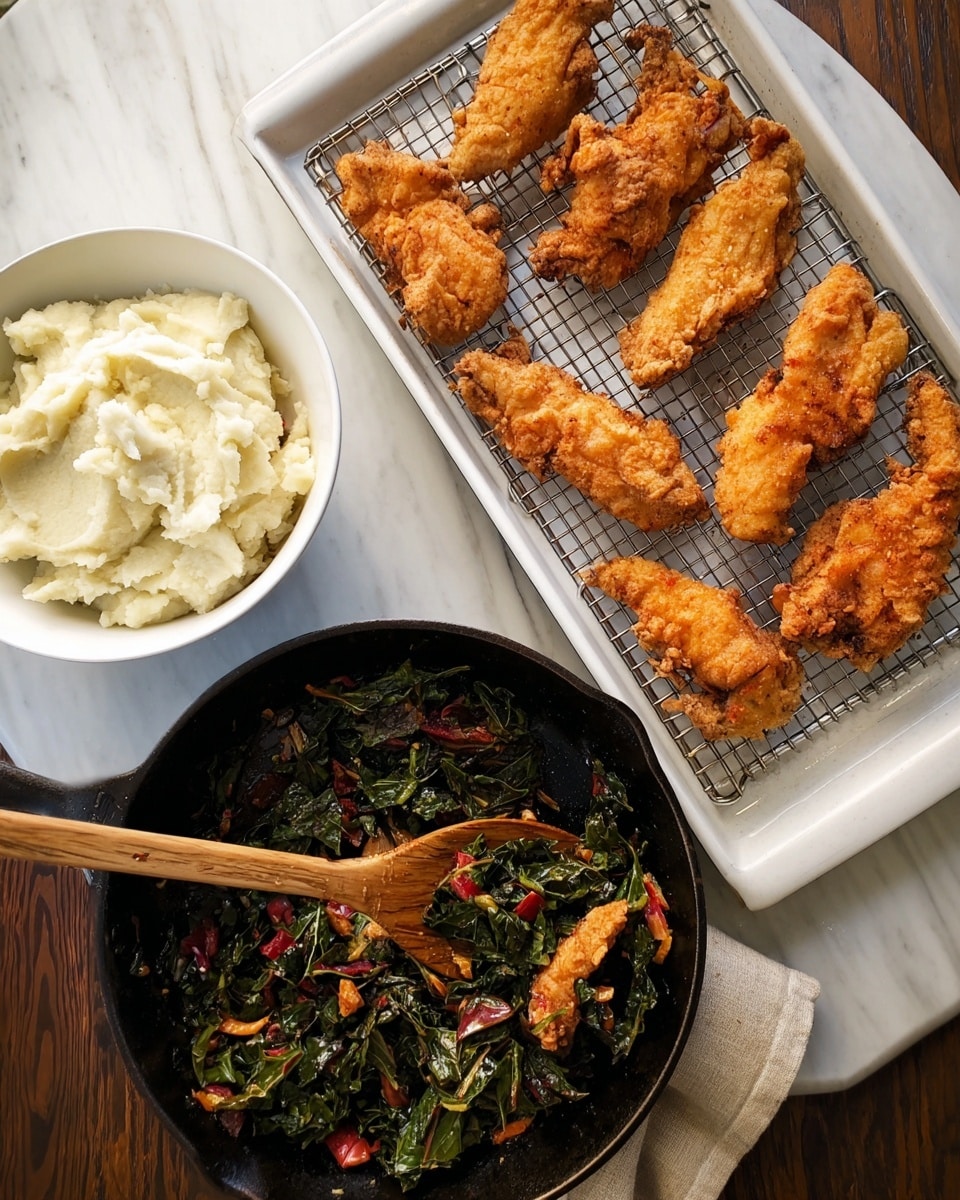
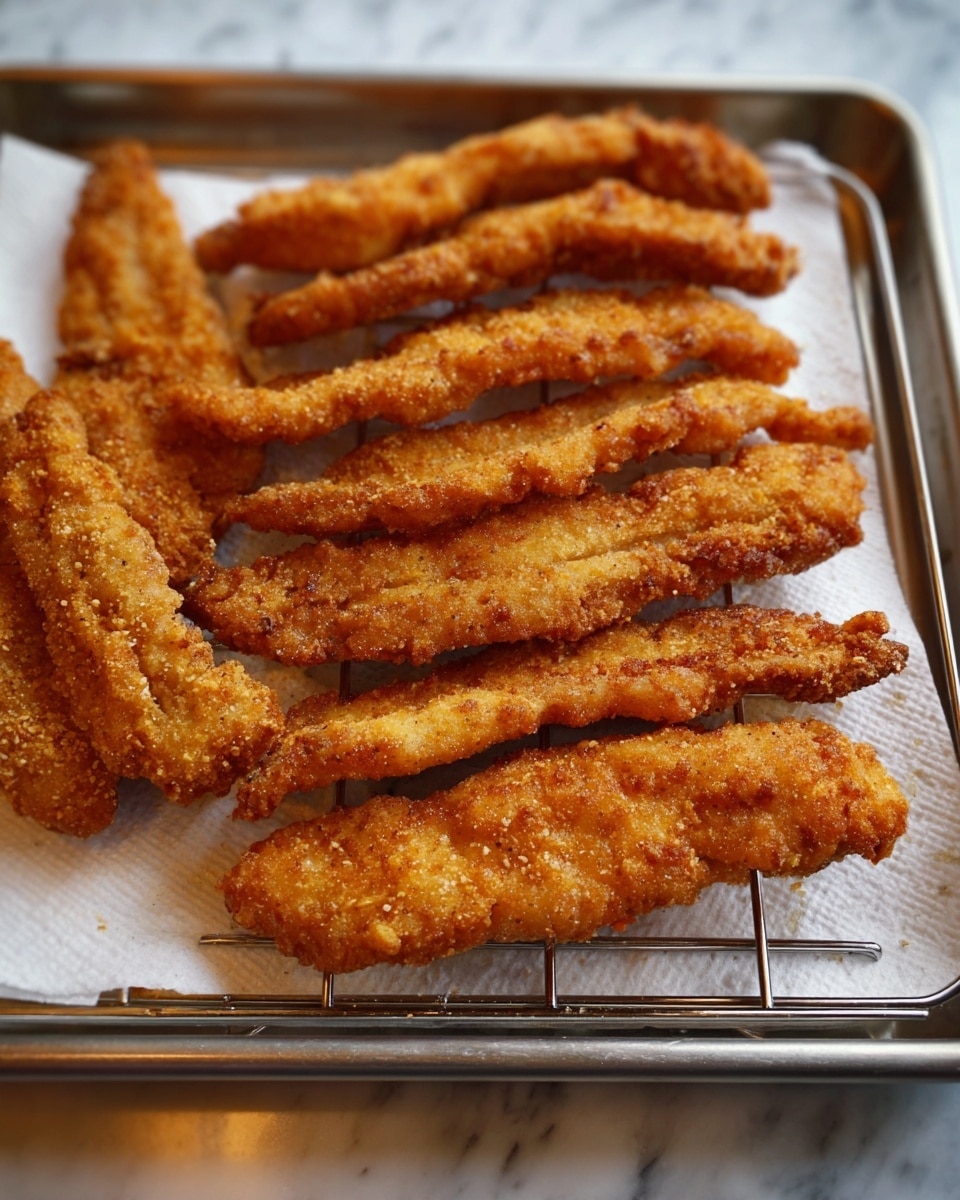
Transfer your golden strips to a cooling rack set over a baking sheet lined with paper towels—that’s the best way to get any excess oil off without losing the crispness. Serve immediately to enjoy the full crunchy texture, or keep warm in the oven at low heat if you’re preparing other dishes.
Tips from My Kitchen
- Keep Your Oil Hot: I always monitor the temperature closely because if it drops too low, the chicken absorbs oil and gets greasy.
- Cut Even Strips: Uniform strips cook evenly and prevent some pieces from being overdone while others remain undercooked.
- Choose Your Oil Wisely: I use canola oil because it has a neutral flavor and high smoke point, perfect for frying.
- Don’t Skip The Final Flour Dip: That last roll in flour before frying adds extra crunch and really boosts the texture.
How to Serve Pan Fried Chicken Strips Recipe
Garnishes
I like to sprinkle mine with a little flaky sea salt and a sprinkle of fresh chopped parsley—it adds a fresh contrast to the crispy, savory chicken. A squeeze of lemon over the top also gives a lovely brightness that cuts through the richness.
Side Dishes
This recipe pairs beautifully with homemade honey mustard or spicy barbecue dipping sauce. As a side, I often go for classic coleslaw or crispy baked fries to round out the plate. For something lighter, a crisp green salad fits the bill perfectly.
Creative Ways to Present
For gatherings, I once served these chicken strips on a wooden board alongside an array of dipping sauces in mini bowls. Tucking them into warm pita pockets with shredded lettuce and a drizzle of tzatziki makes for a fun, customizable finger food experience that everyone enjoyed.
Make Ahead and Storage
Storing Leftovers
I store leftover chicken strips in an airtight container lined with paper towels to keep them crisp longer. They usually last well in the fridge for up to 3 days, perfect for easy lunch or snack options.
Freezing
If I plan ahead, I freeze cooled strips in a single layer on a baking sheet first, then transfer them to a freezer bag. This stops them from clumping. This method makes sure each strip retains its crispy coating when reheated later.
Reheating
To keep them crunchy, I reheat the strips in an oven or toaster oven at 350°F for about 10 minutes. Avoid microwaving if you can because it softens the crust, but in a pinch, a quick zap with a paper towel can work.
FAQs
-
Can I use chicken thighs instead of breasts for the Pan Fried Chicken Strips Recipe?
Absolutely! Chicken thighs bring extra juiciness and flavor. Just be sure to adjust cooking time slightly since thighs tend to cook faster and can benefit from a slightly lower heat to avoid burning the coating.
-
What’s the best way to know when the oil is ready for frying?
Using a candy or deep-fry thermometer is ideal to reach about 350°F. Without one, you can test by dropping a small pinch of flour in the oil—the flour should sizzle immediately and turn golden, not burn too fast.
-
How do I keep the chicken strips from getting soggy after frying?
Draining them on a cooling rack instead of directly on paper towels helps maintain crispiness by letting excess oil drip away without trapping steam underneath.
-
Can I make these chicken strips gluten-free?
Yes! Substitute all-purpose flour with a gluten-free blend. I recommend one that includes xanthan gum or similar binders to mimic the crisp texture.
Final Thoughts
This Pan Fried Chicken Strips Recipe is one of those dishes I find myself coming back to time and time again because it simply works—easy to make, deeply satisfying, and endlessly customizable. Whether you’re feeding family or friends, these crispy, flavorful strips never fail to bring smiles around the table. Give them a try; I promise you’ll enjoy the process and the delicious results just as much as I do!
Print
Pan Fried Chicken Strips Recipe
- Prep Time: 15 minutes
- Cook Time: 10 minutes
- Total Time: 25 minutes
- Yield: 4 servings
- Category: Main Course
- Method: Frying
- Cuisine: American
Description
Crispy and flavorful pan fried chicken strips coated in a seasoned flour mixture, perfect for a quick and delicious meal or snack. This easy recipe uses simple ingredients and pan frying to achieve a tender, juicy inside with a crunchy outside.
Ingredients
Seasoned Flour Mix
- 2/3 cup flour
- 2 tsp kosher salt
- 1 1/2 tsp garlic powder
- 1 1/2 tsp onion powder
- 3/4 tsp freshly ground pepper
- 3/4 tsp paprika
Chicken and Coating
- 1 egg
- 2 chicken breasts
- 1 cup cooking oil (non GMO canola oil recommended)
Instructions
- Heat oil: Heat the cooking oil in a 12-inch cast iron skillet over medium heat until it reaches 350° F, using a candy thermometer to check the temperature.
- Prepare coating: In a shallow dish, combine the flour, kosher salt, garlic powder, onion powder, freshly ground pepper, and paprika; whisk together until blended. Crack the egg into a small bowl and vigorously mix with a fork. Cut the chicken breasts into strips.
- Coat chicken strips: Roll each chicken strip in the seasoned flour mixture until lightly coated. Dip the strip in the beaten egg, then return it to the seasoned flour and roll again to coat thoroughly. For extra crunch, roll the strips one more time in the seasoned flour before cooking. Place coated strips on a plate or cutting board.
- Fry chicken strips: Carefully place each strip into the hot oil and fry for 4 minutes. Using tongs or a fork, flip the strips and cook for an additional 3 to 4 minutes until the internal temperature reaches 160° F.
- Drain and serve: Place a cooling rack over a baking sheet lined with paper towels. Transfer the cooked chicken strips to the rack to drain excess oil. Serve immediately or keep warm in a low oven until ready to eat.
Notes
- Ensure your oil temperature remains steady around 350° F for optimal crispiness.
- Using a cast iron skillet helps maintain consistent heat for frying.
- Check chicken internal temperature with a meat thermometer to ensure safety and juiciness.
- You can substitute canola oil with vegetable or peanut oil if preferred.
- Adjust seasoning in the flour mix to your taste, adding cayenne for a spicy kick.
- For a gluten-free version, substitute all-purpose flour with a gluten-free flour blend.
Nutrition
- Serving Size: 1 serving
- Calories: 350 kcal
- Sugar: 1 g
- Sodium: 600 mg
- Fat: 22 g
- Saturated Fat: 4 g
- Unsaturated Fat: 17 g
- Trans Fat: 0 g
- Carbohydrates: 18 g
- Fiber: 1 g
- Protein: 28 g
- Cholesterol: 90 mg

