No-Bake Fudgy Chocolate Squares Recipe
I’ve been making these No-Bake Fudgy Chocolate Squares for as long as I can remember, and they never fail to impress a crowd. There’s just something magical about a rich, fudgy chocolate dessert that doesn’t require an oven—perfect for breaking out on hot summer days or when you’re short on time but craving something indulgent.
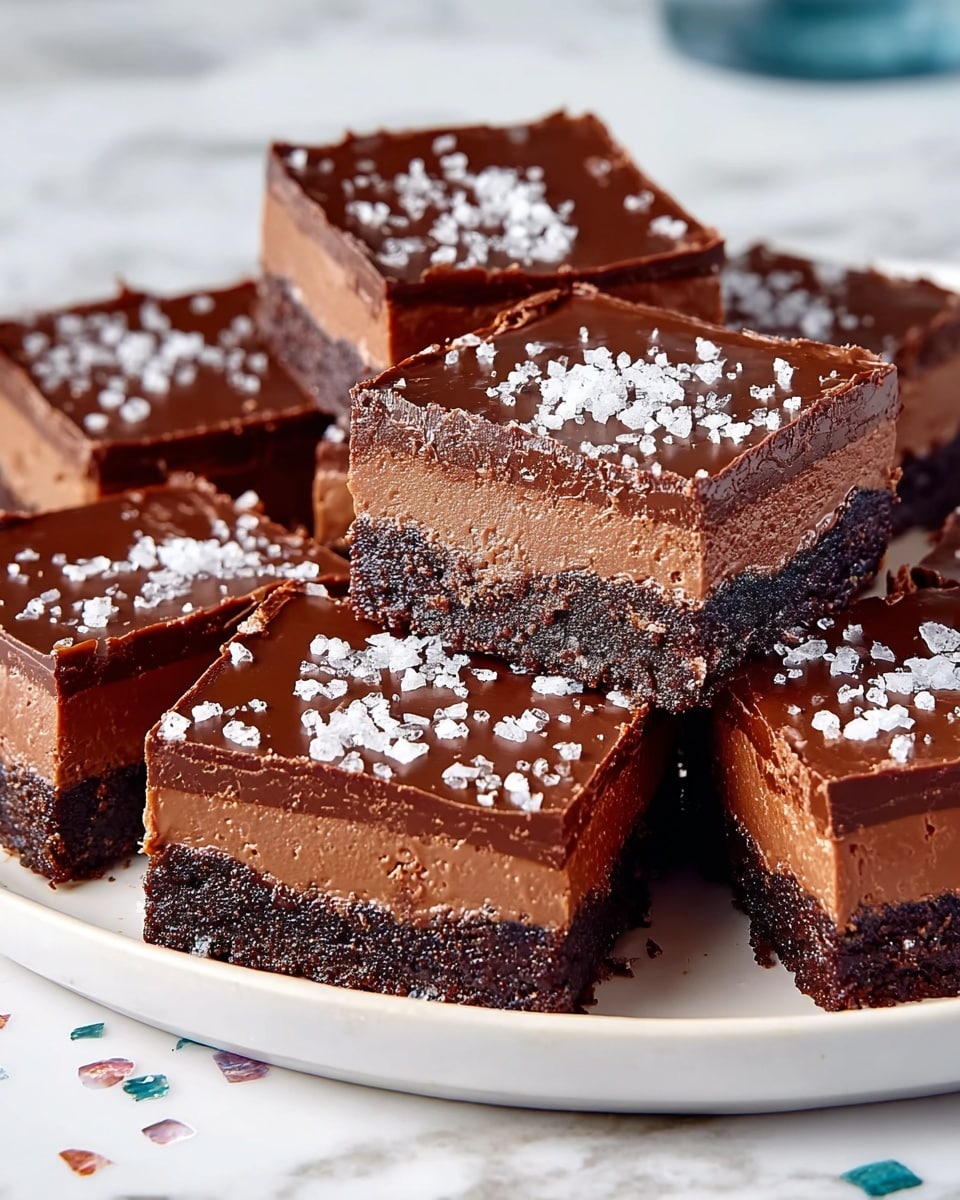
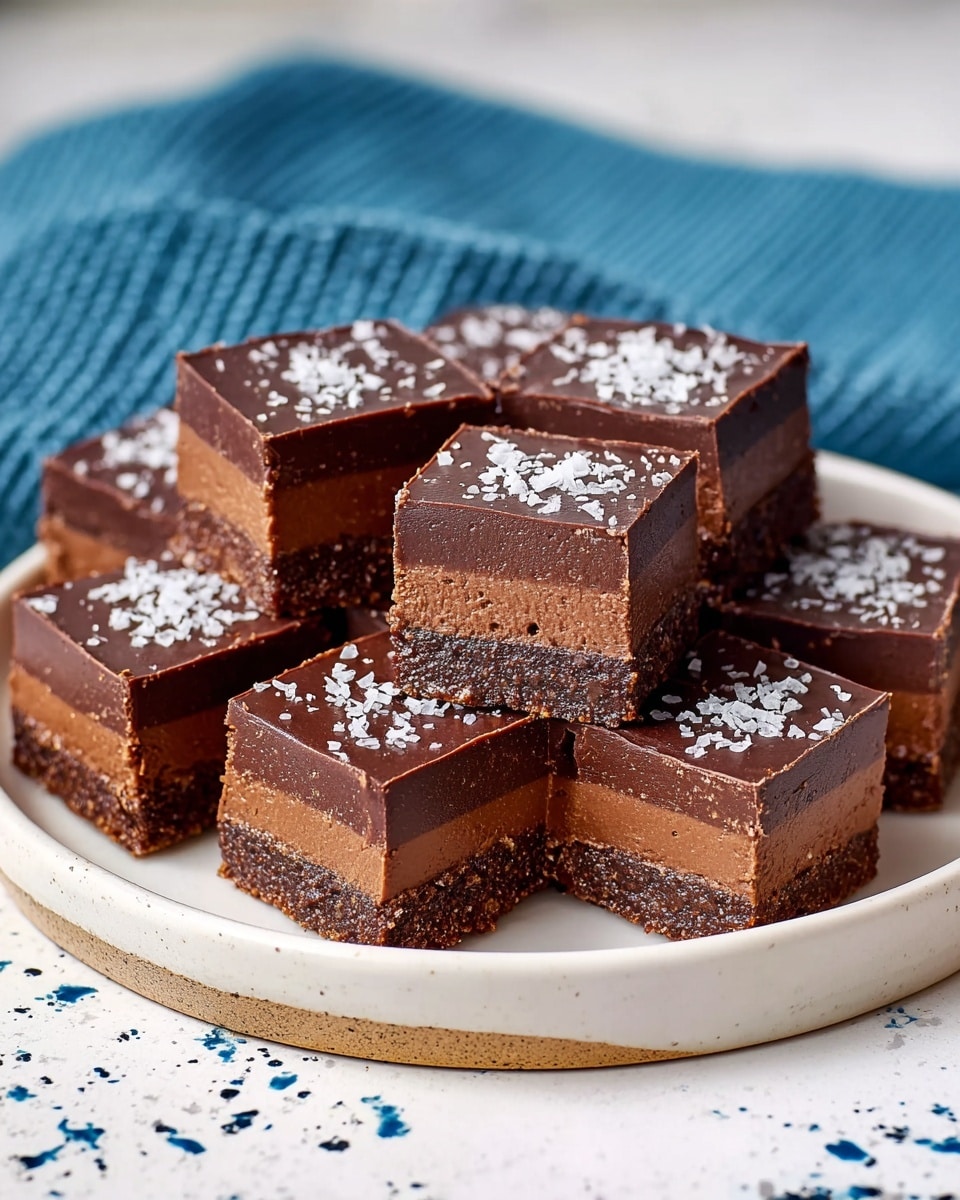
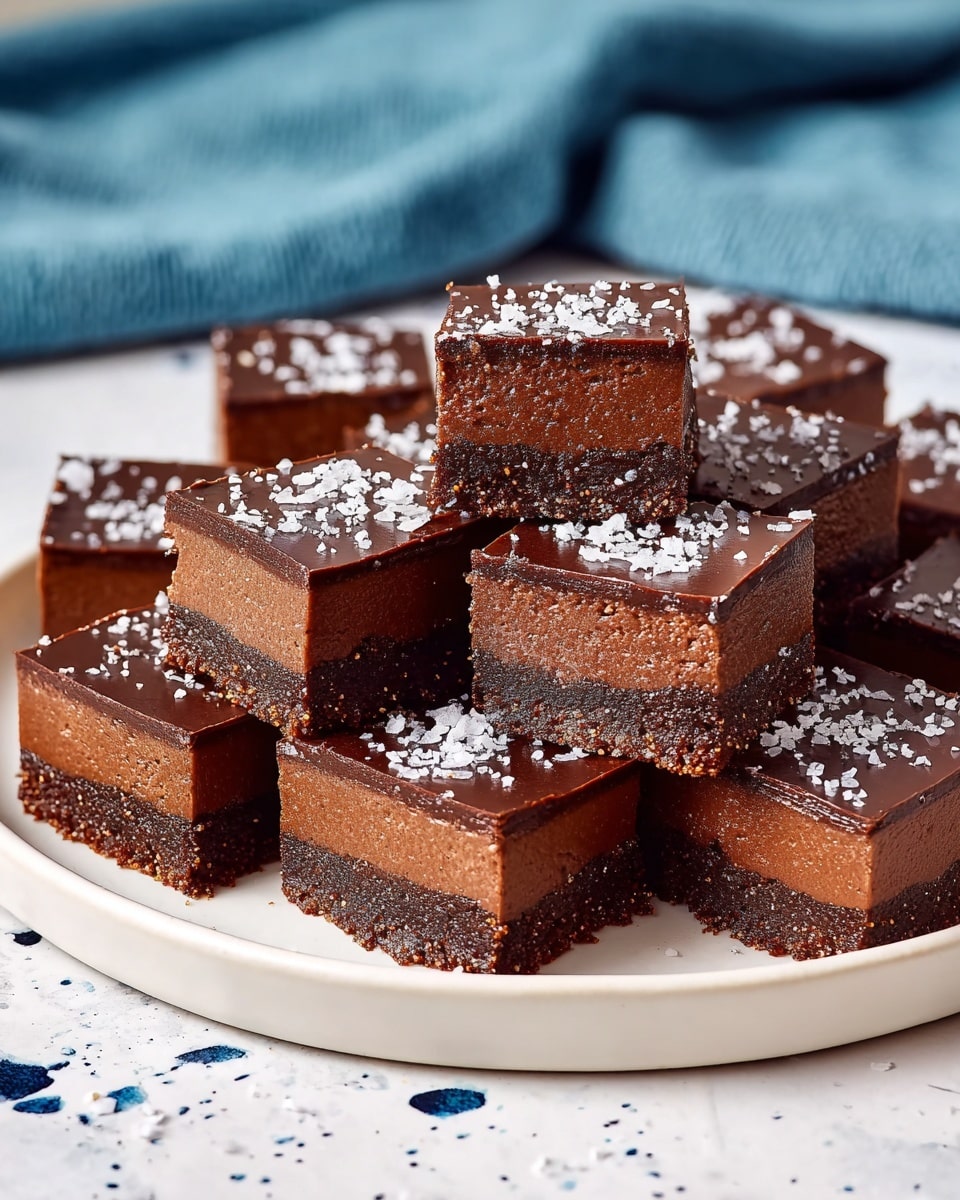
This No-Bake Fudgy Chocolate Squares Recipe really stands out because it combines a crisp cookie base with luscious layers of melty bittersweet chocolate, finished with a touch of flaky sea salt to balance every bite. Whether you’re hosting friends or just need a sweet pick-me-up, these squares deliver every single time.
Why This Recipe Works
- No Oven Needed: Perfect for those too-hot days or a quick treat without heating up the kitchen.
- Fudgy, Not Too Sweet: The bittersweet chocolate balances richness with just the right level of sweetness.
- Simple Ingredients: Uses pantry staples you probably already have, plus a few little extras that elevate the flavor.
- Perfect Texture Layers: Crunchy cookie base, creamy chocolate core, and smooth ganache topping create an irresistible combination.
Ingredients & Why They Work
Every ingredient in this No-Bake Fudgy Chocolate Squares Recipe plays a key role in building flavor and texture. From the crunchy cookie crumb crust to the silky chocolate layers, each component brings something special to the table. I always recommend using good-quality bittersweet chocolate with at least 70% cacao for a wonderfully intense taste.
- Chocolate wafer cookies: Provide a sturdy, crunchy base with that classic chocolate taste; I like to use Oreos or Mexican chocolate wafers.
- Unsalted butter: Adds richness and helps bind the crust and topping smoothly.
- Granulated sugar: Just a touch to balance the bitterness of chocolate.
- Kosher salt: Enhances all the flavors and keeps the chocolate from tasting flat.
- Bittersweet chocolate (70% cacao): The star ingredient—gives the fudgy, deep chocolate flavor without being overly sweet.
- Sweetened condensed milk: Contributes sweetness and creaminess, helping the chocolate layers set perfectly.
- Instant espresso powder: Just a pinch intensifies the chocolate flavor—it’s a game-changer, trust me!
- Vanilla extract: Brings warmth and rounds out all the rich flavors.
- Flaky sea salt: A finishing touch that adds a pop of texture and balances sweetness beautifully.
Make It Your Way
I love how versatile this No-Bake Fudgy Chocolate Squares Recipe is. Sometimes I toss in a handful of chopped nuts or swirl in peanut butter to change things up. Honestly, you can easily adjust this recipe to suit your cravings or dietary needs without losing that signature fudgy goodness.
- Nutty Twist: Adding chopped toasted pecans or walnuts to the crust or sprinkled over the top adds a lovely crunch and earthy flavor.
- Dairy-Free Version: Replace butter with coconut oil and use dairy-free bittersweet chocolate for a vegan-friendly treat.
- Spicy Kick: A pinch of cayenne or cinnamon in the chocolate layer gives an unexpected but amazing depth.
- Seasonal Variation: Add orange zest or a few drops of peppermint extract during the holidays for a festive flair.
Step-by-Step: How I Make No-Bake Fudgy Chocolate Squares Recipe
Step 1: Build the Perfect Cookie Crust
Start by pulsing those chocolate wafer cookies in your food processor until they’re finely ground but not powdery—about 15 quick pulses usually does it. The texture here is key, so don’t over-process. Melt your butter and combine it with the crumbs, sugar, and salt. Press this mixture firmly into your lined pan—using a flat-bottomed glass makes this super easy to get an even, compact layer. Then pop it in the freezer to firm up while you prepare the luscious filling.
Step 2: Create the Rich Fudgy Chocolate Layer
Next, melt two cups of bittersweet chocolate along with four tablespoons of butter in the microwave—stir every 30 seconds to avoid scorching. Stir in your sweetened condensed milk, espresso powder, vanilla, and remaining salt for that perfect fudgy flavor. Pour this luscious mixture onto the chilled cookie crust and smooth it out with an offset spatula. Let it chill uncovered in the fridge for about an hour until fully set and ready for the final layer.
Step 3: Finish with a Smooth, Glossy Ganache
For the top layer, melt the remaining chocolate and butter together until perfectly smooth. Spread this glossy ganache evenly over the firm chocolate layer and refrigerate again for about 30 minutes. Right before you slice the squares, sprinkle flaky sea salt all over—that little salty crunch makes a huge difference!
Step 4: Cut and Serve Like a Pro
To get those clean cuts, lift the whole set out with the parchment paper overhang and place on a cutting board. Run your sharp knife under warm water, wipe it dry, and slice carefully into 36 squares. I like to rinse the knife between cuts for the neatest edges. These are super rich, so bite-size squares are perfect for serving.
Tips from My Kitchen
- Cookie Choice Matters: I found that Mexican chocolate wafers give a deeper chocolate hit, but Oreos work perfectly if that’s what you have.
- Press Crust Firmly: Taking extra time to press the crust evenly ensures the bars hold together nicely when you cut and serve.
- Don’t Skip the Espresso: Even a small amount brings out the chocolate’s richness without adding coffee flavor.
- Warm Knife for Cutting: Running your knife under warm water between slices guarantees smooth edges and less crumbling.
How to Serve No-Bake Fudgy Chocolate Squares Recipe
Garnishes
I usually go simple and sprinkle flaky sea salt right before serving—that little salty burst perfectly balances the deep fudgy chocolate. Sometimes, I add a few crushed toasted nuts or a light dusting of cocoa powder for guests who want a bit more flair. Fresh raspberries also make a beautiful, tart contrast if you want a pop of color and brightness.
Side Dishes
These squares are so rich and satisfying on their own, but if I’m serving them at a party, I like pairing them with fresh fruit or a small scoop of vanilla bean ice cream. A cup of strong black coffee or a bold red wine like a Zinfandel also pairs wonderfully for a complete dessert experience.
Creative Ways to Present
For special occasions, I sometimes arrange the squares on a pretty platter with little piles of sea salt and fresh mint sprigs around for color and texture. Another fun idea is to serve them layered in small clear cups with whipped cream and fresh berries for a no-fuss yet elegant look. These squares also make a delightful edible gift wrapped in parchment paper and tied with twine—always a hit!
Make Ahead and Storage
Storing Leftovers
I keep leftovers in an airtight container in the fridge, and they stay fresh and fudgy for up to a week. Just make sure the container seals tightly to avoid absorbing any fridge odors. I also love that the squares soften slightly at room temperature, so let them sit out for a few minutes before enjoying again.
Freezing
If you want to prep ahead or save some for later, these squares freeze beautifully. Wrap them tightly in plastic wrap and foil to prevent freezer burn. They keep well for up to a month. When ready to eat, thaw them overnight in the fridge for the best texture.
Reheating
I don’t recommend microwaving this dessert because it can change the texture, but if you want your squares a bit softer, simply let them warm up at room temperature for 15-20 minutes. That way, you get the perfect fudgy softness without melting the layers.
FAQs
-
Can I use different types of cookies for the crust?
Absolutely! While chocolate wafer cookies give a classic base, you can experiment with other chocolate or even vanilla cookies. Just aim for something crisp and not overly soft to maintain a sturdy crust.
-
What if I don’t have a microwave—can I melt the chocolate another way?
Sure thing! A double boiler works wonderfully for melting chocolate and butter gently without burning. Just stir constantly until smooth.
-
Is it necessary to add espresso powder?
While it’s optional, I highly recommend it because it amplifies the chocolate flavor without adding a coffee taste. You can leave it out if you prefer, and the squares will still be delicious.
-
How do I get those nice clean cuts?
Warm your knife under hot water, dry it well, and slice carefully. Wiping the knife clean between cuts helps keep edges sharp and neat.
-
Can I make this gluten-free?
Yes! Just swap the cookie crust for gluten-free chocolate wafers or crushed gluten-free cookies. Make sure your other ingredients don’t contain gluten as well.
Final Thoughts
This No-Bake Fudgy Chocolate Squares Recipe feels like a little celebration every time I make it. It’s simple enough for a last-minute dessert but impressive enough to bring out for guests. I truly think anyone can nail these squares, whether you’re a seasoned pro or just starting out in the kitchen. So, grab your ingredients, follow the steps, and enjoy every rich, fudgy bite—you’re going to love how effortless and delicious this treat is!
Print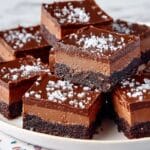
No-Bake Fudgy Chocolate Squares Recipe
- Prep Time: 20 minutes
- Cook Time: 5 minutes
- Total Time: 2 hours 10 minutes
- Yield: 36 squares
- Category: Dessert
- Method: No-Cook
- Cuisine: American
Description
Delicious no-bake fudgy chocolate squares layered with a crispy cookie crust, rich bittersweet chocolate, and a creamy chocolate topping, finished with a sprinkle of flaky sea salt for the perfect sweet and salty treat.
Ingredients
Crust
- 1 (9-ounce; 255 g) package chocolate wafer cookies (about 72 cookies), such as Dewey’s, Oreos, or Goya Chocolate Maria Cookies
- 8 tablespoons (4 ounces; 113 g) unsalted butter, cut into 1 tablespoon pieces, divided
- 1 tablespoon (1/2 ounce; 13 g) granulated sugar
- 1/4 teaspoon Diamond Crystal kosher salt (use half for table salt)
Filling
- 12 ounces (2 1/2 cups; 340 g) chopped bittersweet chocolate, 70% cacao, divided
- 4 tablespoons (2 ounces; 57 g) unsalted butter, divided
- 1 (14-ounce) can sweetened condensed milk
- 2 teaspoons instant espresso powder
- 2 teaspoons vanilla extract
- 1/2 teaspoon Diamond Crystal kosher salt (use half for table salt)
Topping
- 4 tablespoons (2 ounces; 57 g) unsalted butter
- 1/2 cup (6 ounces; 170 g) chopped bittersweet chocolate
- Flaky sea salt, to garnish
Instructions
- Prepare the pan: Lightly spray an 8- by 8-inch baking pan with cooking spray. Line bottom and sides with parchment paper, leaving a 2-inch overhang on two sides. Lightly spray parchment with cooking spray and set aside.
- Make the crust: Pulse the chocolate wafer cookies in a food processor until finely ground, about 15 pulses, scraping down the sides as needed. Microwave 8 tablespoons butter on high, stirring occasionally, until melted, about 1 minute. Stir melted butter, sugar, and 1/4 teaspoon salt into the ground cookies. Transfer mixture to prepared pan and firmly press into an even, compact layer using a flat-bottomed glass or measuring cup. Freeze uncovered until firm, about 15 minutes.
- Prepare the chocolate filling: In a large microwave-safe bowl, combine 2 cups chopped chocolate and 4 tablespoons butter. Microwave on high, stirring every 30 seconds, until melted and smooth, about 2 minutes. Stir in sweetened condensed milk, instant espresso powder, vanilla extract, and remaining 1/2 teaspoon salt until fully combined. Pour mixture over the chilled crust and spread evenly with an offset spatula. Refrigerate uncovered until set, about 1 hour.
- Make the chocolate topping: In a medium microwave-safe bowl, combine remaining 1/2 cup chopped chocolate and remaining 4 tablespoons butter. Microwave on high, stirring occasionally, until melted, about 1 minute. Stir until smooth. Pour over the chilled chocolate filling and spread into an even layer. Refrigerate uncovered until set, about 30 minutes.
- Finish and serve: Sprinkle flaky sea salt over the top. Use the parchment overhang to lift the bars from the pan and transfer them to a cutting board. Cut into 36 squares using a sharp knife. For cleaner cuts, warm and dry the knife between slices.
Notes
- Oreo wafers can be purchased online or at specialty grocery stores.
- For a smoother crust, pulse cookies to a fine crumb but avoid powdery texture.
- Use parchment paper overhang to easily lift bars without breaking.
- Store refrigerated in an airtight container for up to 1 week.
- Freeze wrapped tightly for up to 1 month and thaw overnight in refrigerator before serving.
- Warm and dry the knife between cuts for clean edges.
Nutrition
- Serving Size: 1 square
- Calories: 210 kcal
- Sugar: 20 g
- Sodium: 90 mg
- Fat: 14 g
- Saturated Fat: 8 g
- Unsaturated Fat: 5 g
- Trans Fat: 0 g
- Carbohydrates: 22 g
- Fiber: 2 g
- Protein: 2 g
- Cholesterol: 30 mg

